Step-by-step guide for using and maintaining your ecoQ DryAir 13L Energy Saver dehumidifier. Includes setup, humidity settings, night mode, drainage, cleaning, troubleshooting, and safety information for efficient and safe operation.
Product Information
ecoQ DryAir 13L Energy Saver
ecoQ dehumidifiers ensure an optimal indoor climate by maintaining relative humidity at an ideal and healthy level. A room that's too humid can lead to mold growth (which can trigger allergies), musty smells, and laundry that doesn't dry. In addition, the summer heat is much more bearable when the air isn't too humid. Increaseyour well-being at home with the newecoQ DryAir 13Lat an affordable price.
The modern, compact ecoQ DryAir 13L Energy Saver dehumidifier is the solution with ultra-quiet operating noise and low power consumption for dehumidifying living areas, bathrooms and bedrooms up to 30 m².
Ensure the supply power is in correspondence with the value on the nameplate.
Ensure the water tank is correctly fitted before the dehumidifier can be switched on.
If the dehumidifier is turned off and then turned back on again immediately, it will take approximately 3 minutes to reach full power (compressor back to work).
If the dehumidifier is switched off by a power cut, it will automatically switch back on once the power is restored.
The dehumidifier works best at normal room temperature, its efficiency is reduced if the ambient temperature falls below 15 °C.
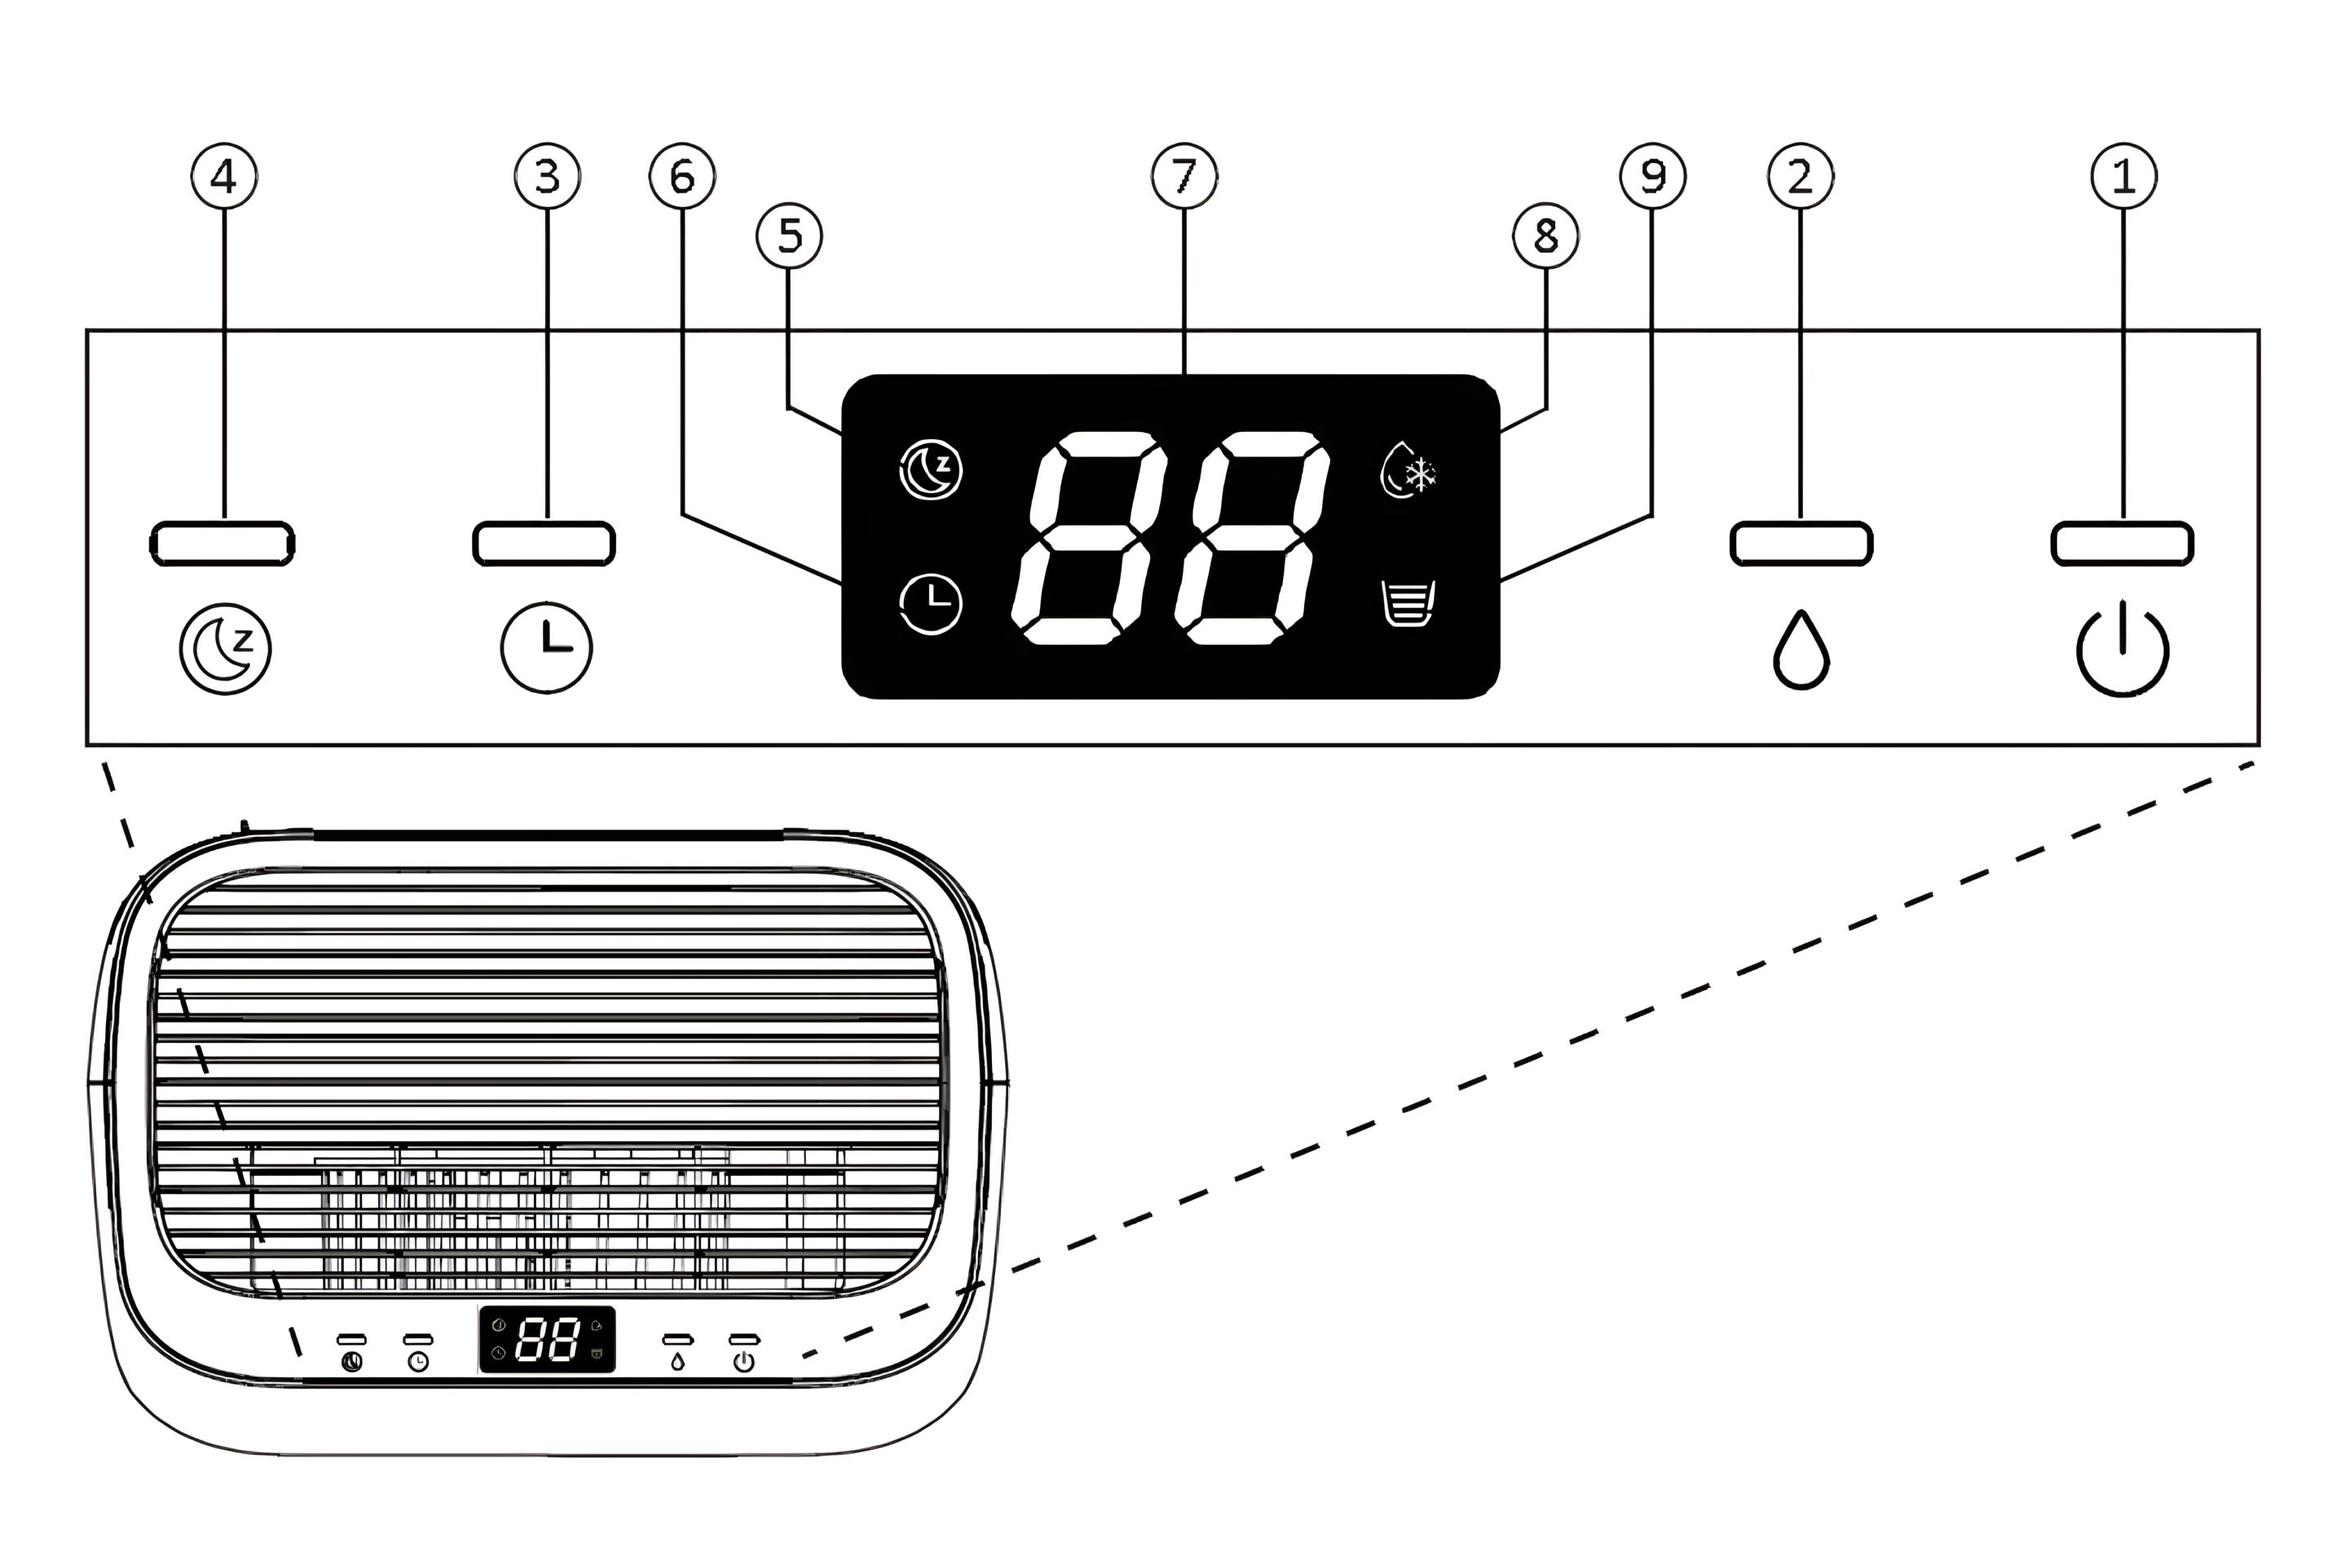
3. Switching the Unit On / Off
Connect the mains lead to power socket.
Press power button once to turn on the unit. By default, it runs on Manual Dehumidifying Mode.
Press Power button once again to turn off the unit.
4. Target Humidity Setting
Press the Humidity button once to enter Manual Dehumidifying Mode or to select the desired humidity level
If ambient humidity is lower than 30%, display shows LO.
If ambient humidity is higher than 90%, display shows HI.
Switching logic
Once the target value is reached, the compressor and fan switch off immediately.
After 55 minutes, the fan switches on.
After 60 minutes, the H/T sensor switches on (five minutes after the fan) and measures the humidity.
If the humidity is above the target value, the compressor switches on and dehumidification starts again.
If the humidity is not above the target value, the fan switches off.
The next check starts again after 55 minutes.
5. Timer Setting
While the unit is on, press the Timer button repeatedly to select your preferred automatic shutoff duration. The corresponding indicator will be shown on the display.
6. Night Mode
In Manual Mode, press the Night Mode button once to enter Night Mode. The corresponding indicator will be shown on the display. After 10 seconds, the other indicators will turn off.
In Night Mode, the unit operates at low fan speed.
Note: In Night Mode, press any button once to wake the unit up, then press again to use the desired function.
7. Lock Function
To prevent the mishandling, the unit is equipped with a lock function.
Press and hold the Night Mode button for 2 seconds to activate or deactivate the lock function.
Note: After activating the lock function, LC will be displayed on screen, 3 seconds later, screen will show the current room humidity.
8. Automatic Shut Off
When the water tank becomes full during normal use, the unit shuts off automatically with tank full indicator on the screen and buzzer alarm goes off for 5 times.
Note: If water tank is removed or not placed properly, above phenomenon will appear also.
9. Automatic Defrost Feature
The unit is equipped with an automatic defrost feature.
When room temperature is too low, the compressor shuts off and the unit runs on high fan speed setting until the frost has disappeared, no other setting can be made for this feature.
Its corresponding indicator will be displayed on screen.
10. Memory Feature
When power failure and after recovering, the unit will work with the mode prior to the shutdown. Meaning the humidity setting and working mode setting will be kept.
Continuous Drainage
11. Continuous Drainage Function
Continuous drainage option allows easy removal of collected water instead of manually emptying from the water tank when the environment is very high humidity.
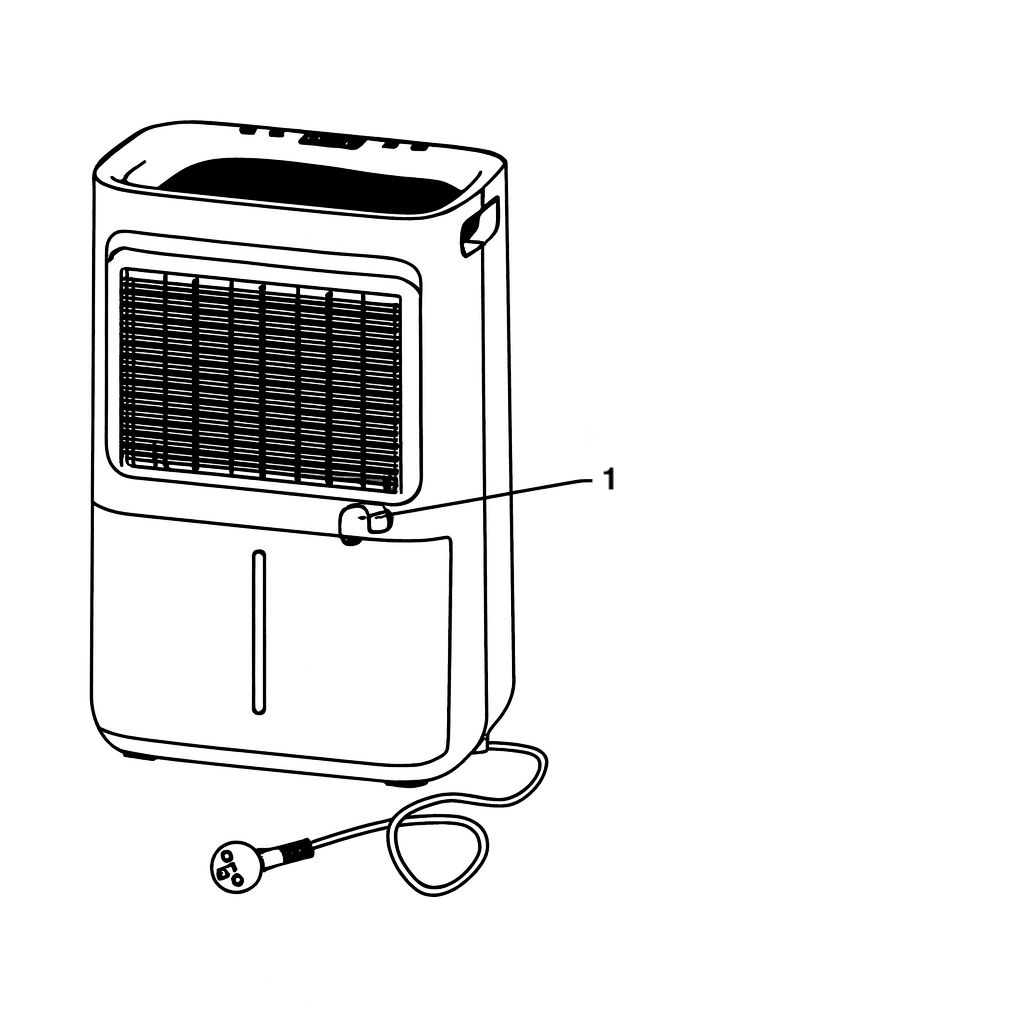
12. Remove Plug
Remove the rubber plug covering the drain hose connection (1)
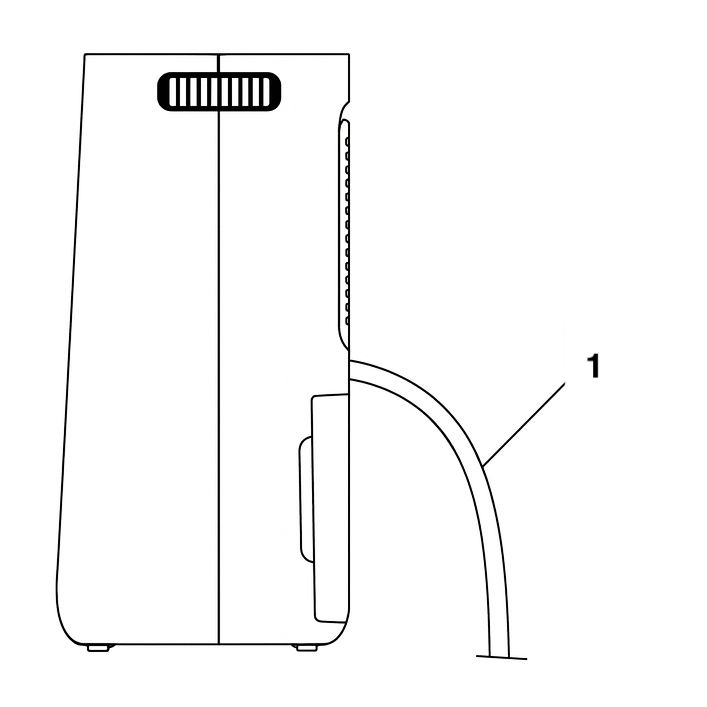
13. Attach the Drain Hose
Connect a suitable drain hose (1) (14 mm inner diameter) through the drainage outlet. Ensure that the hose is secure and tight to prevent leakage.
Always make sure the drainage hose is not blocked or obstructed to maintain a smooth flow.
14. Check for Blockages
Always make sure the drainage hose is not blocked or obstructed to maintain a smooth flow.
Cleaning and Maintenance
15. Cleaning the Dehumidifier
To ensure the effectiveness of the dehumidifier, it is recommended to clean the unit at least every two weeks.
Turn the dehumidifier off and disconnect the power plug before cleaning.
Use a soft cloth to gently wipe the outer case to remove dust.
Vacuum clean the air inlet and outlet grilles of the dehumidifier.
Remove the water tank and wash it by hand using a mild detergent.
Rinse the water tank with clean water.
Note: Do not spray water directly onto the unit.
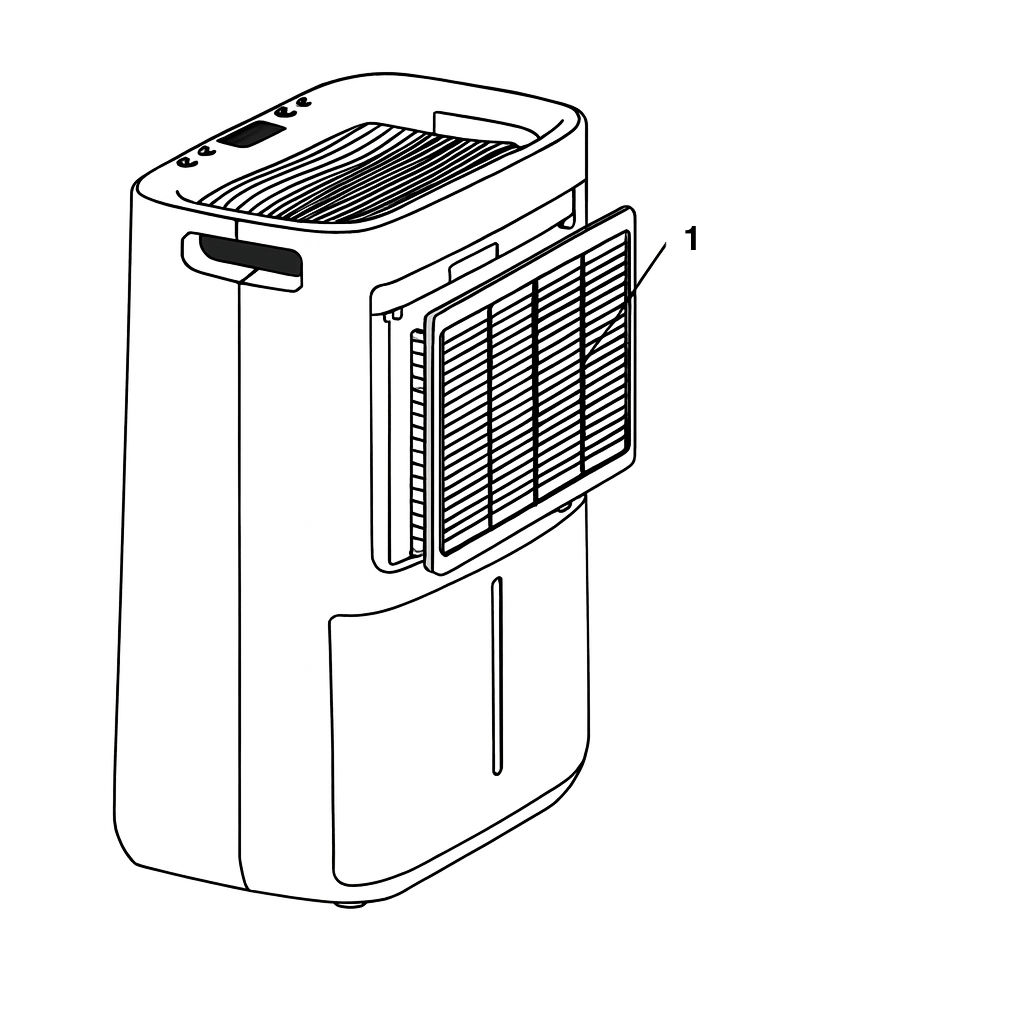
16. Cleaning the Air Filter Frame
Remove the inlet frame from the back (1).
Wash the filter frame carefully in warm water, use a mild detergent if necessary.
Note: Do not wash the filter frame in a dishwasher.
17. Reinstall the Filter
Rinse the filter frame in clean water and let it dry before reinserting it.
Fit the filter frame back onto the unit
Note: DO NOT use the dehumidifier without the Air Filter Frame in place.
Troubleshooting
18. The dehumidifier will not switch on
Make sure that the mains lead is properly plugged in and that there is power in the wall socket.
The water tank is full or incorrectly fitted.
The set humidity level has been reached.
Power plug or cord damaged.
19. The humidity is not decreasing
The dehumidifier has not been used long enough.
Make sure that the doors and windows are closed.
The ambient temperature is too low.
The surrounding humidity level is too low.
The air filter frame is dirty.
Exceeded recommended room coverage area.
The ambient humidity level is lower than the desired humidity level set.
20. Unusual noises
The dehumidifier is tilted or standing on an uneven surface.
Make sure that the air filter is clean.
Loose or foreign particles inside the unit.
Sound of flowing refrigerant.
21. Water in tank overflows
Water tank may be damaged.
Float for water auto-sensor is not in place.
Internal drainage passage is blocked or obstructed.
22. Error code
E1: Temperature sensor error. Contact customer care center.
E2: Humidity sensor error. Contact customer care center.
LC: This is not a malfunction. It means the lock is on. Press and hold the Night Mode button for 2 seconds to turn the lock off.
Previous stepCopy link to sharePrint / PDFNext step