Easy-to-follow instructions for setup and daily use of the ecoQ DryAir 20L/25L Energy Saver Complete. Covers humidity settings, modes, timer, air purification, Wi-Fi connection, maintenance, and troubleshooting.
Product Information
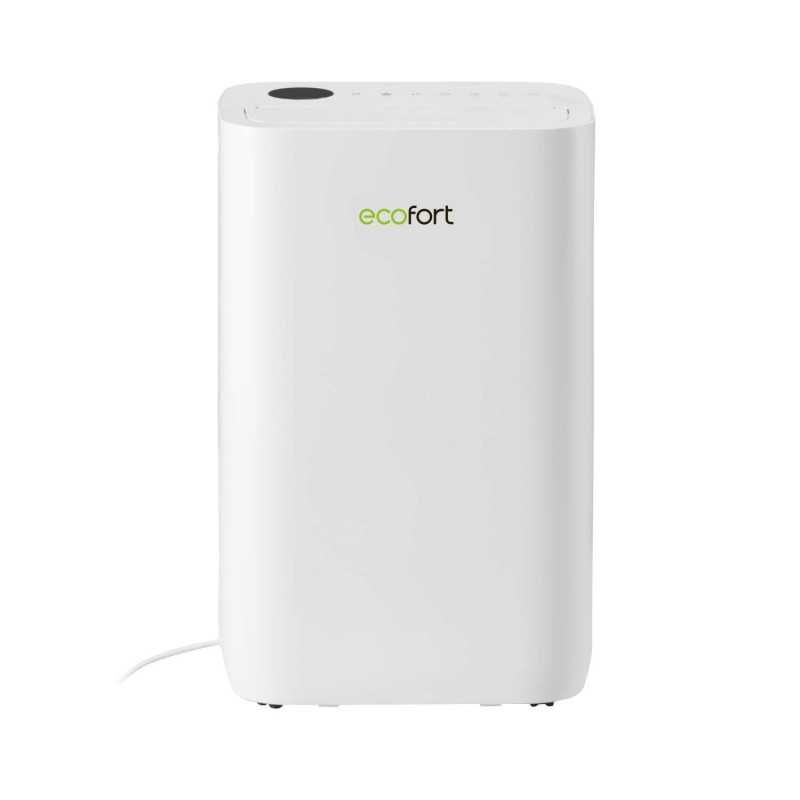
ecoQ DryAir 20L/25L Energy Saver Complete
The ecoQ DryAir 20L/25L Energy Saver Complete is a powerful, quiet dehumidifier with smart features. It offers air purification, laundry drying mode, UV sterilization, Wi-Fi control, and continuous drainage. Ideal for home use to combat humidity, allergens, and mold efficiently.
Ensure the supplied power is in correspondence with the value on the label.
Ensure the water tank is correctly fitted, otherwise the dehumidifier cannot be turned on.
If the dehumidifier is turned off and then turned back on again immediately, it will take approximately 3 minutes to reach full dehumidifying power (compressor requires time to restart).
If the dehumidifier is switched off by a power cut, it will automatically switch back on once power is restored.
The dehumidifier works best at normal room temperature, its efficiency is reduced if the ambient temperature drops below 15 °C.
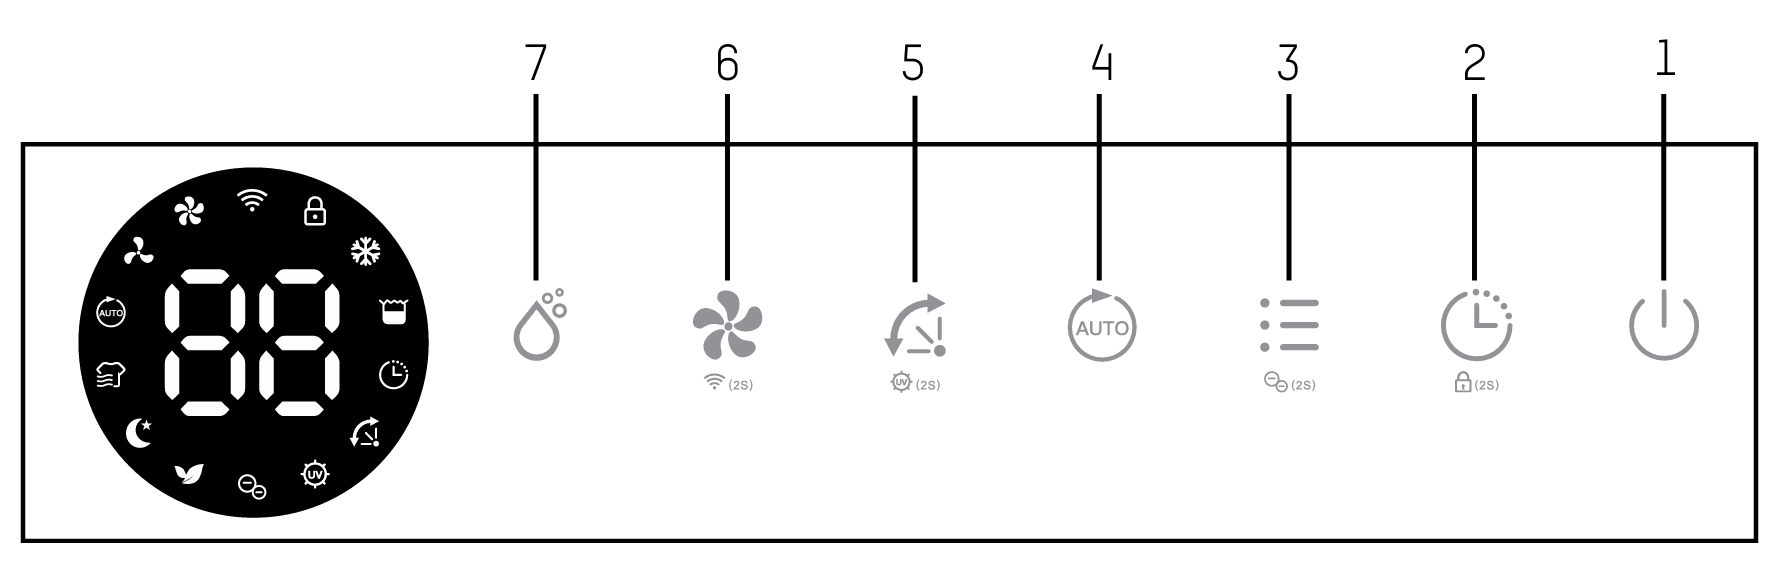
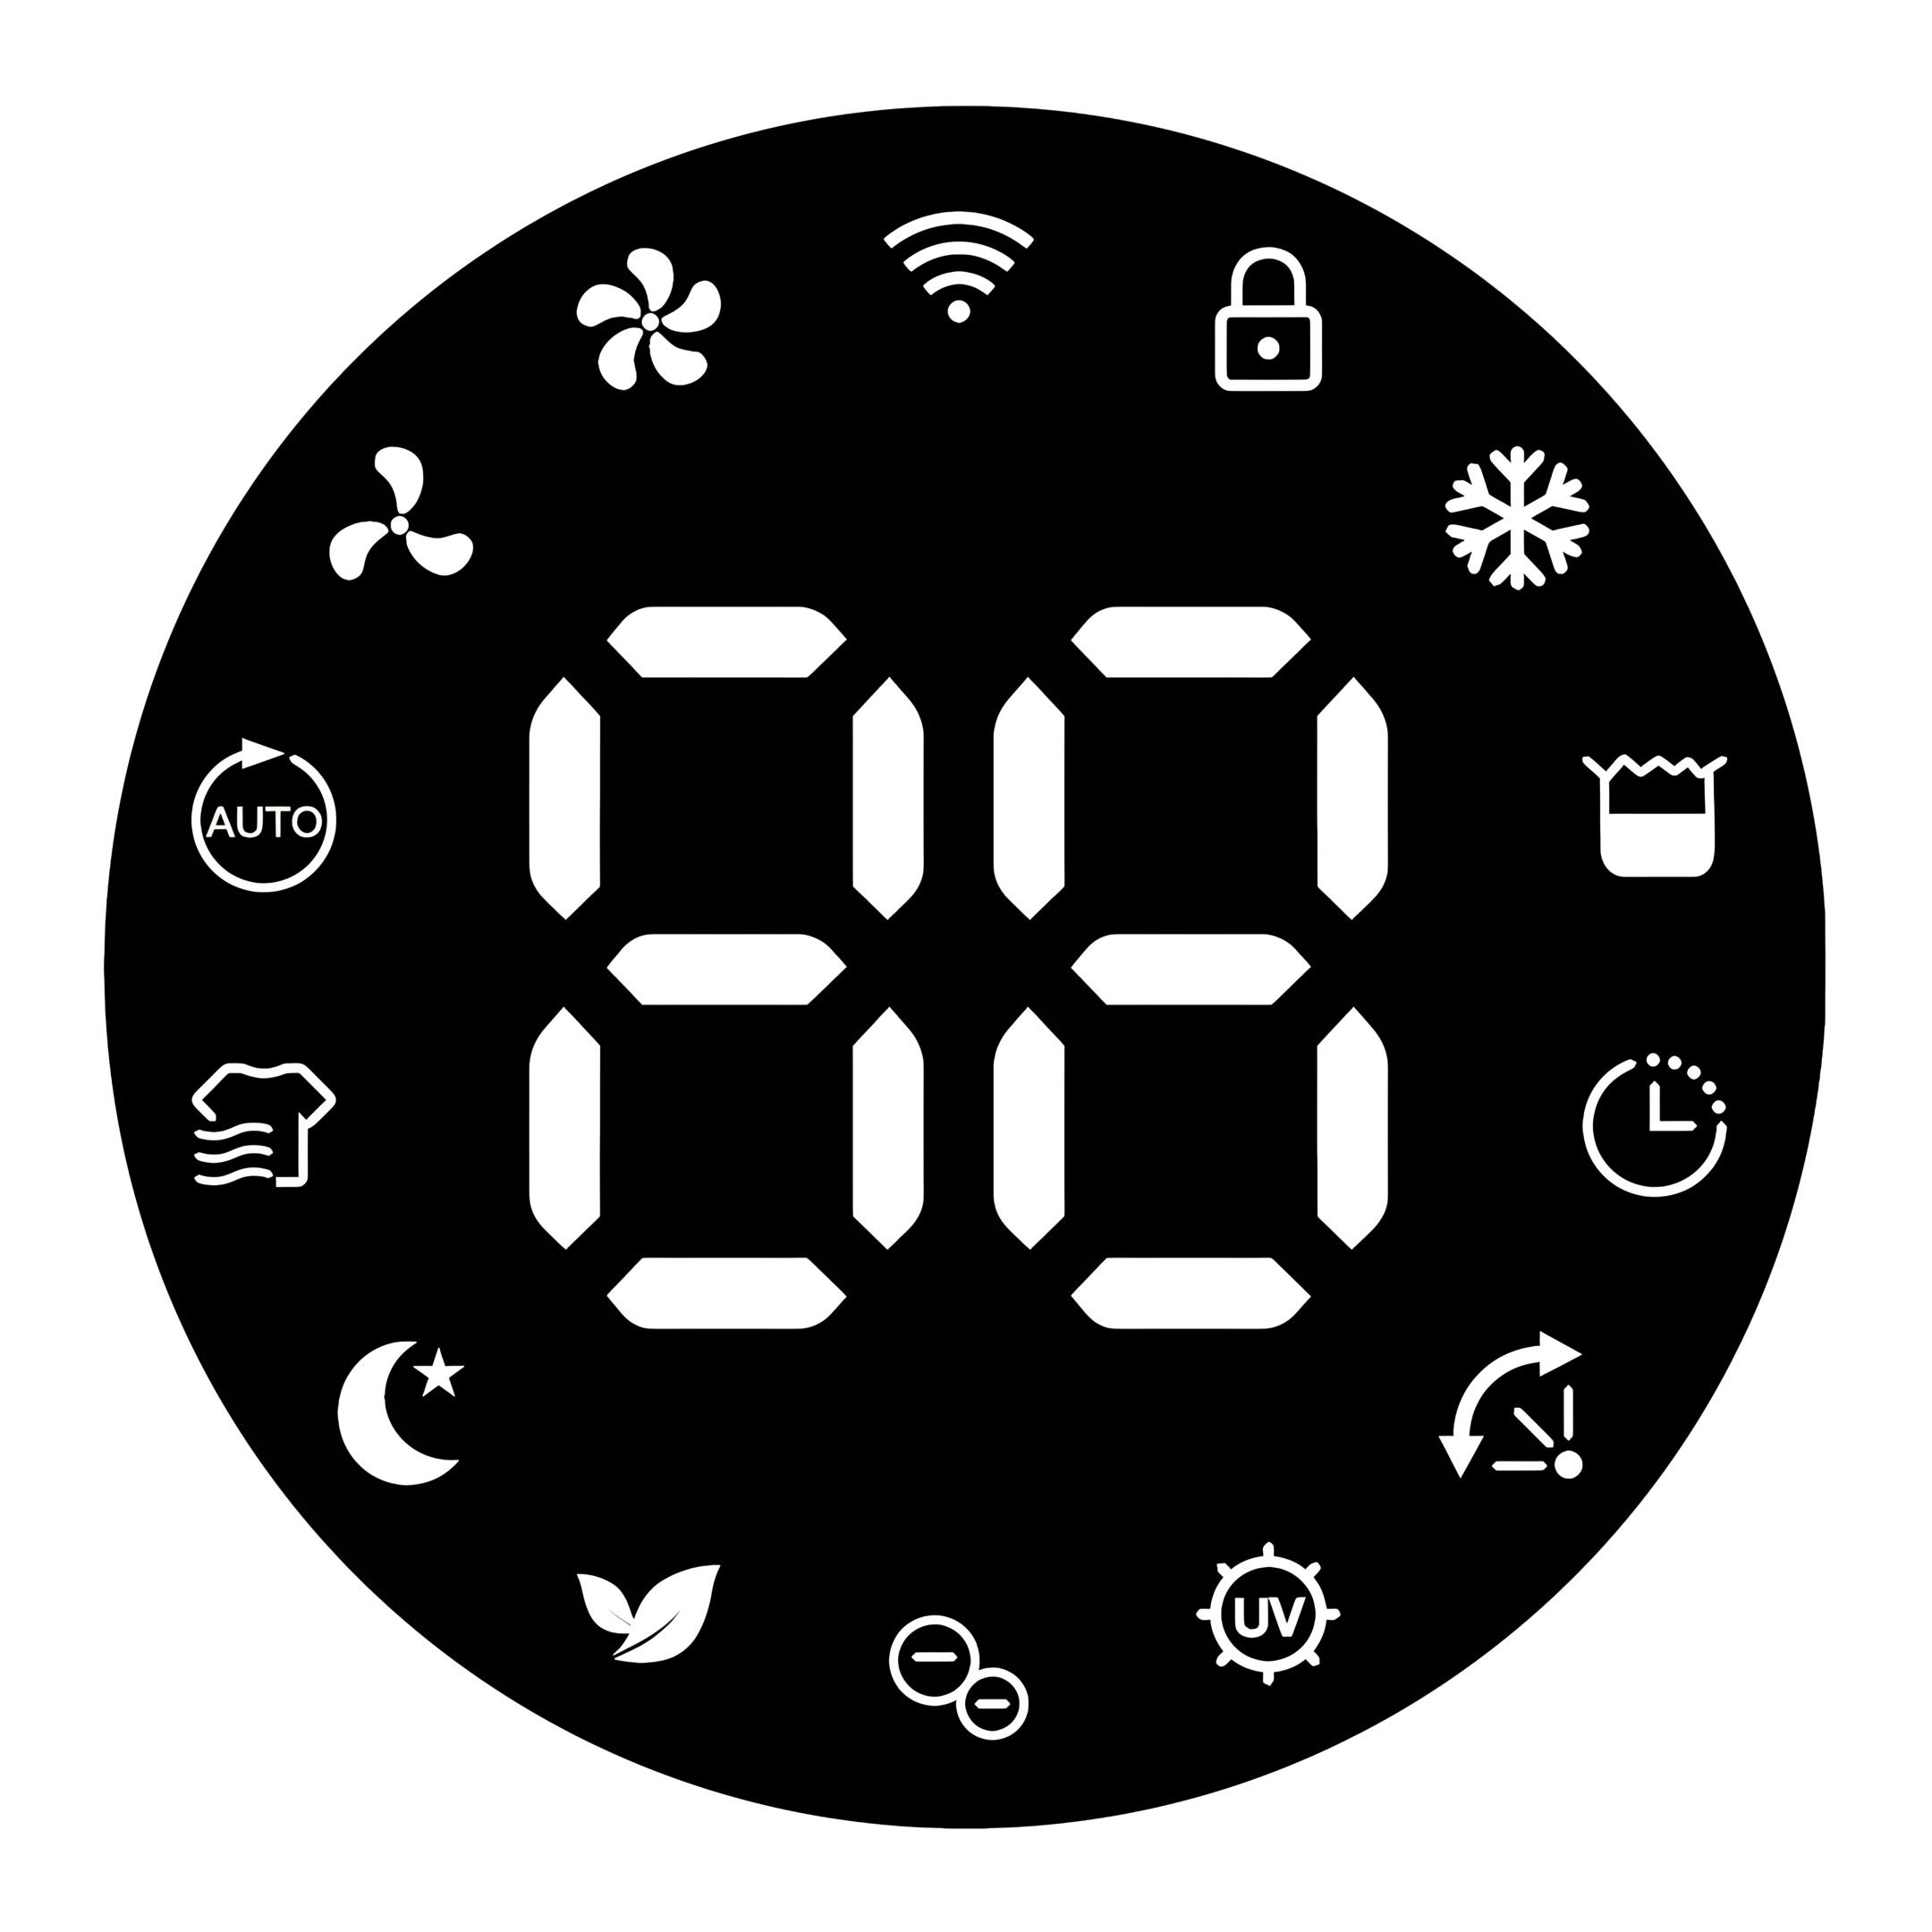
4. Switching the Unit On/Off
Connect the mains lead to socket.
Press Power button once to turn on the unit.
By default, it runs in Manual Dehumidifying Mode. Press Power button once again to turn off the unit.
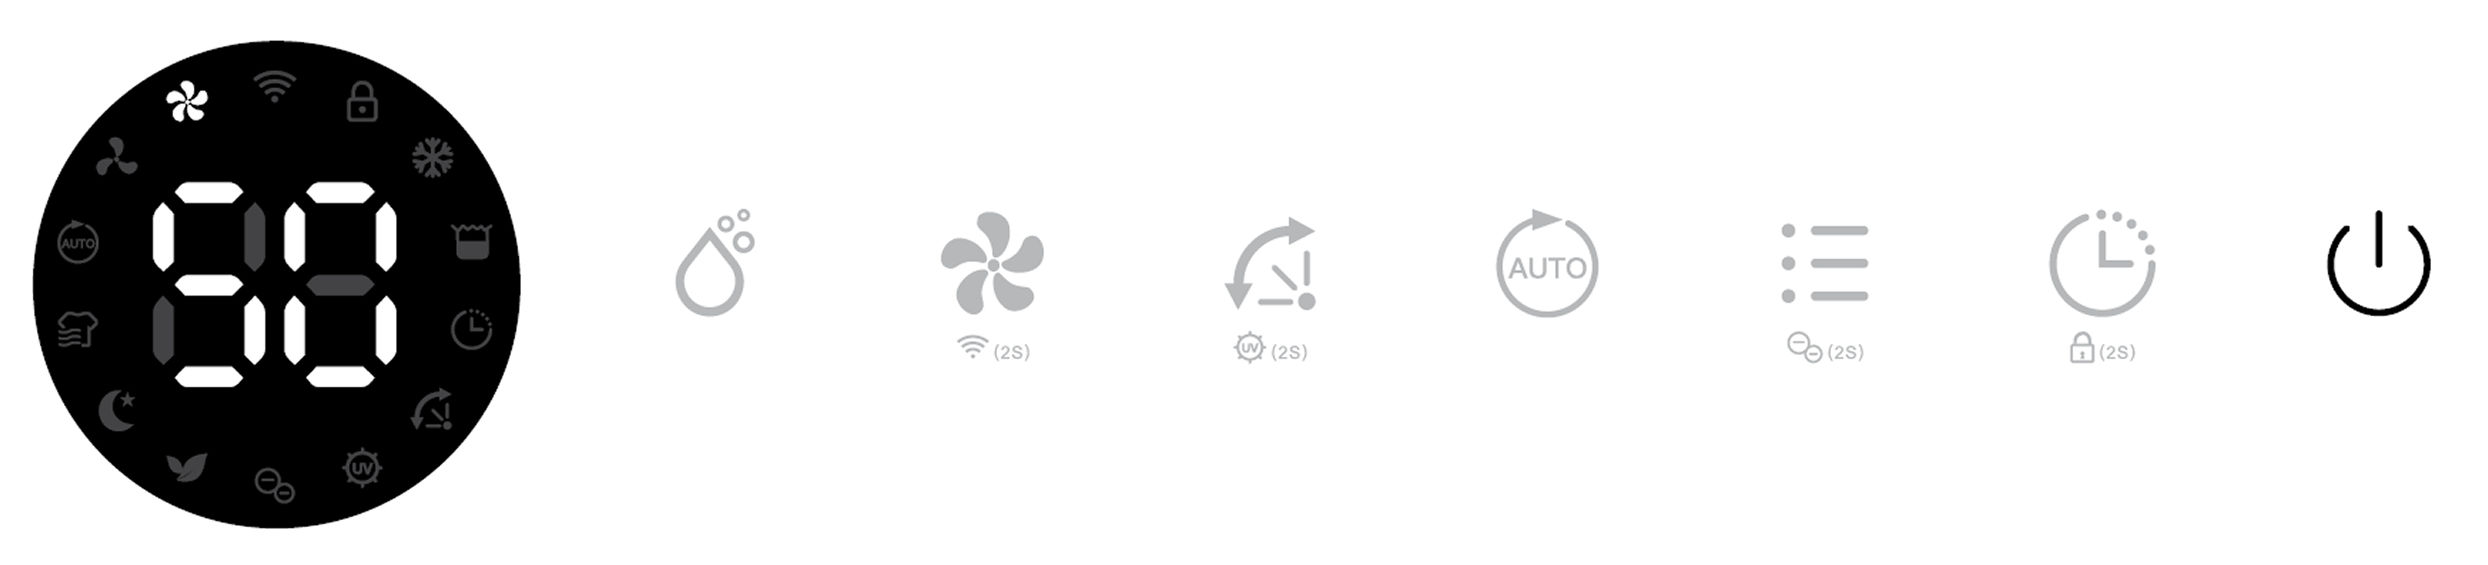
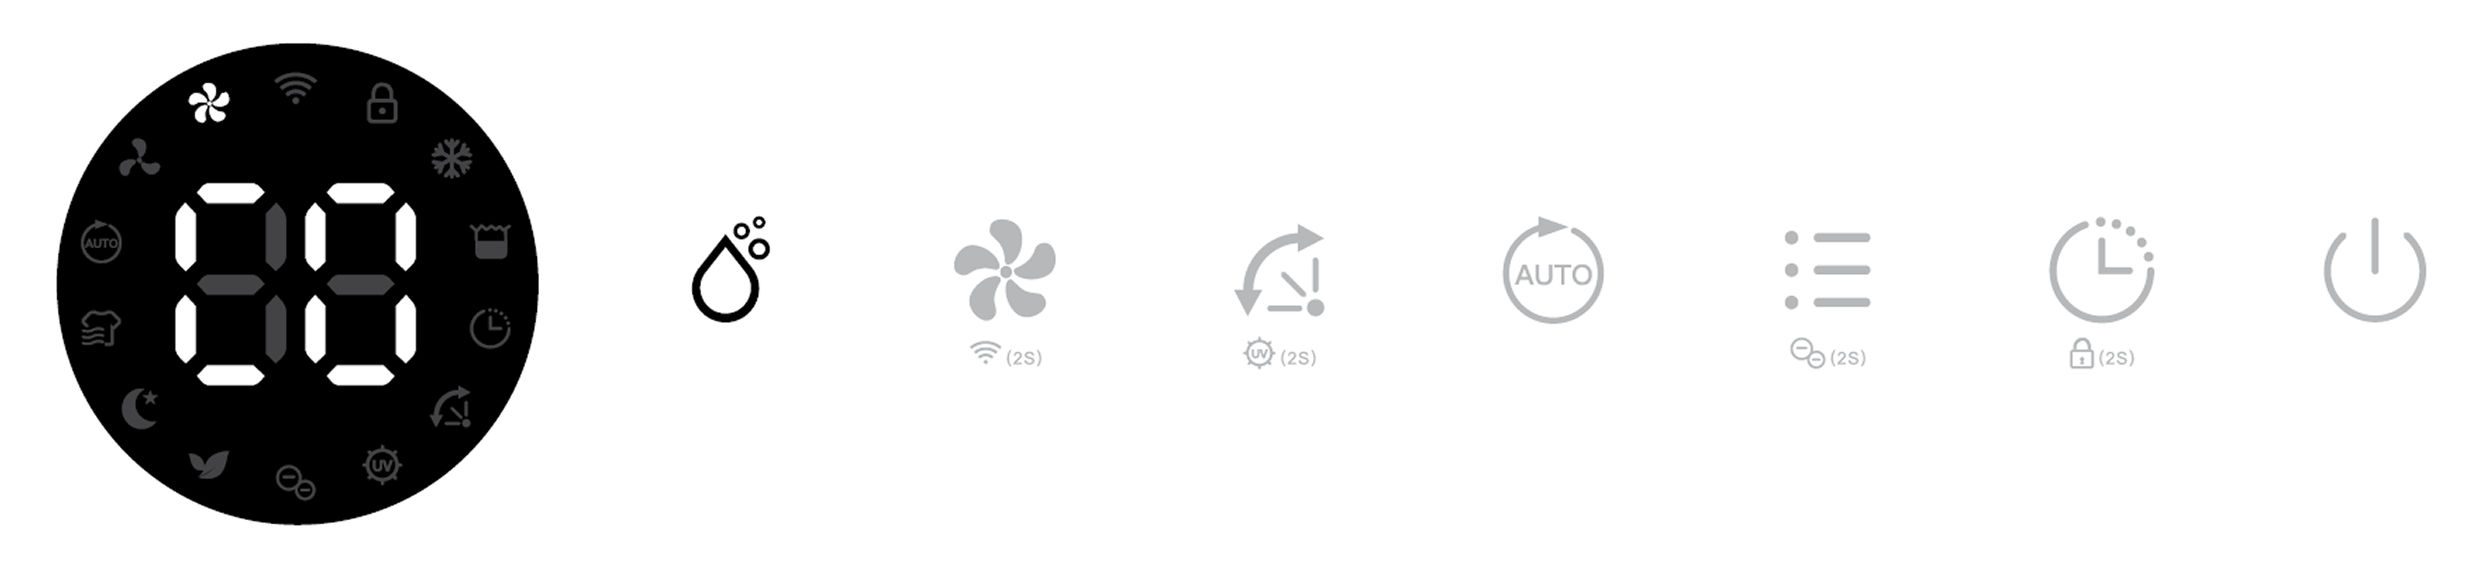
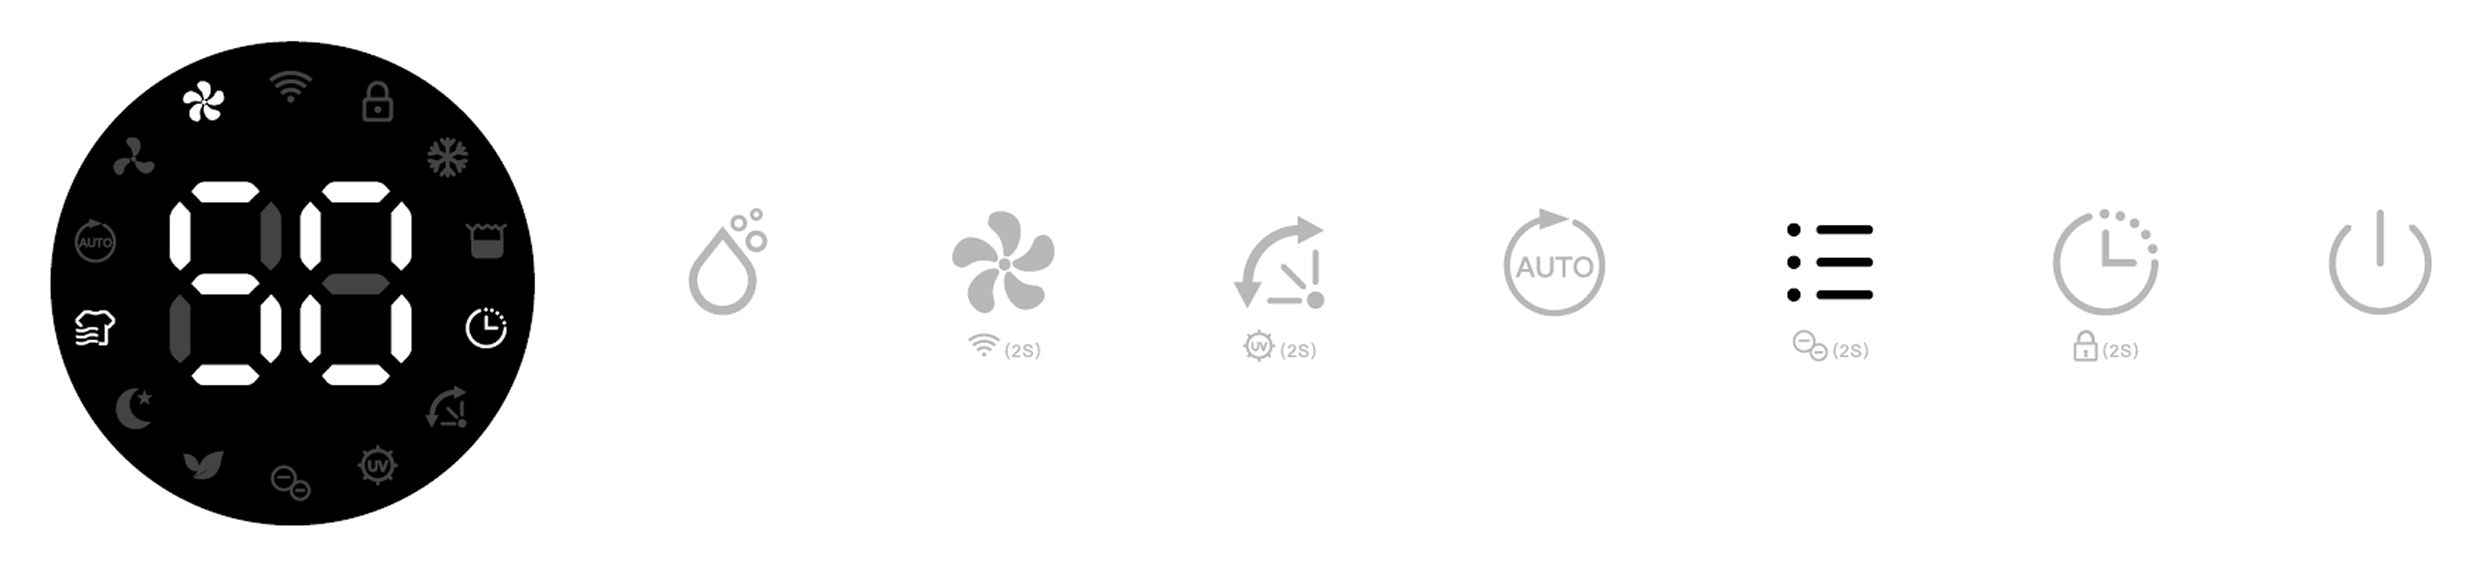
5. Humidity Setting
Press Manual button once to enter Manual Dehumidifying Mode or to select desired level of humidity from CO-30%-35%-40%-45%-50%-55%-60%-65%-70%-75%-80%-CO.
Note:
In the ecofort SMART App CO will be displayed as 25%
When target humidity is reached, the fan and compressor shut off. The fan is activated every hour for 5 minutes in order to check humidity development.
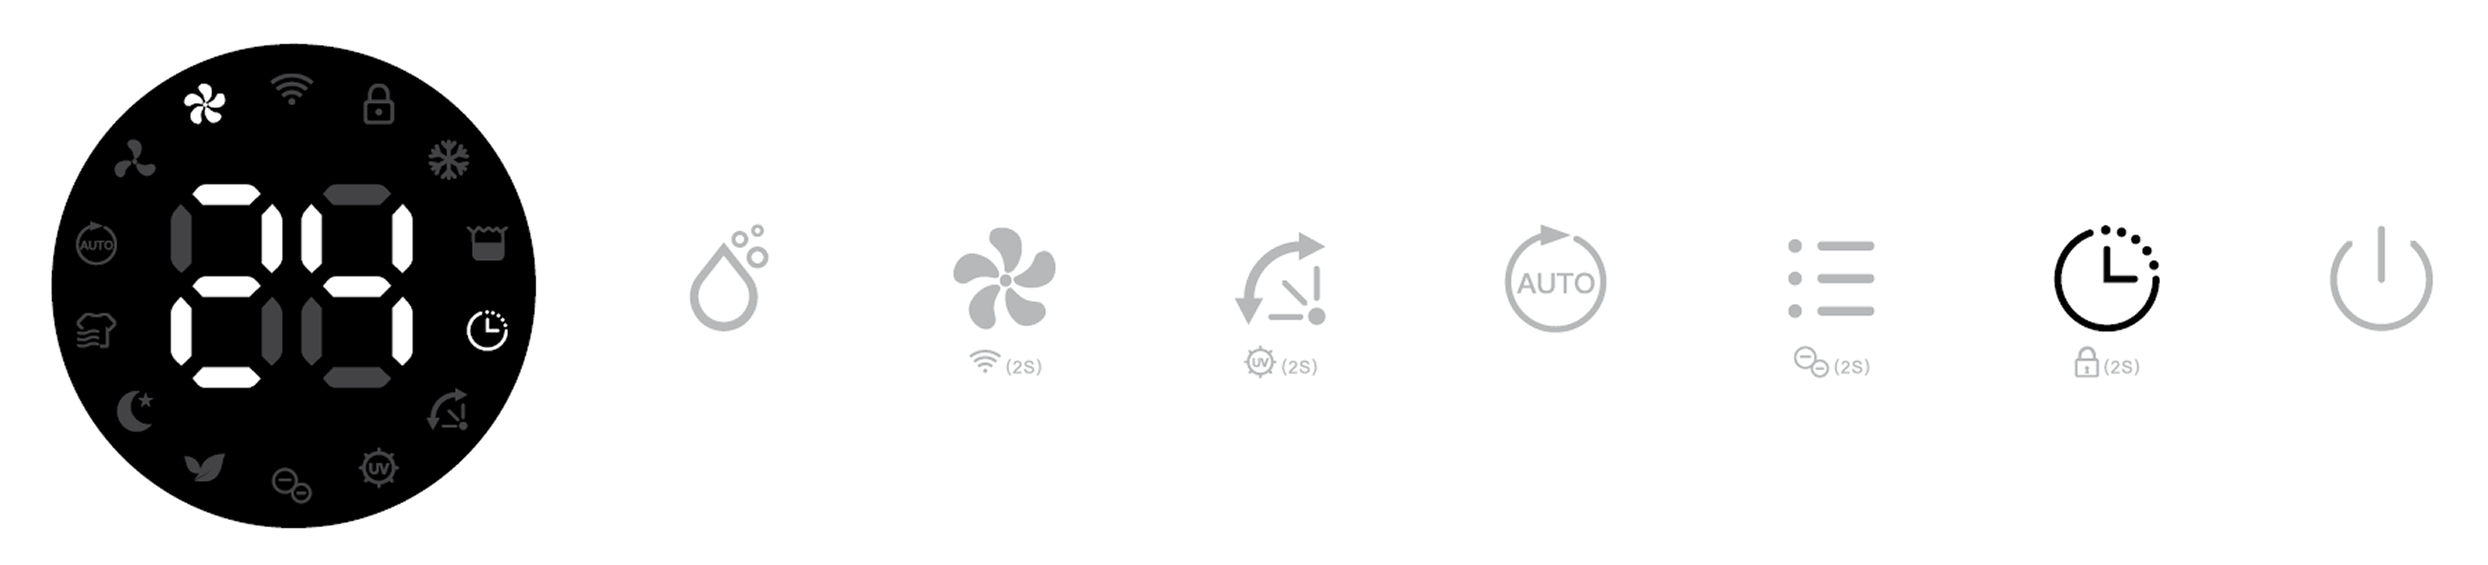
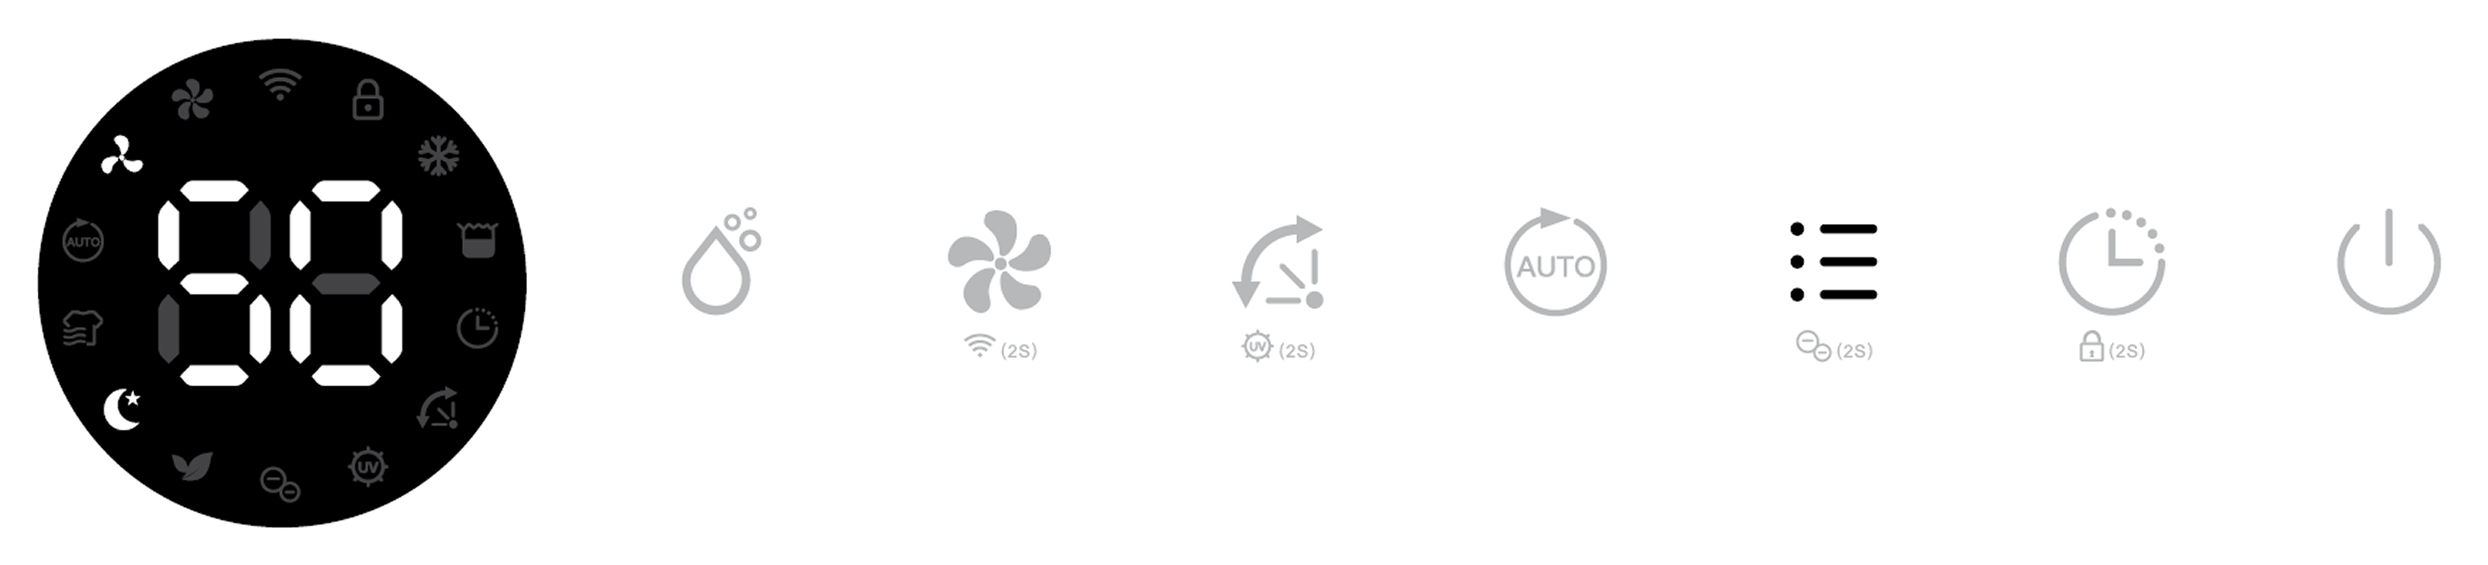
6. Timer Setting
When the unit is ON, press Timer button consecutively from 1-24h to select your preferred timer duration for automatic shutoff.
Its corresponding Timer indicator will be displayed.
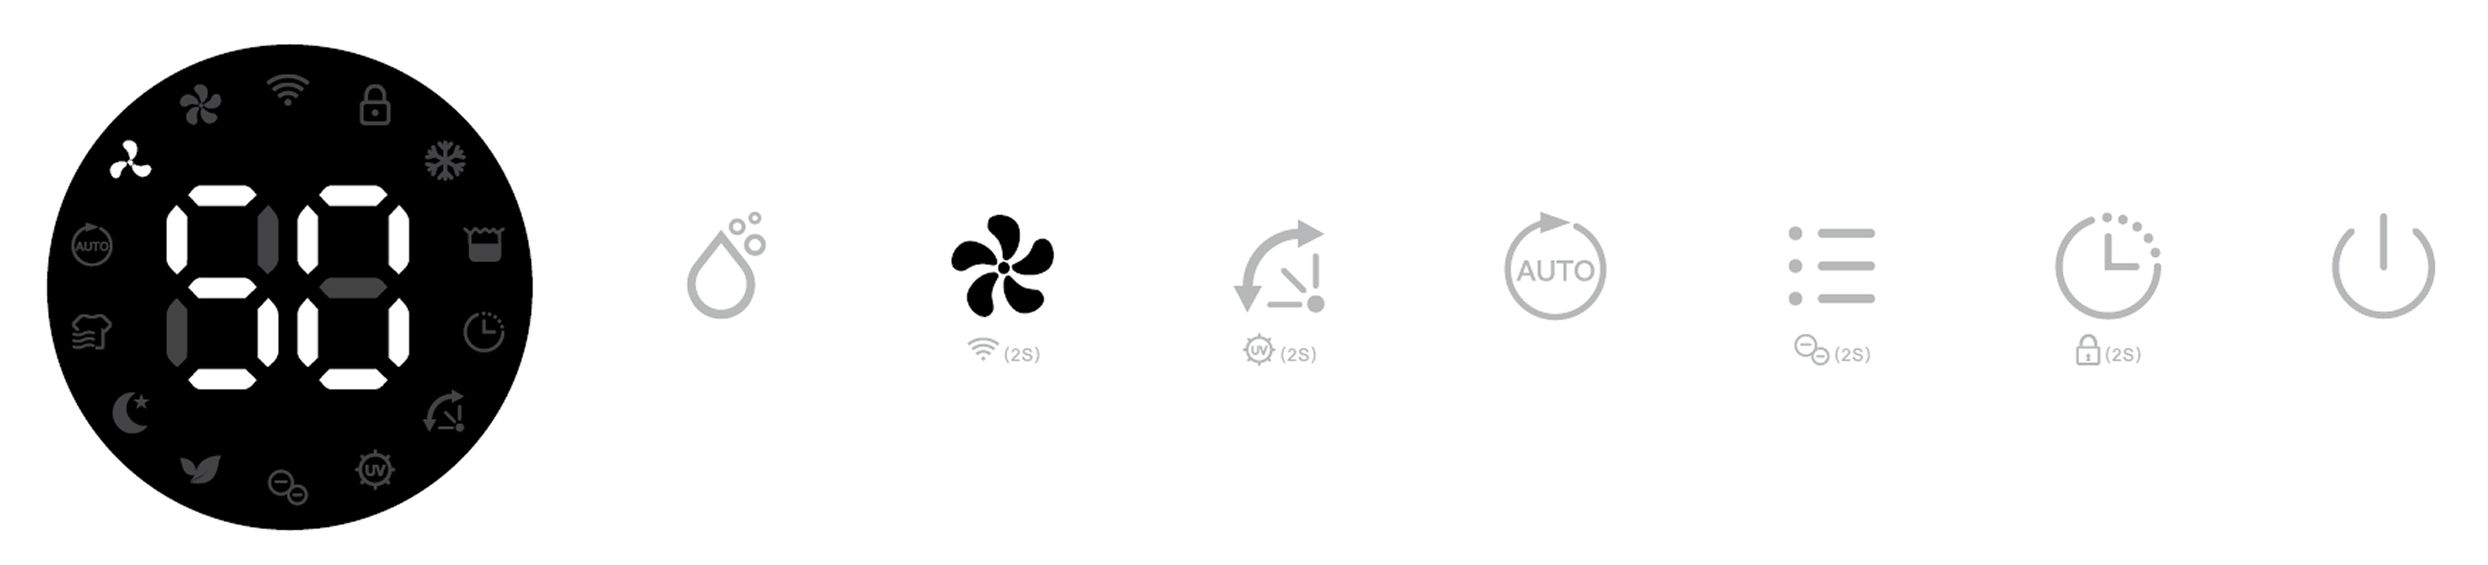
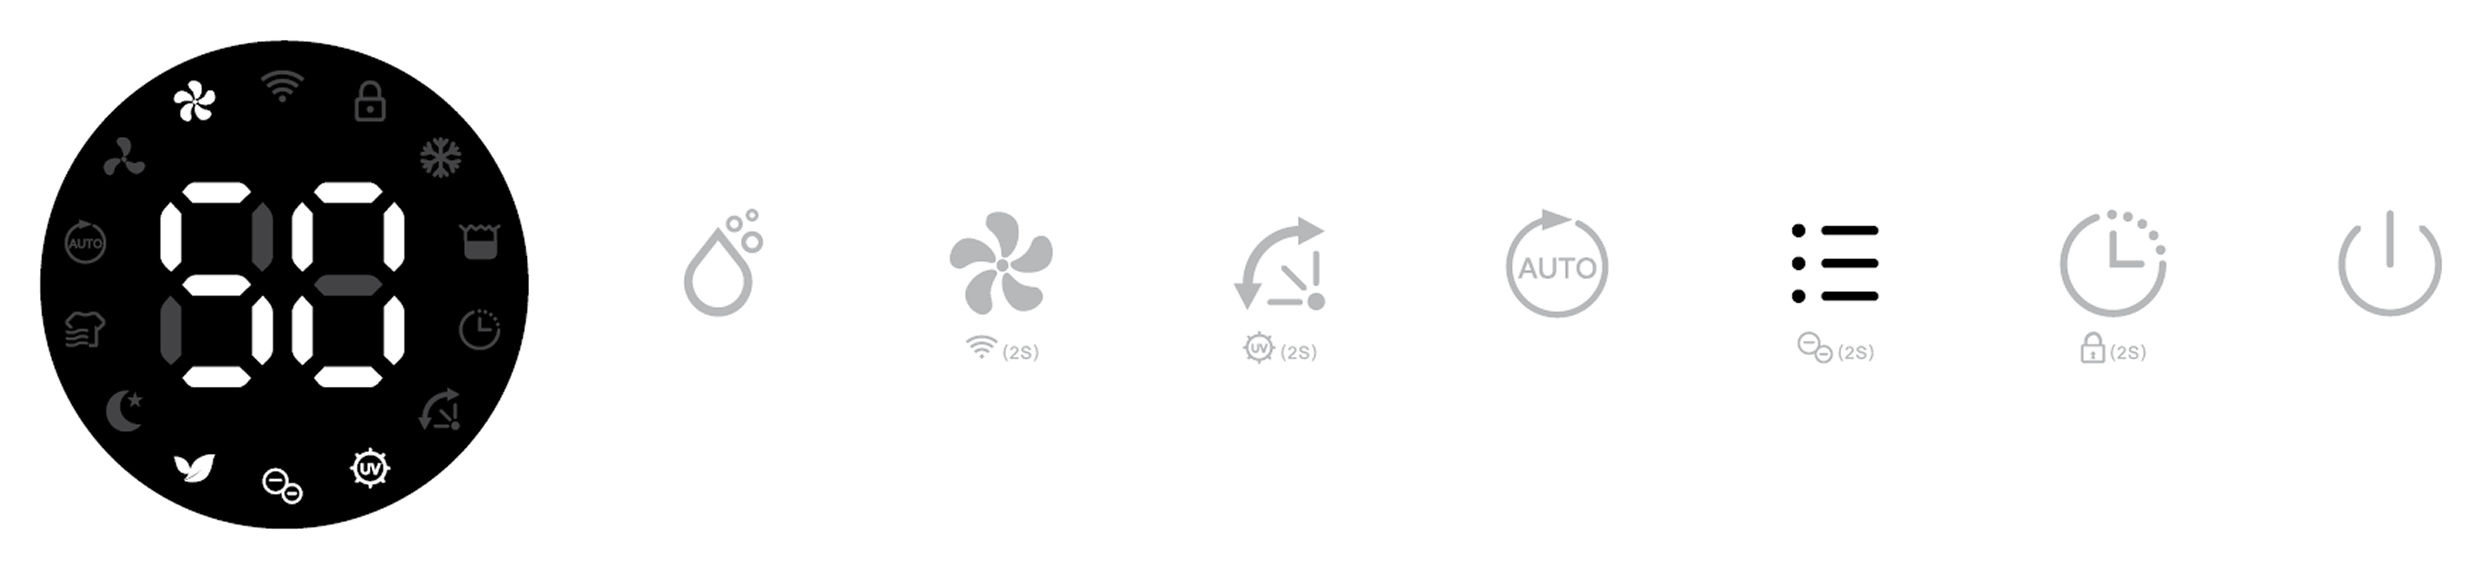
7. Fan Speed Option
Press the Fan Speed button to select your preferred fan speed setting of low or high to meet different usage requirements.
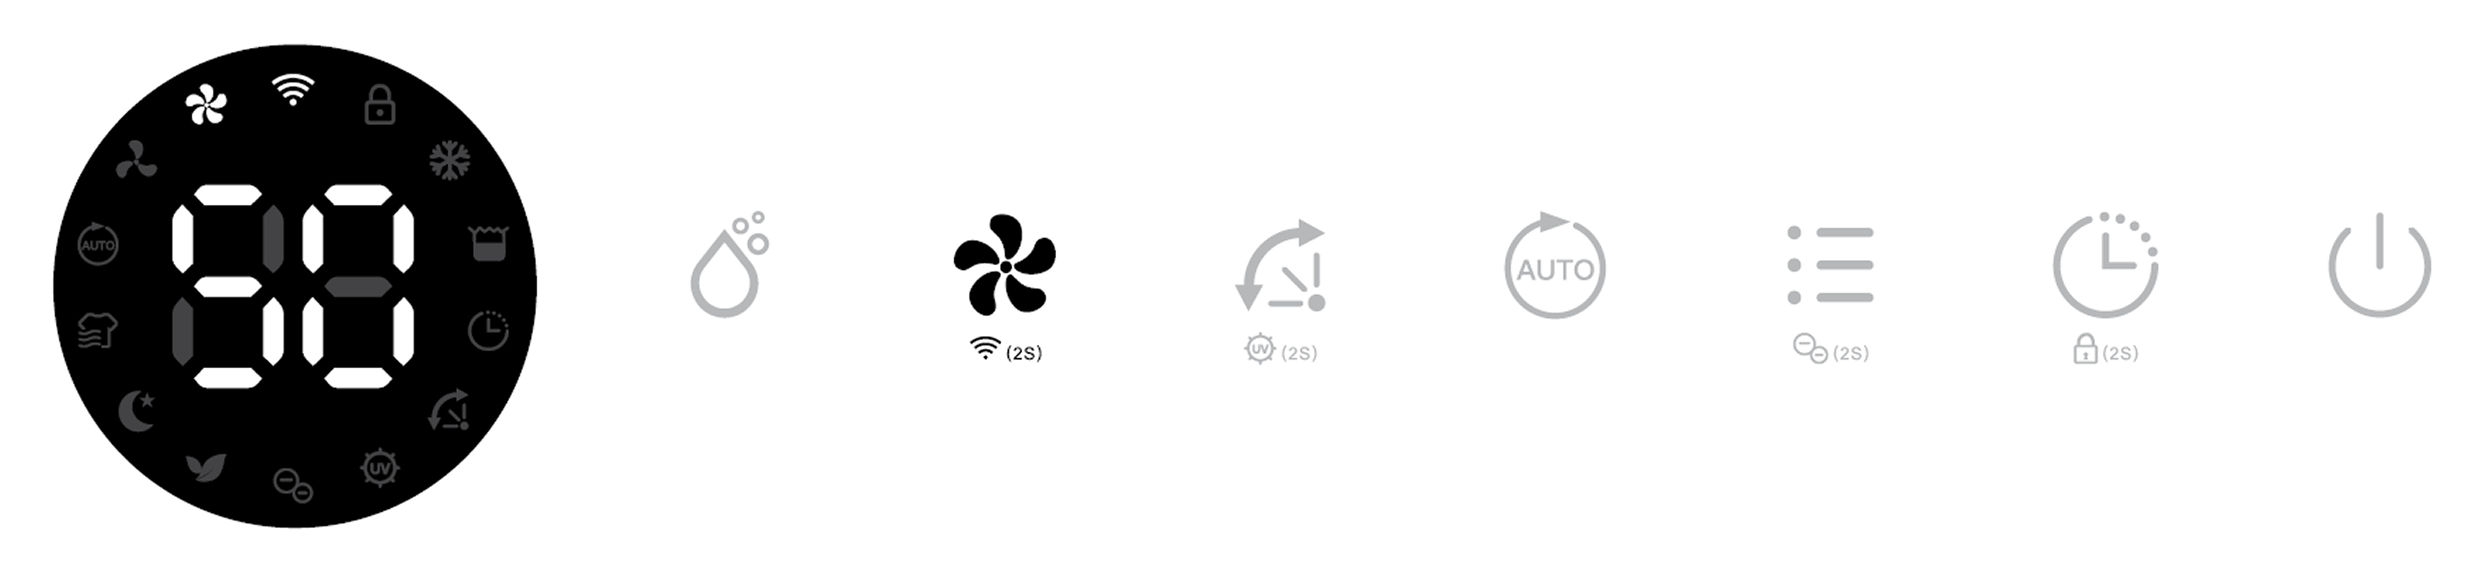
8. Wi-Fi
Press the Fan Speed button for 2 seconds to activate the Wi-Fi function and enter into the distribution network mode.
During the network configuration, the Wi-Fi indicator flashes, after successful Wi-Fi connection, the icon is permanently on.
Note:
For detailed configuration, please refer to the manual section “Wi-Fi Connection”.
Long press Fan Speed button for 2 seconds will disconnect Wi-Fi.
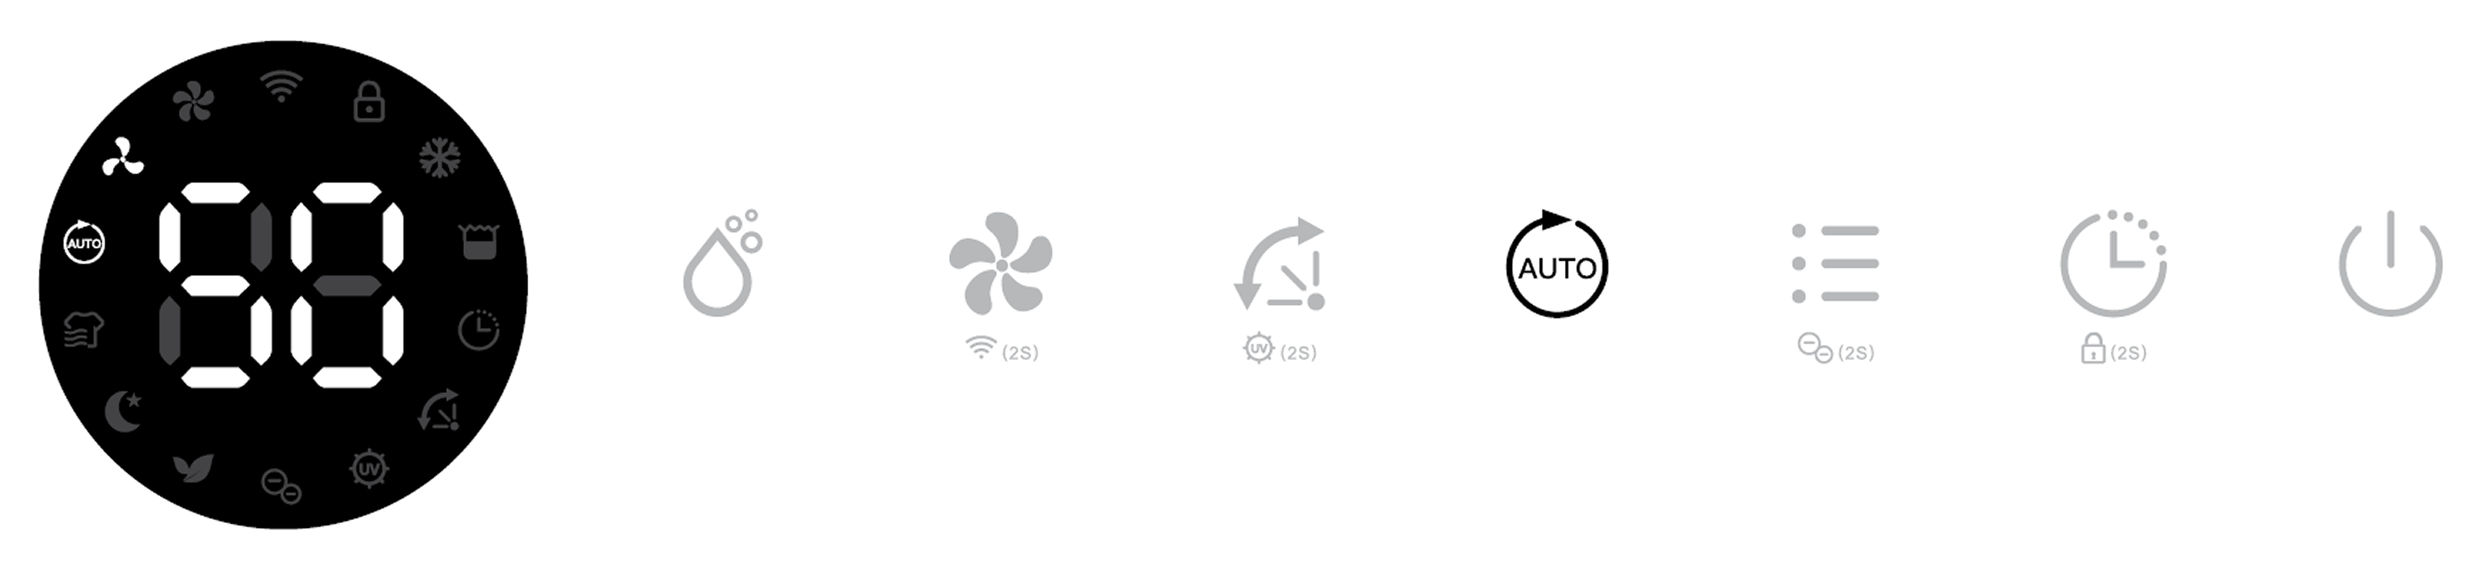
9. Auto-Dehumidifying
Press the Auto button to enter Auto-Dehumidifying Mode. The unit runs automatically in accordance to the detected ambient humidity, as depicted below:
Detected ambient humidity: RH above 65%
Compressor: operating
Fan speed: high
Detected ambient humidity: 55% to 65%
Compressor: operating
Fan speed: low
Detected ambient humidity: RH below 55%
Compressor: not operating
Fan speed: off
Note: Manual humidity setting is disabled in Auto mode.
Auto mode check cycle
If the humidity drops below 55%, the compressor and fan switch off.
After 55 minutes, the fan switches on.
After 60 minutes, the H/T sensor switches on (five minutes after the fan) and measures the humidity.
If the humidity is above 55%, the compressor starts and the unit dehumidifies again.
If the humidity is at or below 55%, the fan switches off.
The next check starts again after 55 minutes.
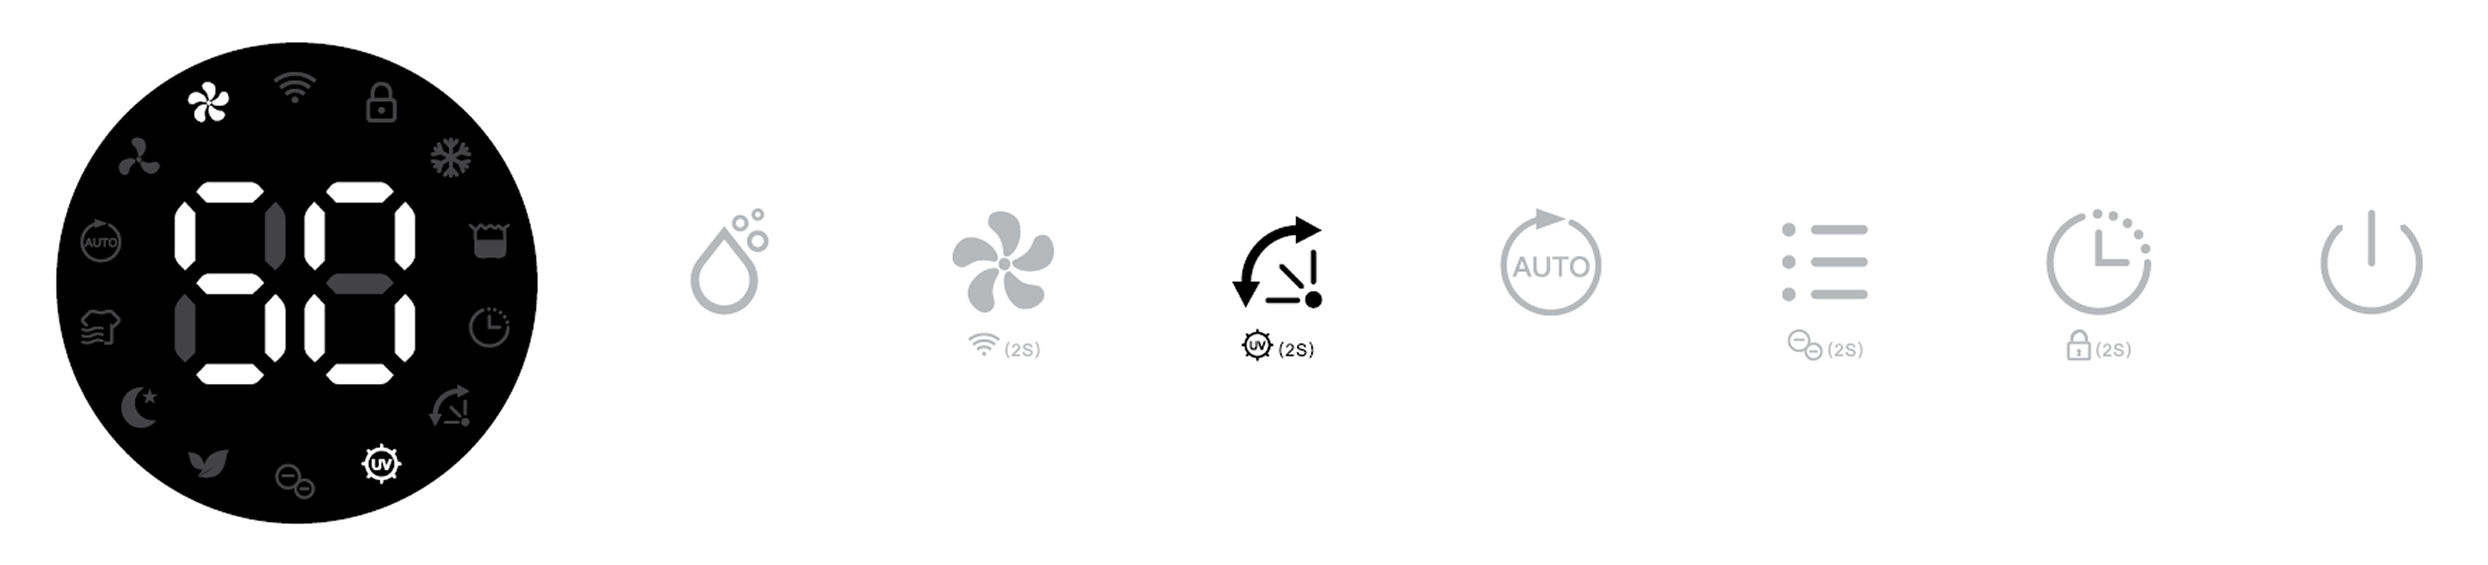
10. UV Sterilization
Press and hold the Air Louver Oscillation button for 2 seconds to activate the UV Sterilization function.
Its corresponding UV indicator will be displayed.
11. Ionizer
Press and hold Mode button for 2 seconds to activate the ionizer function.
The built-in Ionizer generates negative ions to improve air quality by neutralizing allergens and germs in the air.
Note: If the fan stops working, the Ionizer function will automatically be deactivated.
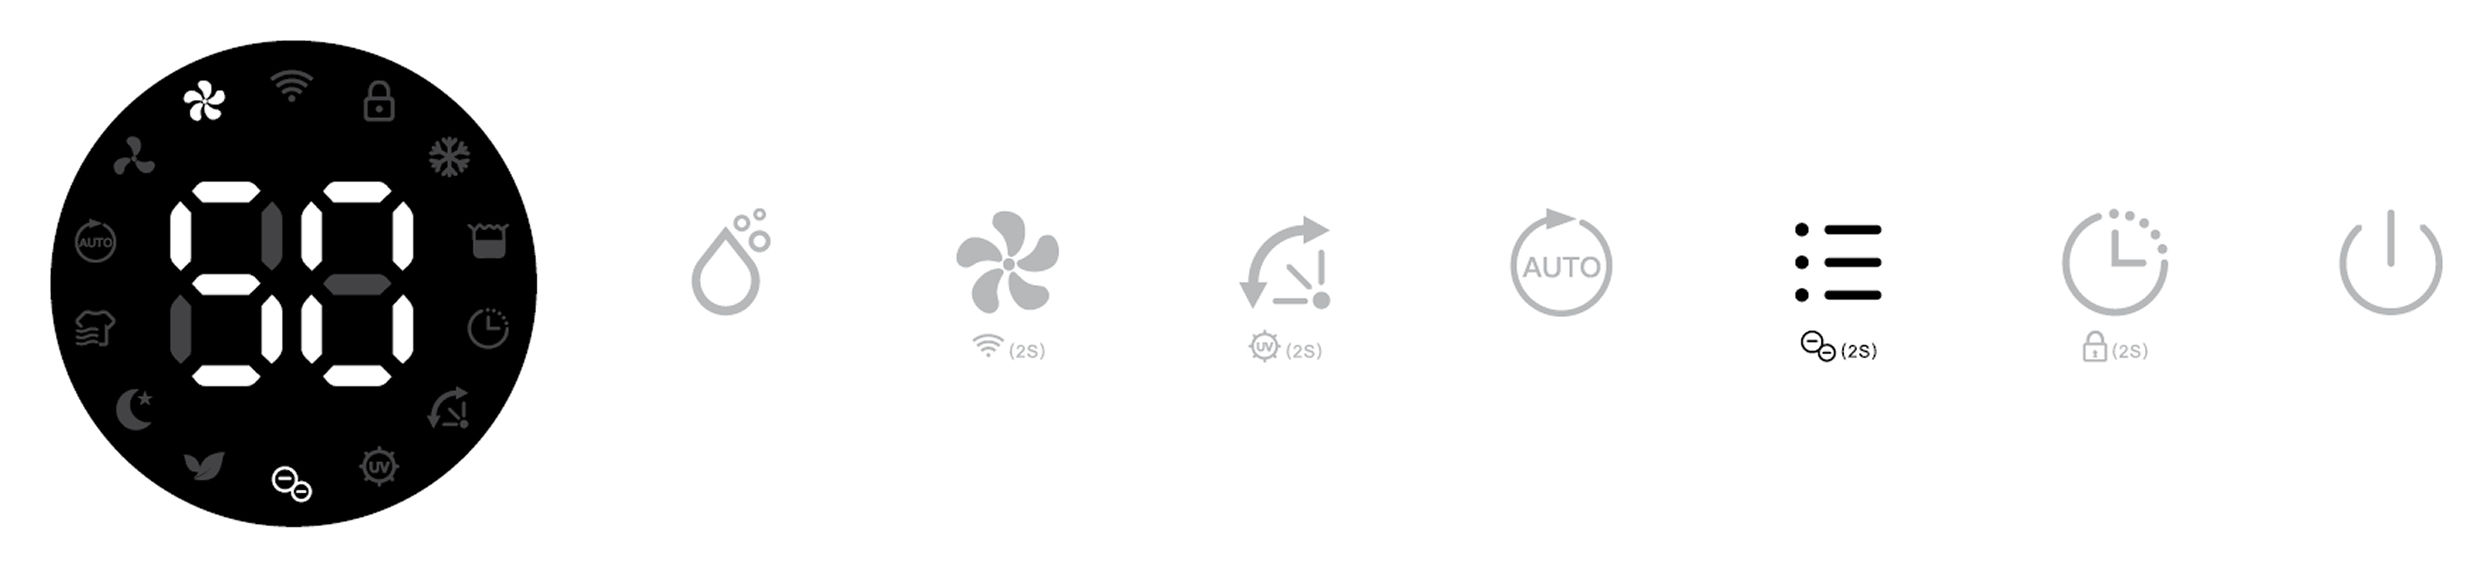
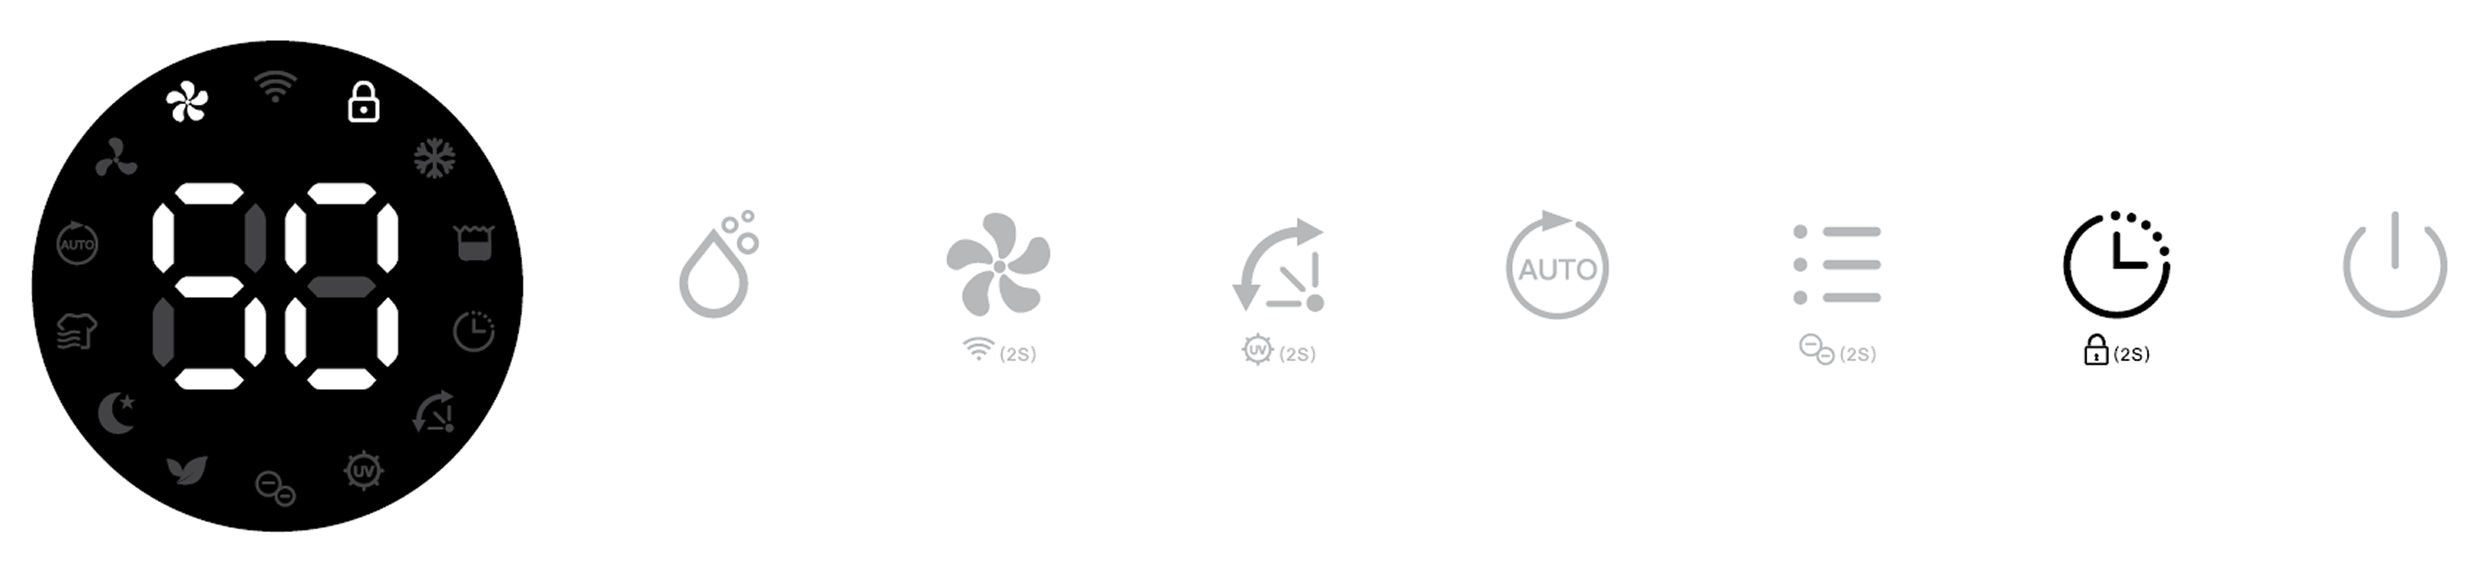
12. Key Lock
To prevent the mishandling by young children, the unit is equipped with a key lock function, which will make all buttons on the unit non-functional.
Press Timer button for 2 seconds to activate or deactivate the key lock function.
Note: After activating the key lock, the key lock indicator will be displayed on screen.
13. Automatic Shut Off
When the water tank becomes full during normal use, the unit shuts off automatically with tank full indicator displaying and the buzzer alarm sounds 5 times.
Pull water tank out
Pour water away
Restore the water tank
Note: If the water tank is removed or not placed correctly, the behavior described above will also occur.
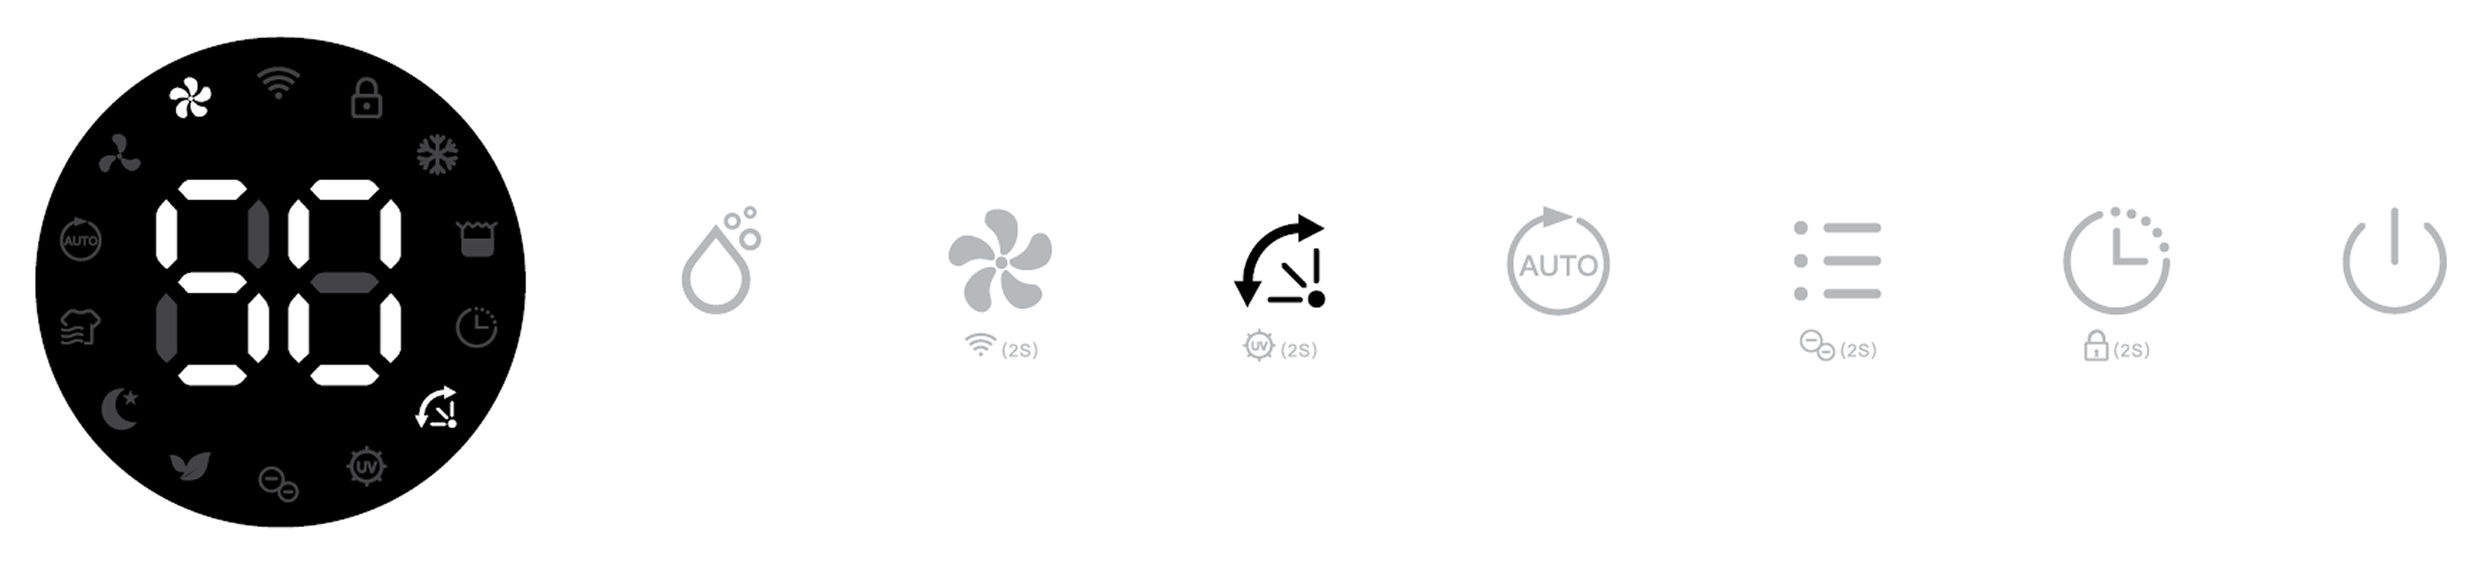
14. Oscillation
Air Louver oscillates in changing angles for better air circulation and optimum diffusion of the dehumidified air throughout the room.
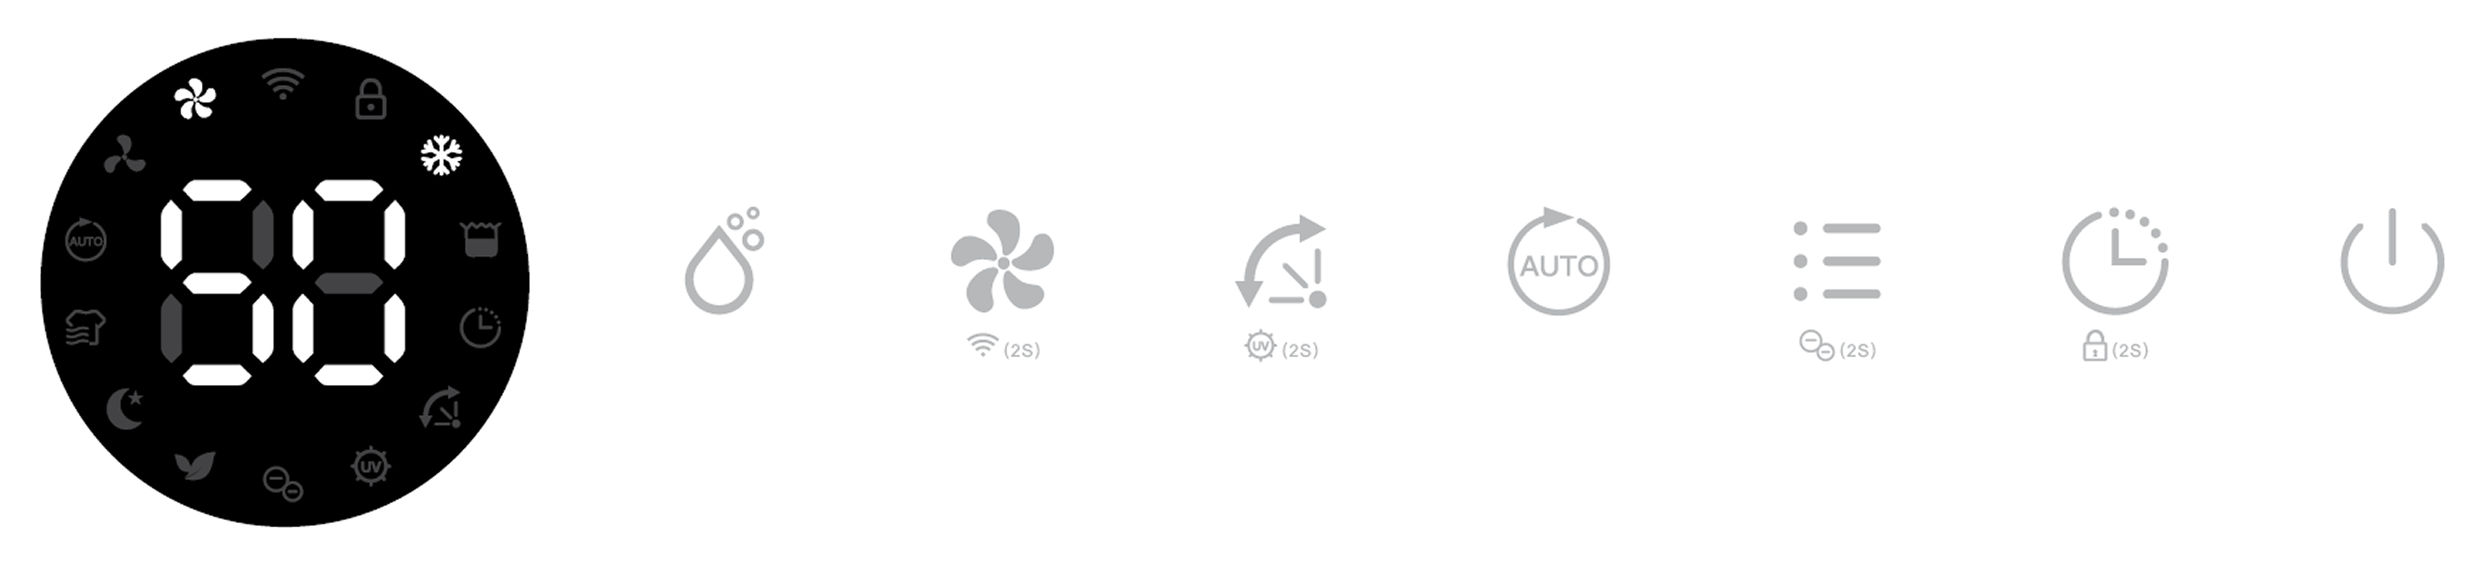
15. Automatic Defrost Feature
The unit is equipped with an automatic defrost feature.
When ice builds up on the vaporizer, the compressor shuts off and the unit runs on high fan speed until the frost has disappeared, the corresponding indicator will be displayed.
This feature is not manually adjustable by the user.
16. Memory Feature
In case of a power failure, the unit will continue operating in the mode set prior to the shutdown, as soon as power is recovered. Meaning the fan speed setting, humidity setting and working mode setting will be obtained.
Multifunction
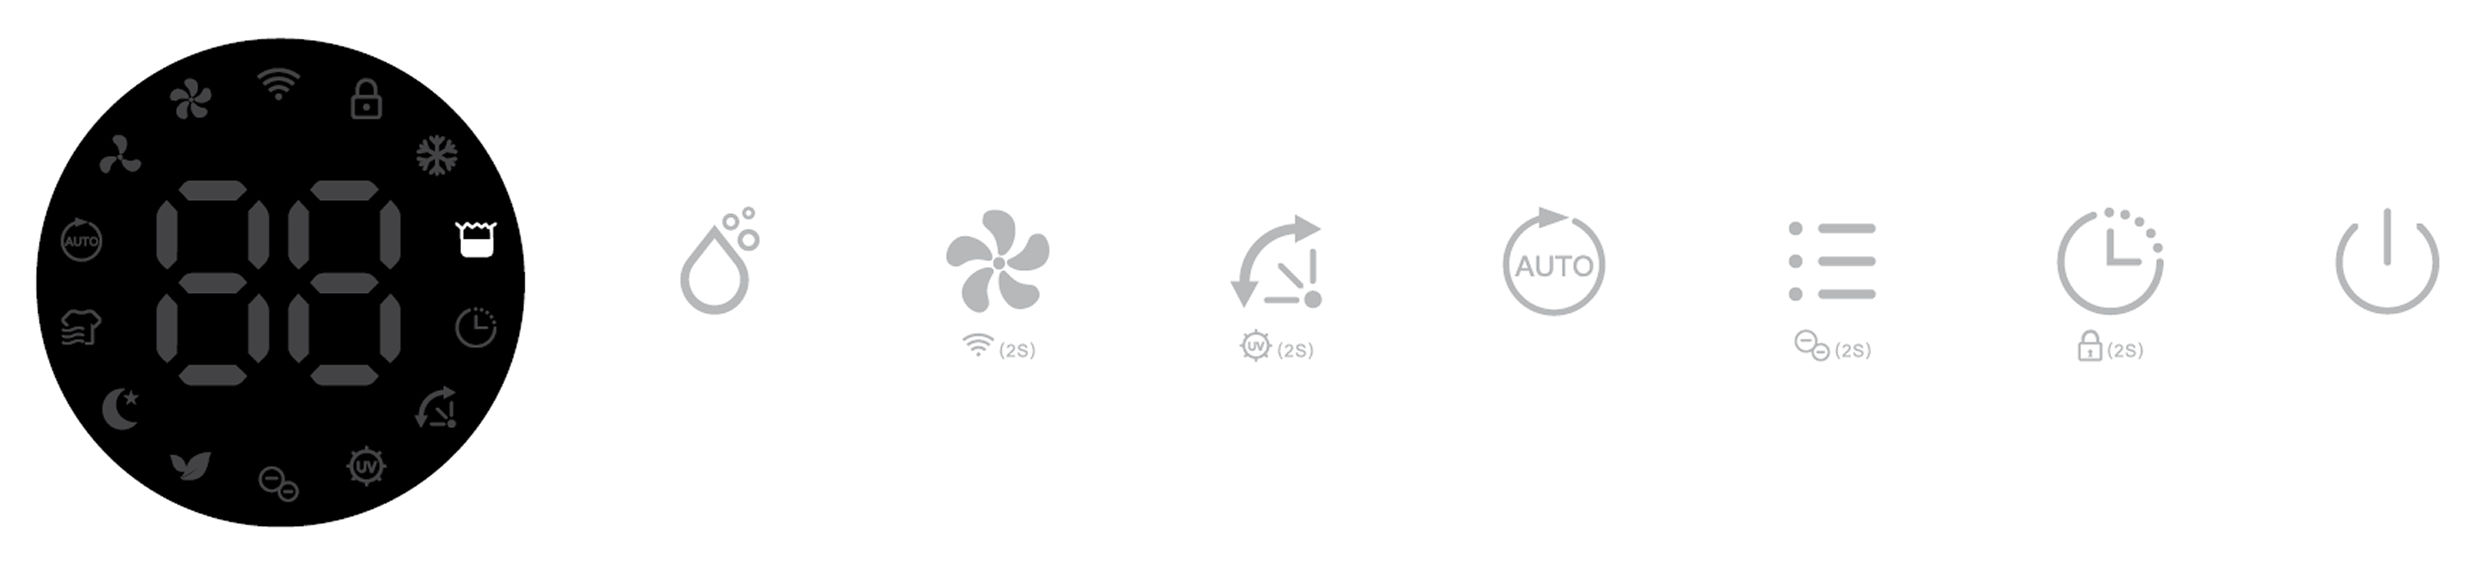
17. Laundry Drying Mode
Press Mode button once to select Laundry Drying mode.
Its corresponding Laundry Drying indicator will be displayed.
The unit works in continuous dehumidification with high fan speed for 6 hours, then turns off automatically.
18. Night Mode
Press Mode button twice to select Night mode.
Its corresponding Night Mode indicator will be displayed.
The unit works in previously set mode but in low fan speed and 10 seconds later, all indicators will be off.
Note: In Night Mode, press any button to wake up the unit first, then operate as usual.
19. Air Purifying
Press Mode button 3 times to select the Air Purifying mode.
Its corresponding Air Purifying, Ionizer and UV indicators will be displayed on screen.
The unit works with high fan speed without dehumidifying, Ionizer and UV function start operating as well.
Note:
Ionizer function can be turned off by pressing and holding the Mode button for 2 seconds.
The UV function can be turned off by pressing and holding the Oscillation button for 2 seconds.
Continuous Drainage
20. Continuous Drainage Function
Continuous drainage option allows easy removal of collected water instead of manually emptying from the water tank when the environment is very high humidity.
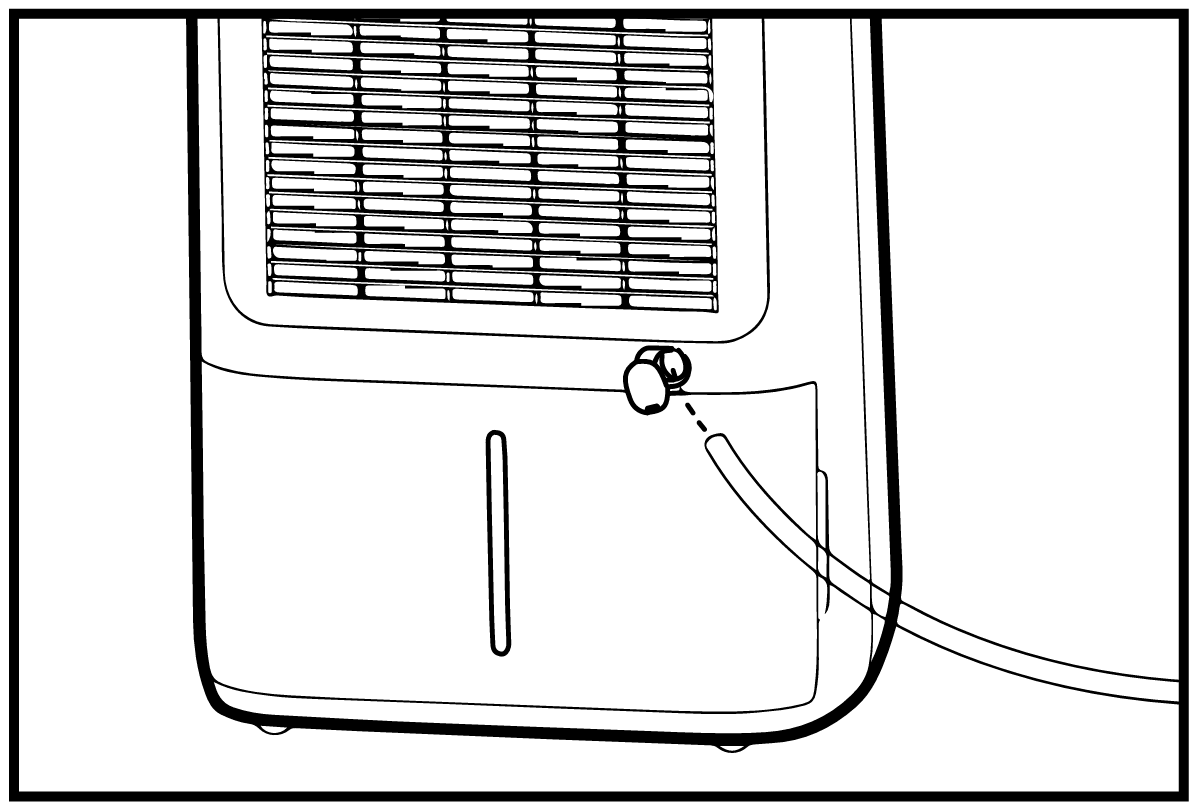
21. Remove Drain Plug
Remove the rubber plug covering the drain hose connection
22. Attach the Drain Hose
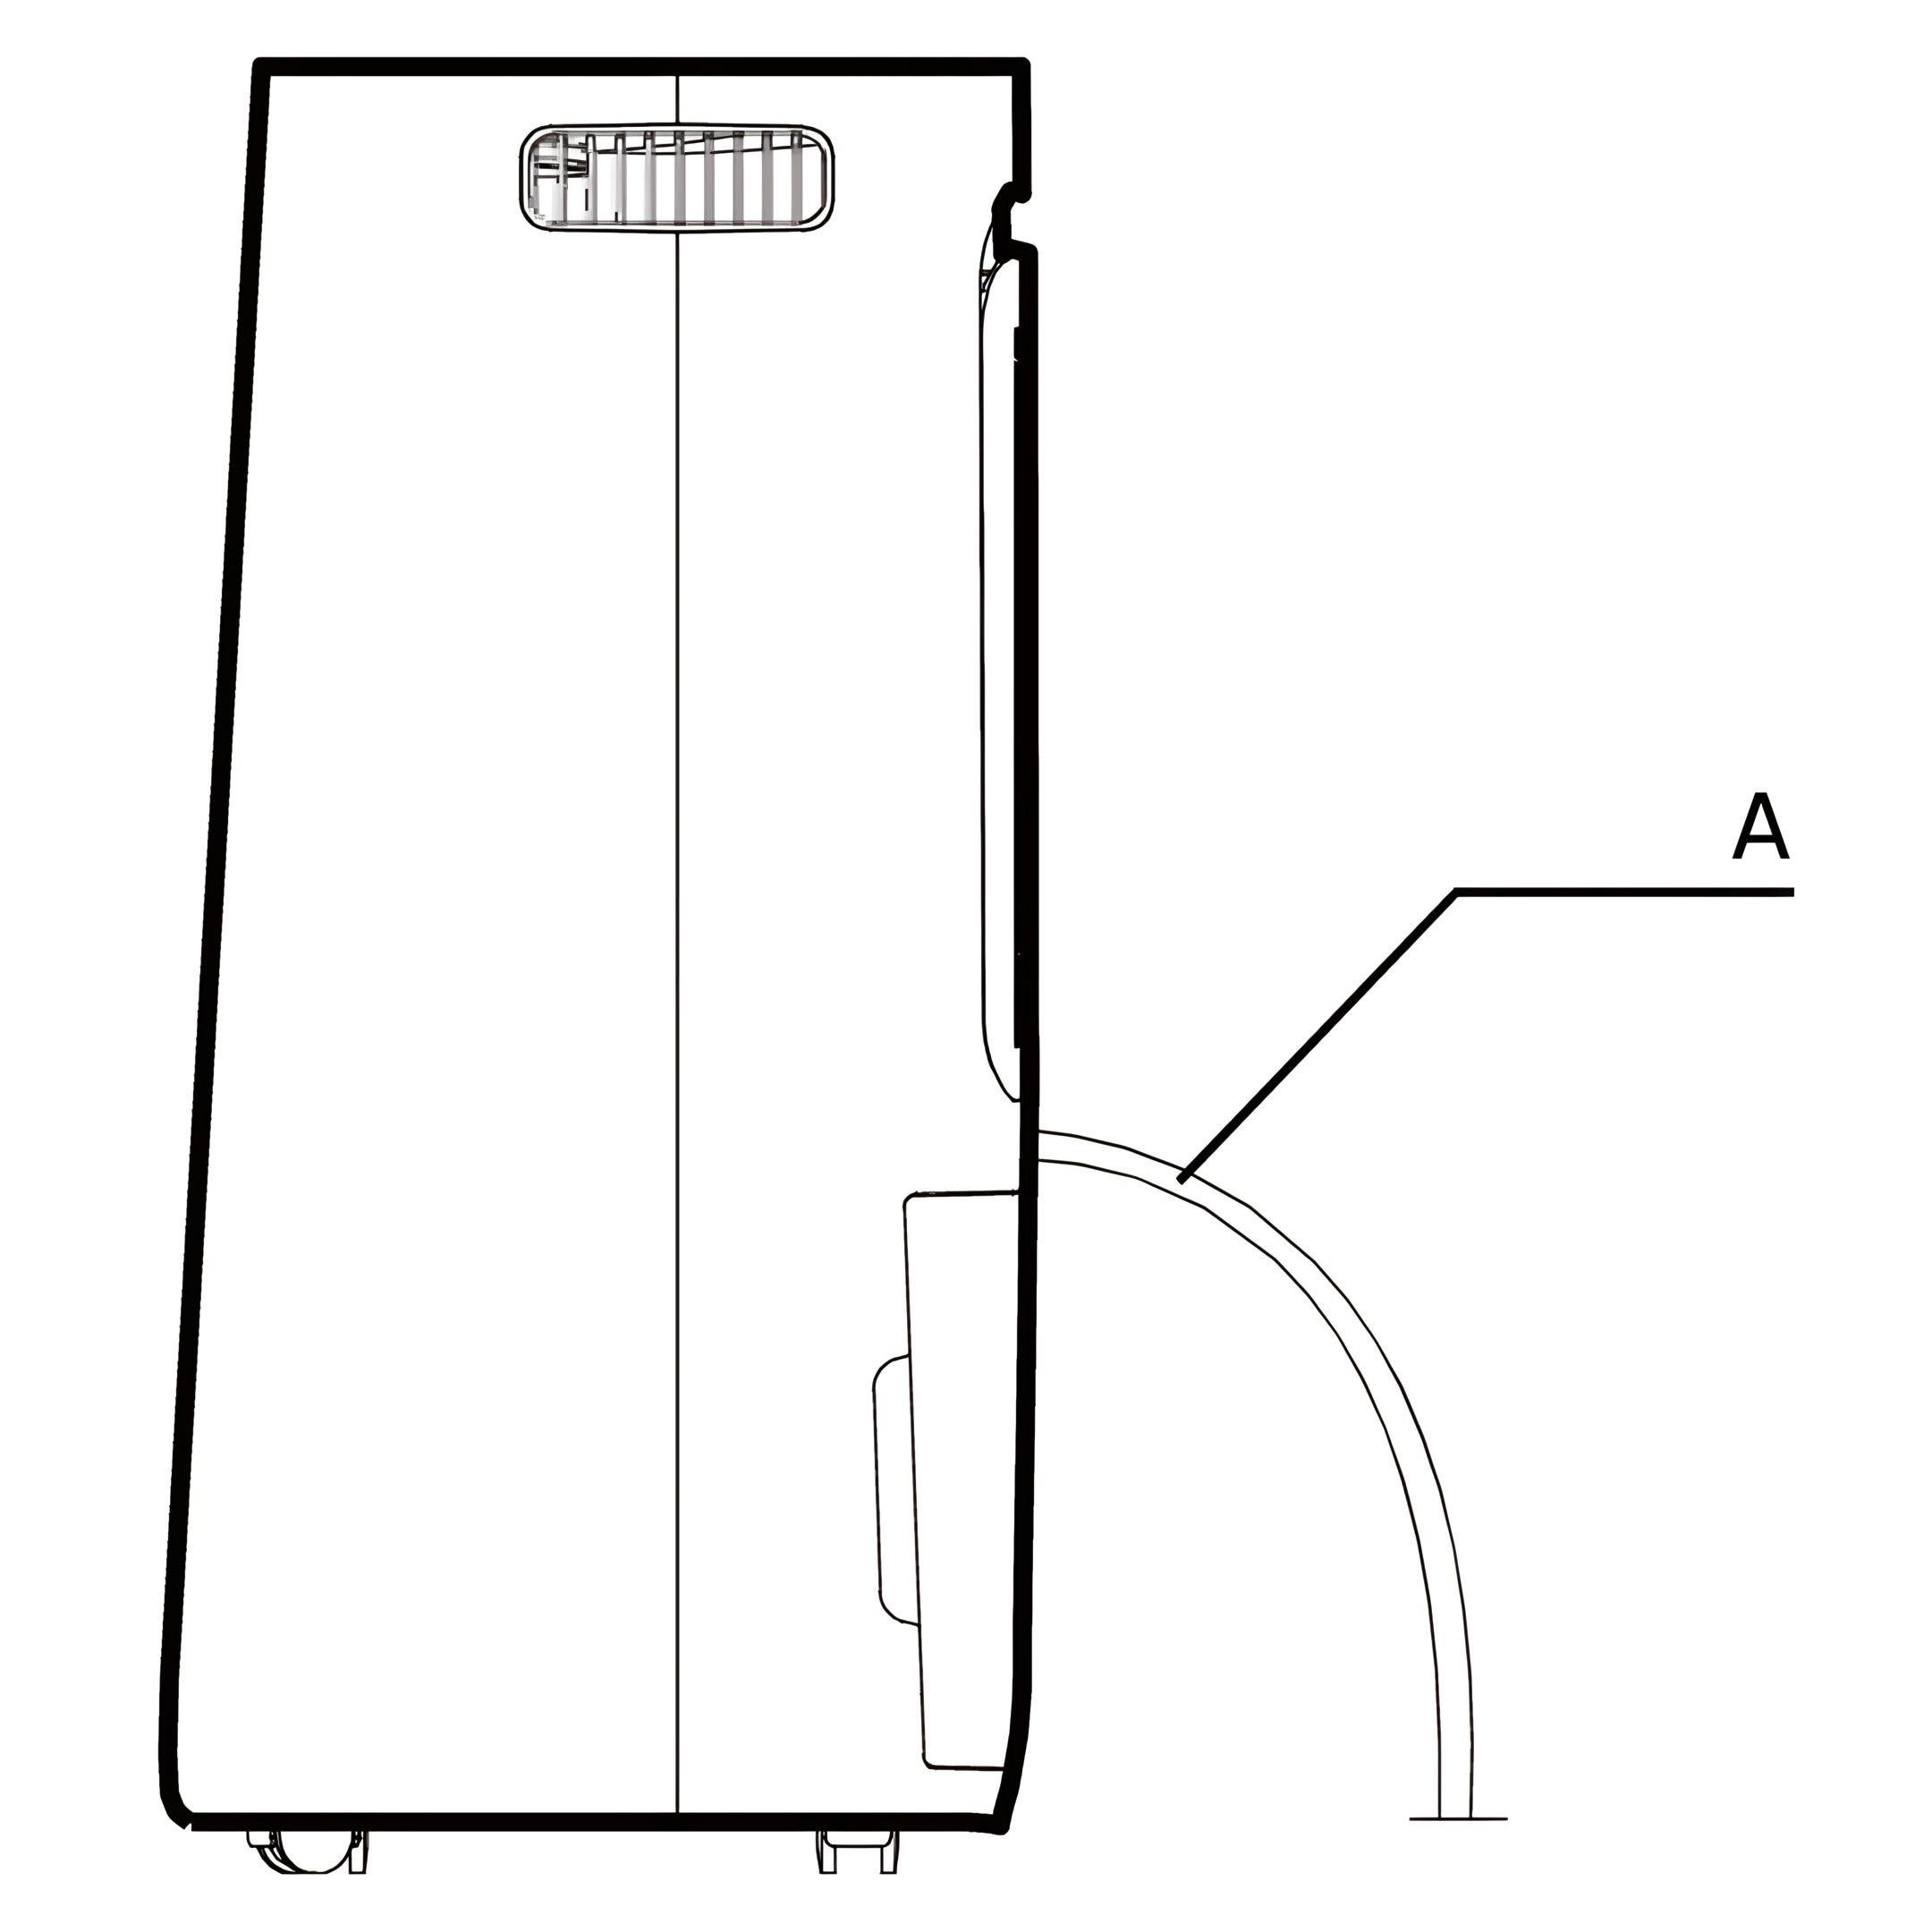
Connect a suitable drain hose (A)(14 mm inner diameter) through the drainage outlet.
Ensure that the hose is securely and tightly fitted to prevent leakage.
23. Check for Blockages
Always make sure the drainage hose is not blocked or obstructed to maintain a smooth flow
Wi-Fi Connection
24. Information on the ecofort SMART App
This application allows you to operate the unit via your home network.
A prerequisite is a permanent Wi-Fi connection to your router and the “ecofort SMART” app (iOS & Android)
25. Wi-Fi Connection
In order to be able to connect your device, the “ecofort SMART” app has to be installed on your smartphone or tablet and a user account must be created (follow the instructions in the app).
Your smartphone or tablet must have an active Wi-Fi connection to the local network where the dehumidifier will be used in.
26. Automatic Connection
Bluetooth has to be activated on your smartphone or tablet during the connection process.
Turn on device
Open the “ecofort SMART” app
Select “Add Device”, available devices will be shown
Press “Add”, your device will automatically be added
27. Manual Connection
If your device is not automatically detected, find it in the “Add Manually” section below.
Select “Dehumidifier” and then your particular model.
Follow the instructions as given within the application.
Note: Once the unit has been successfully connected, the Wi-Fi lamp on the unit stays lit You can now operate the unit from anywhere by using the app.
28. Disconnection
Press and hold the Fan Speed button for about 5 seconds to disconnect the unit, the Wi-Fi indicator lamp will go off.
The device can also be disconnected within the app, by deleting the corresponding device.
Note: If a different user connects to the device, the existing connection will be disrupted and the device deleted.
Cleaning and Maintenance
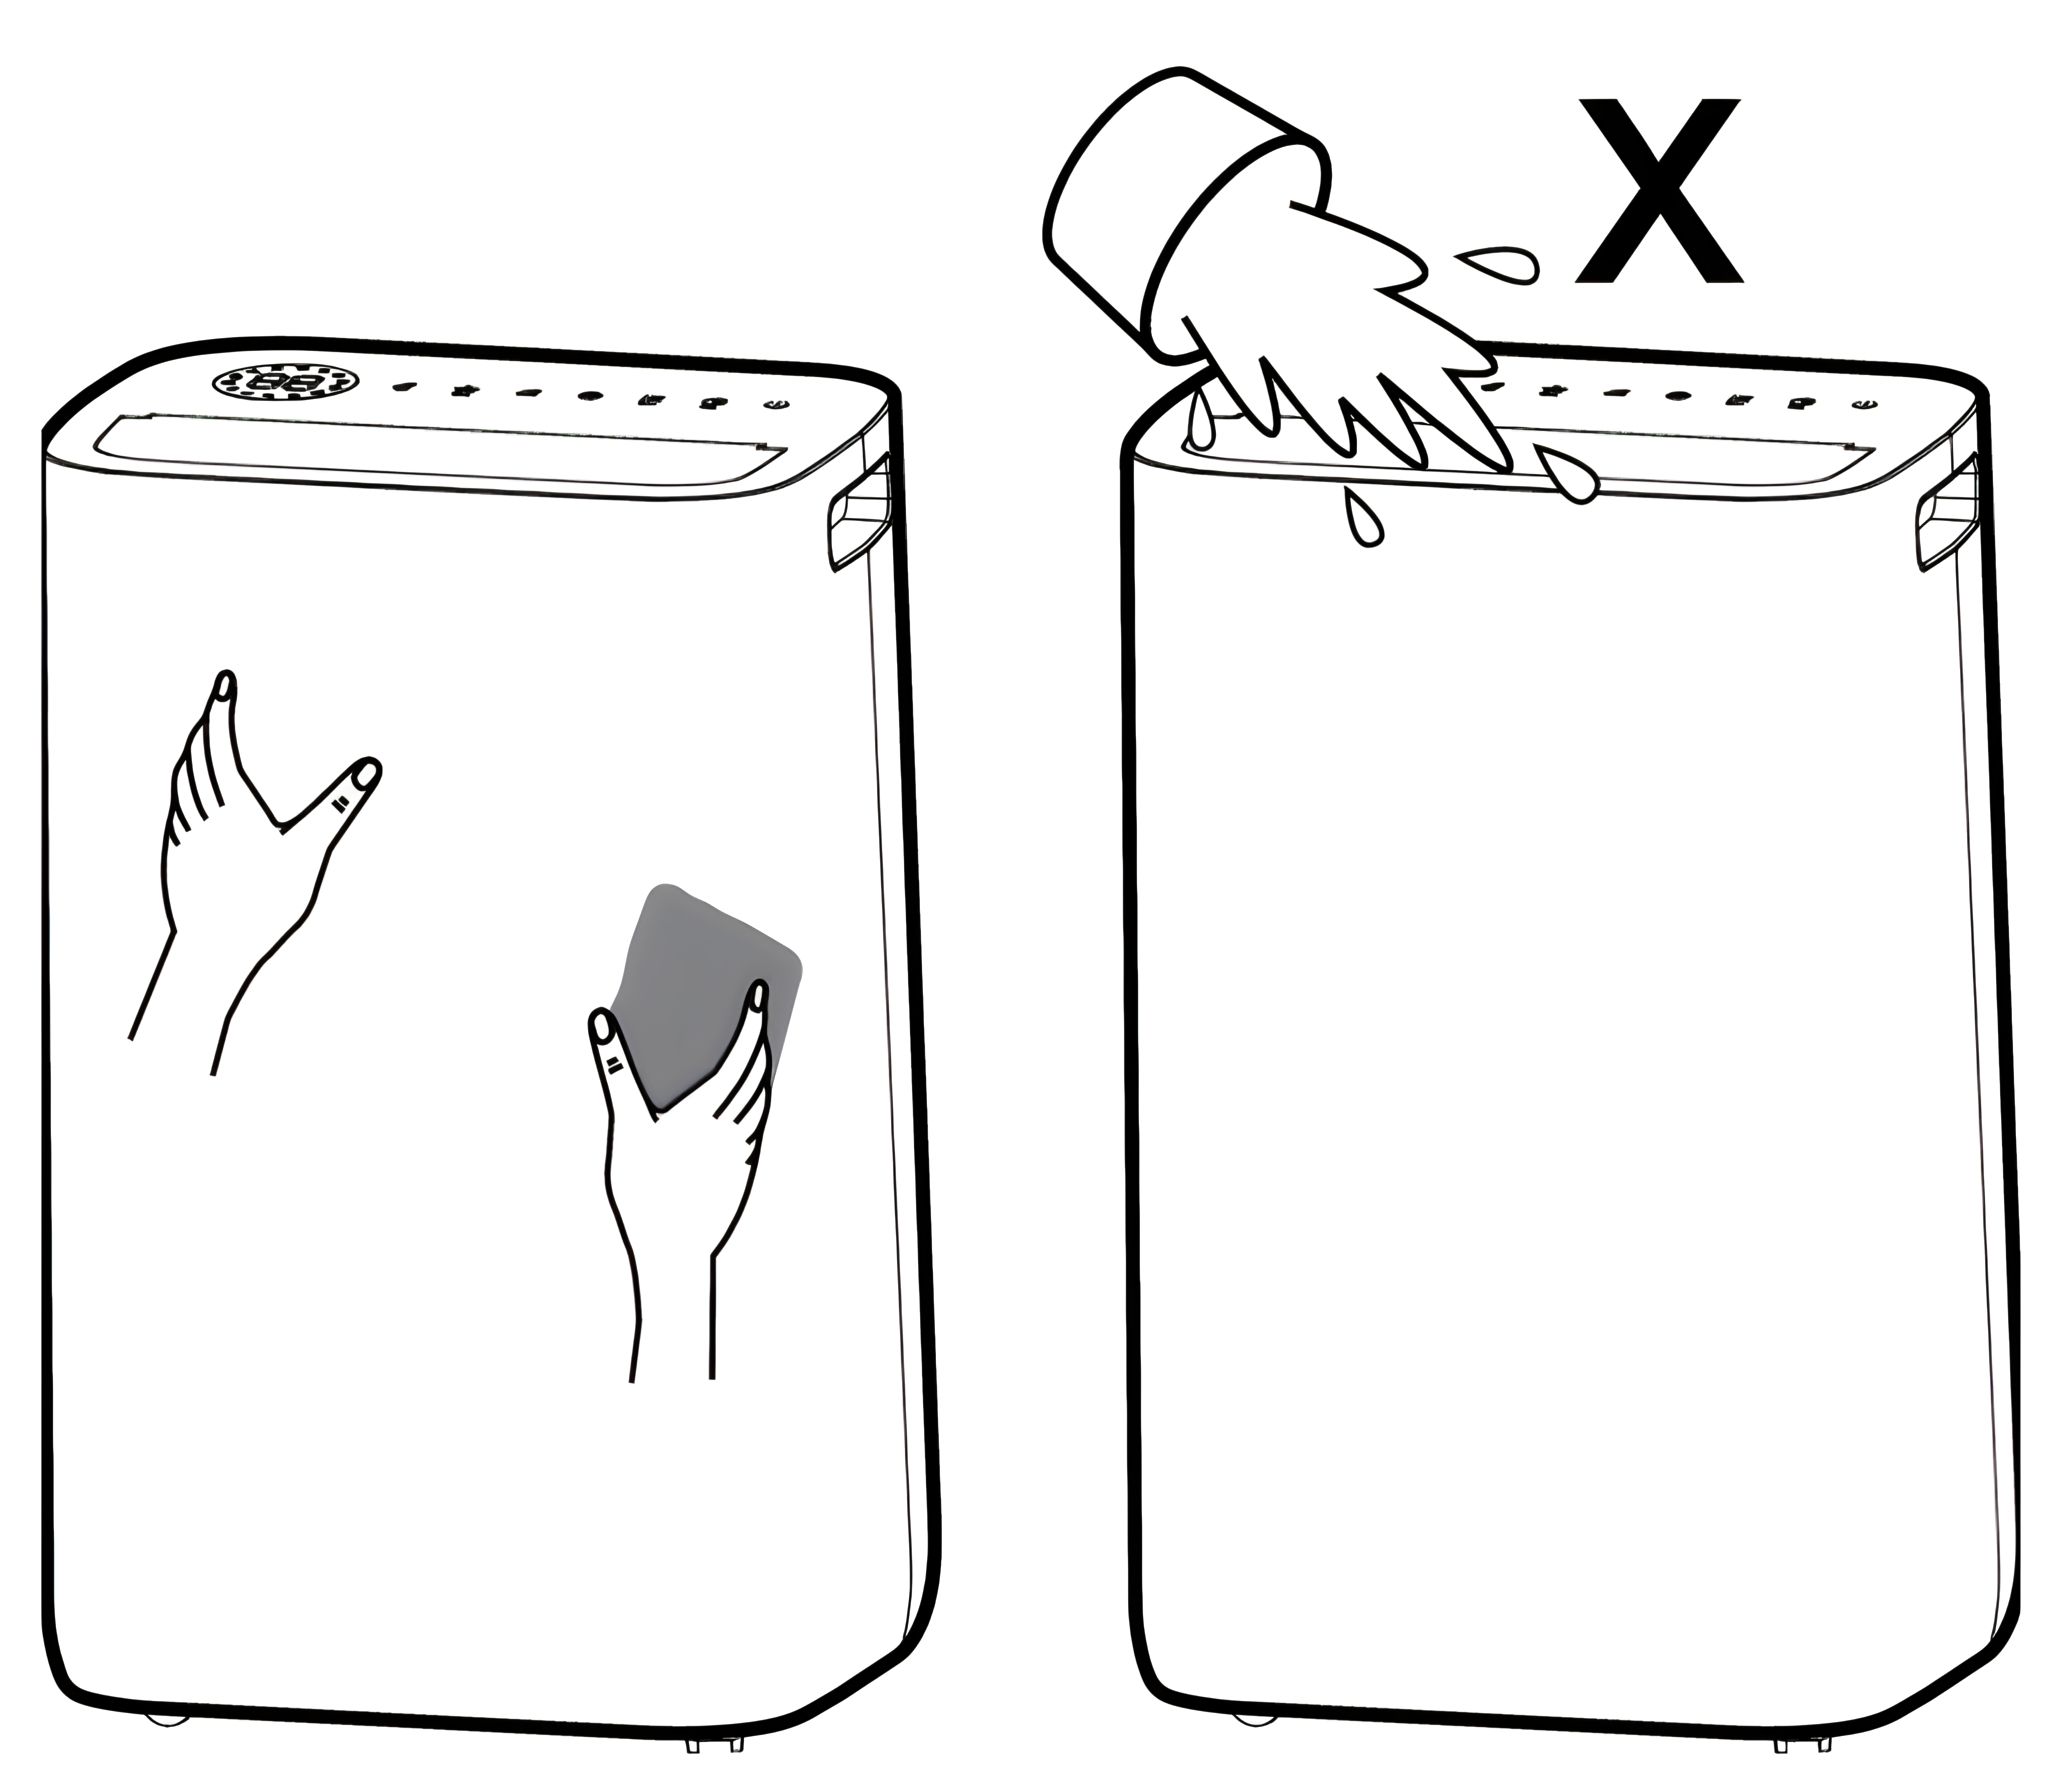
29. Cleaning the dehumidifier
To ensure the effectiveness of the dehumidifier, it is recommended to clean the unit at least every two weeks.
Turn the dehumidifier off and disconnect the power plug before cleaning
Use a soft cloth to gently wipe the outer case to remove dust
Vacuum clean the air inlet and outlet grilles of the dehumidifier
Remove the water tank and wash it by hand using a mild detergent
Rinse the water tank with clean water
Note: Do not spray water directly onto the unit
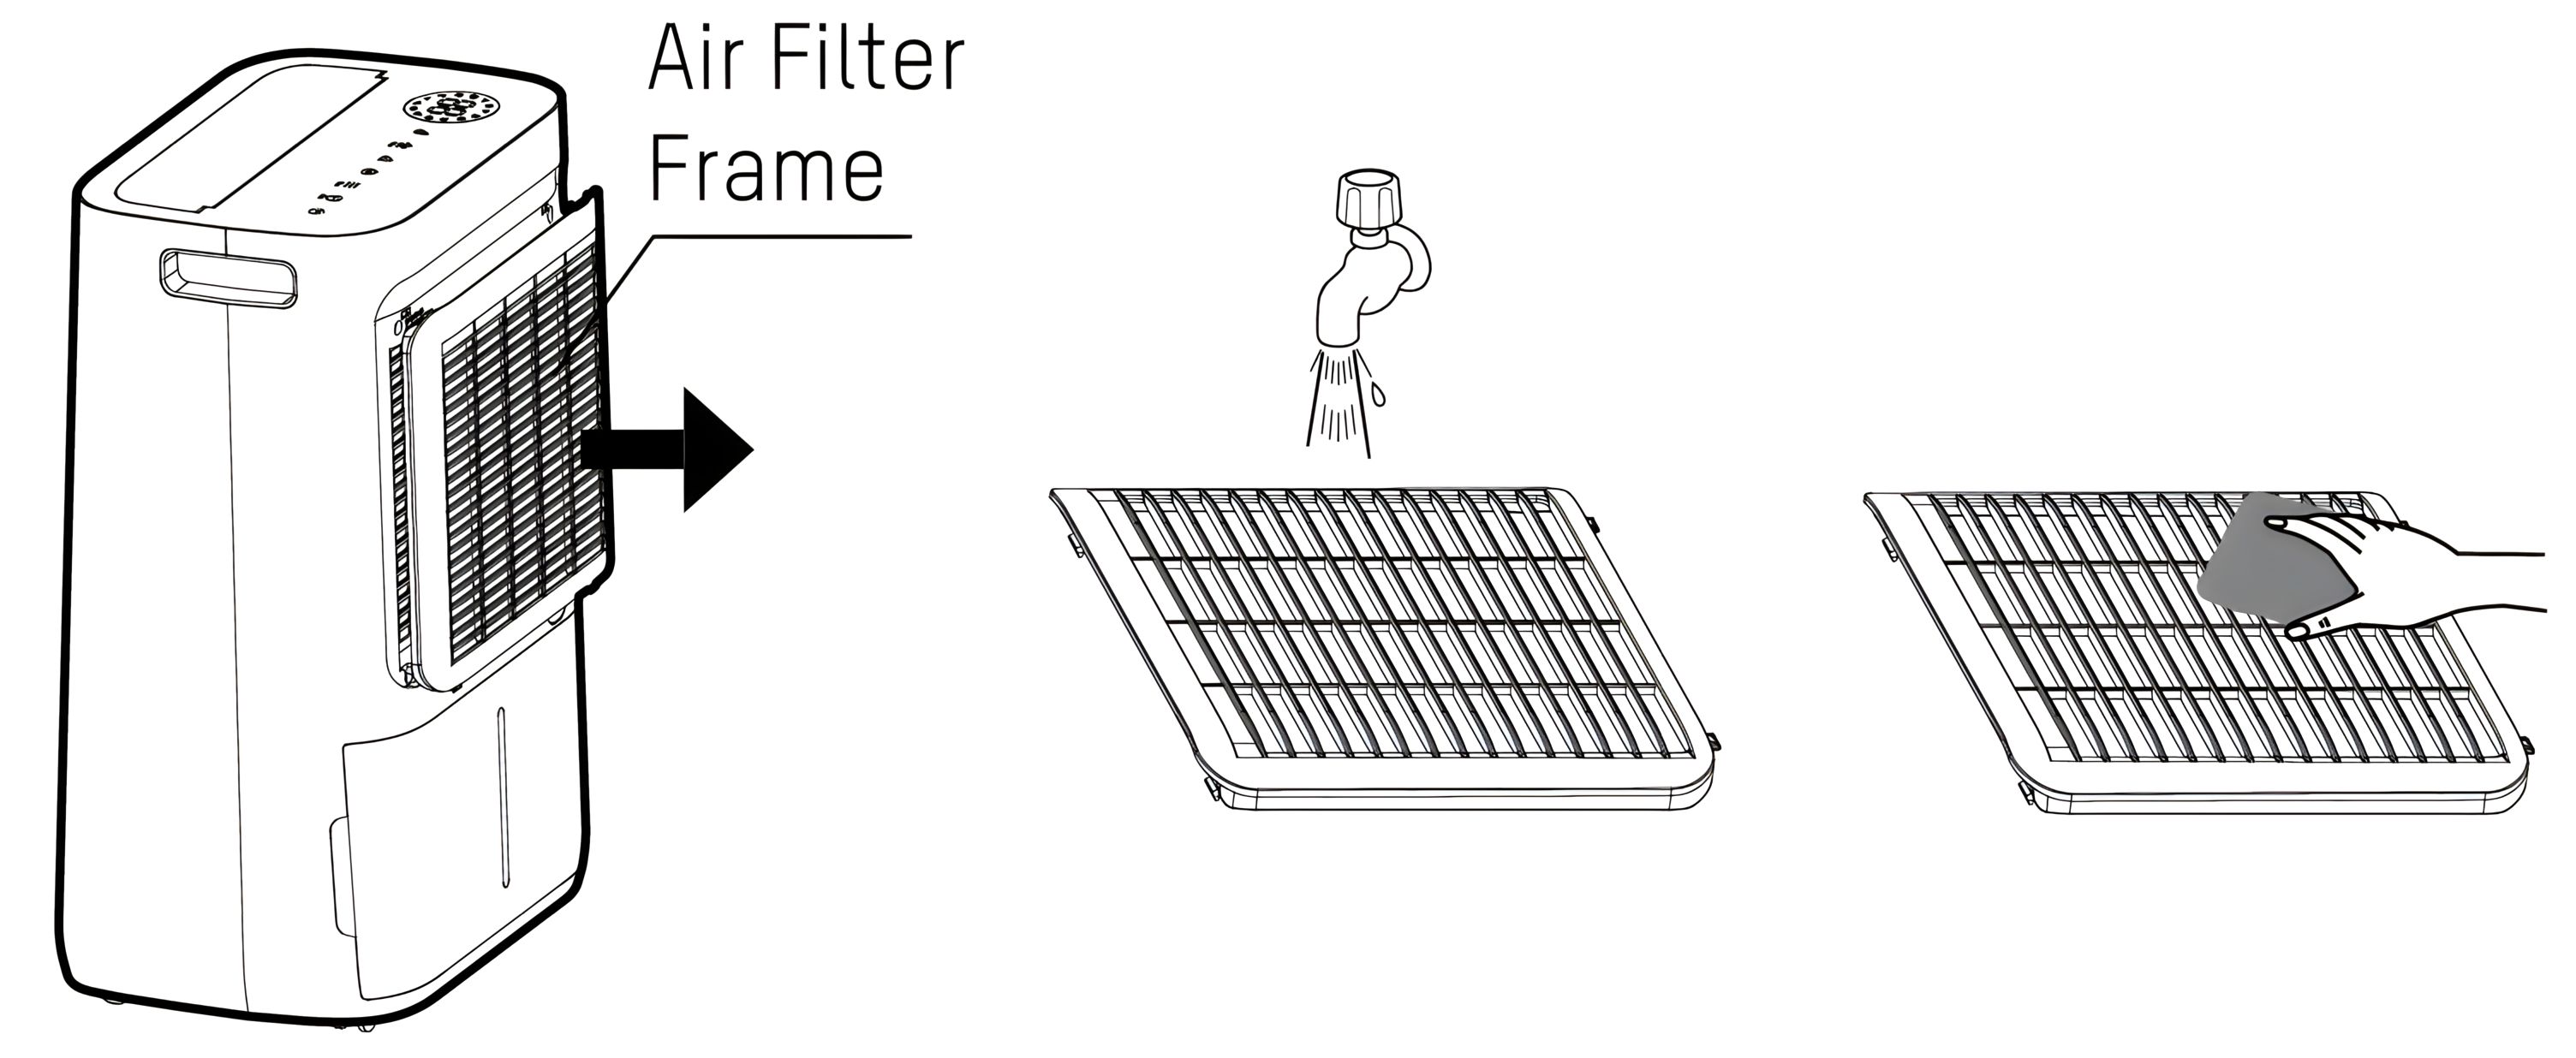
30. Cleaning the Air Filter Frame
To ensure the effectiveness of the dehumidifier, it is recommended to clean the unit at least every two weeks.
Remove the inlet frame from the back
Wash the filter frame carefully in warm water, use a mild detergent if necessary
Rinse the filter frame in clean water and let it dry before reinserting it
Fit the filter frame back onto the unit
Note:
Do not wash the filter frame in a dishwasher
Do not use the dehumidifier without the air filter frame in place
Troubleshooting
31. The dehumidifier will not turn on
The mains lead is not properly plugged in or there is no power from the wall socket.
The water tank is full or incorrectly fitted.
The set humidity level has been reached.
Power plug or cord damaged.
32. The humidity is not decreasing
The dehumidifier has not been used long enough.
Make sure that the doors and windows are closed.
The ambient temperature is too low.
The ambient humidity level is lower than the humidity set.
The air filter frame is overly dirty.
Exceeded recommended room capacity.
33. Unusual noises
The dehumidifier is tilted or standing on an uneven surface.
Make sure that the air filter is clean.
Loose or foreign particles inside the unit.
Sound of flowing refrigerant.
34. Buttons don’t work
Key Lock is activated, press timer button for 2 seconds, until key lock indicator disappears from display.
35. Water in tank overflows
Water tank may be damaged.
Float for water auto-sensor is not in place.
Internal drainage passage is blocked or obstructed.
36. Error code
E1: Temperature sensor error. Contact customer care center.
E2: Humidity sensor error. Contact customer care center.
LO: Low environmental humidity (below 30%)
HI: High environmental humidity (above 90%)
Previous stepCopy link to sharePrint / PDFNext step