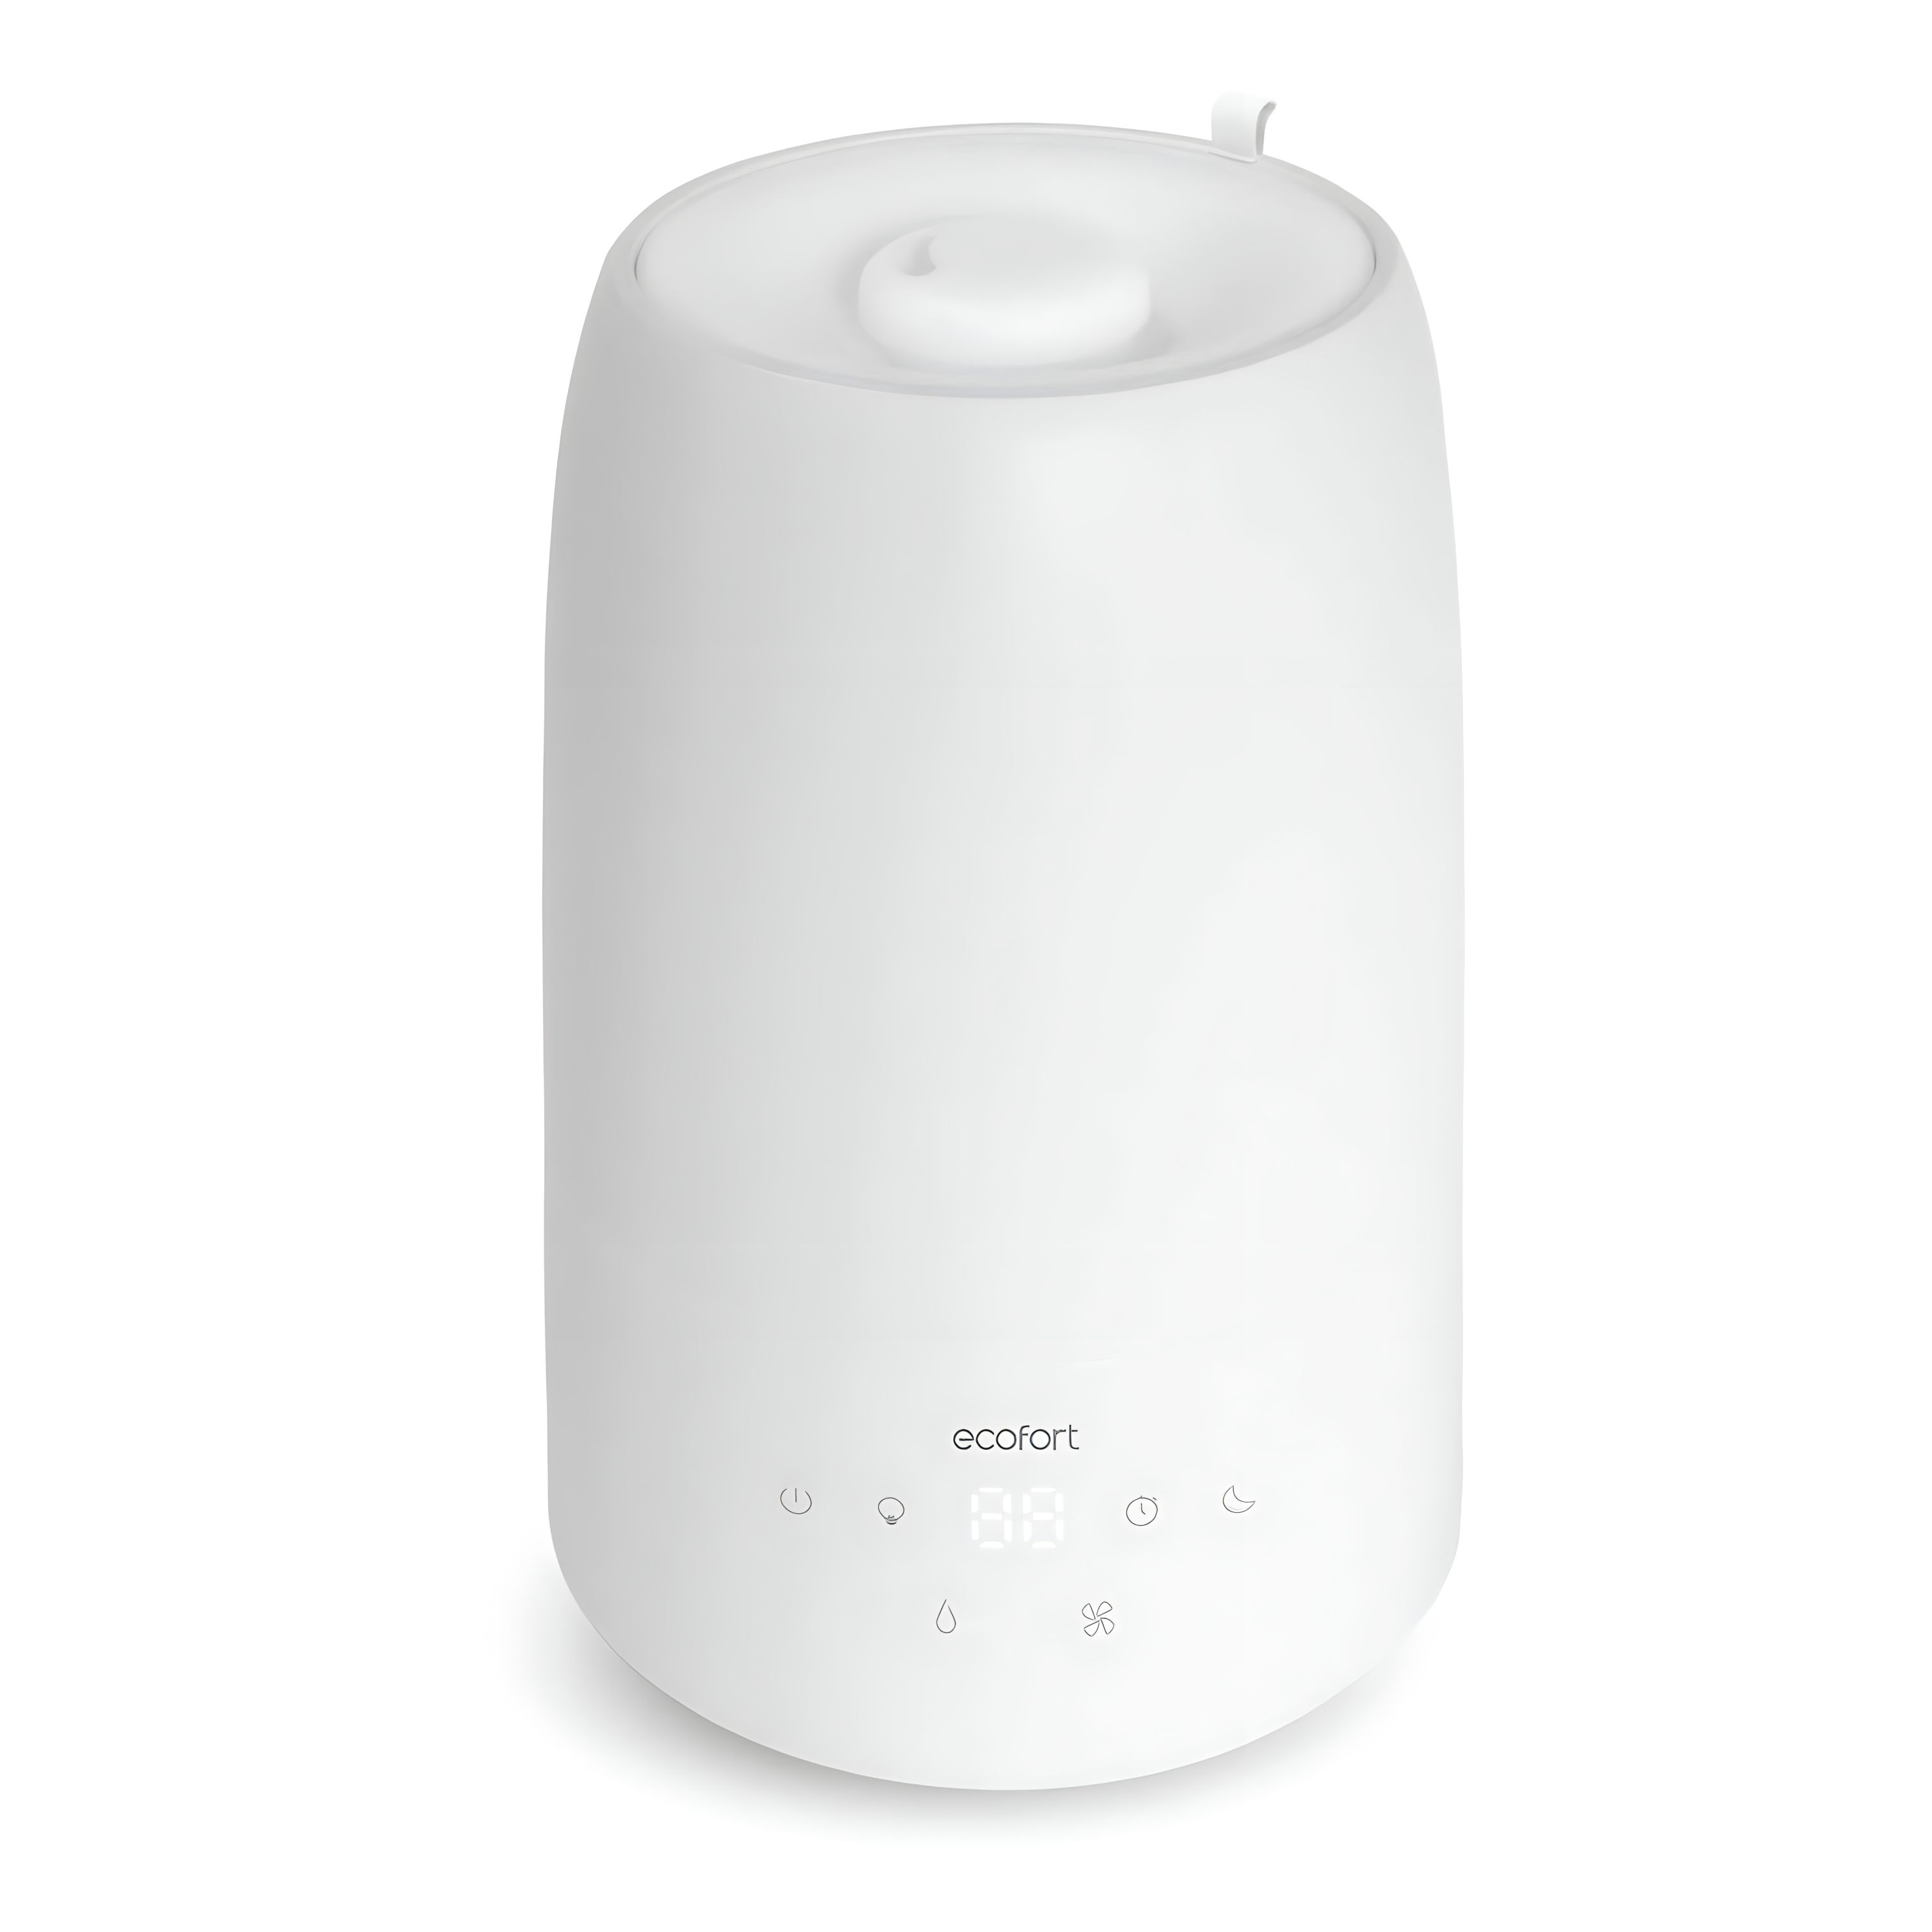
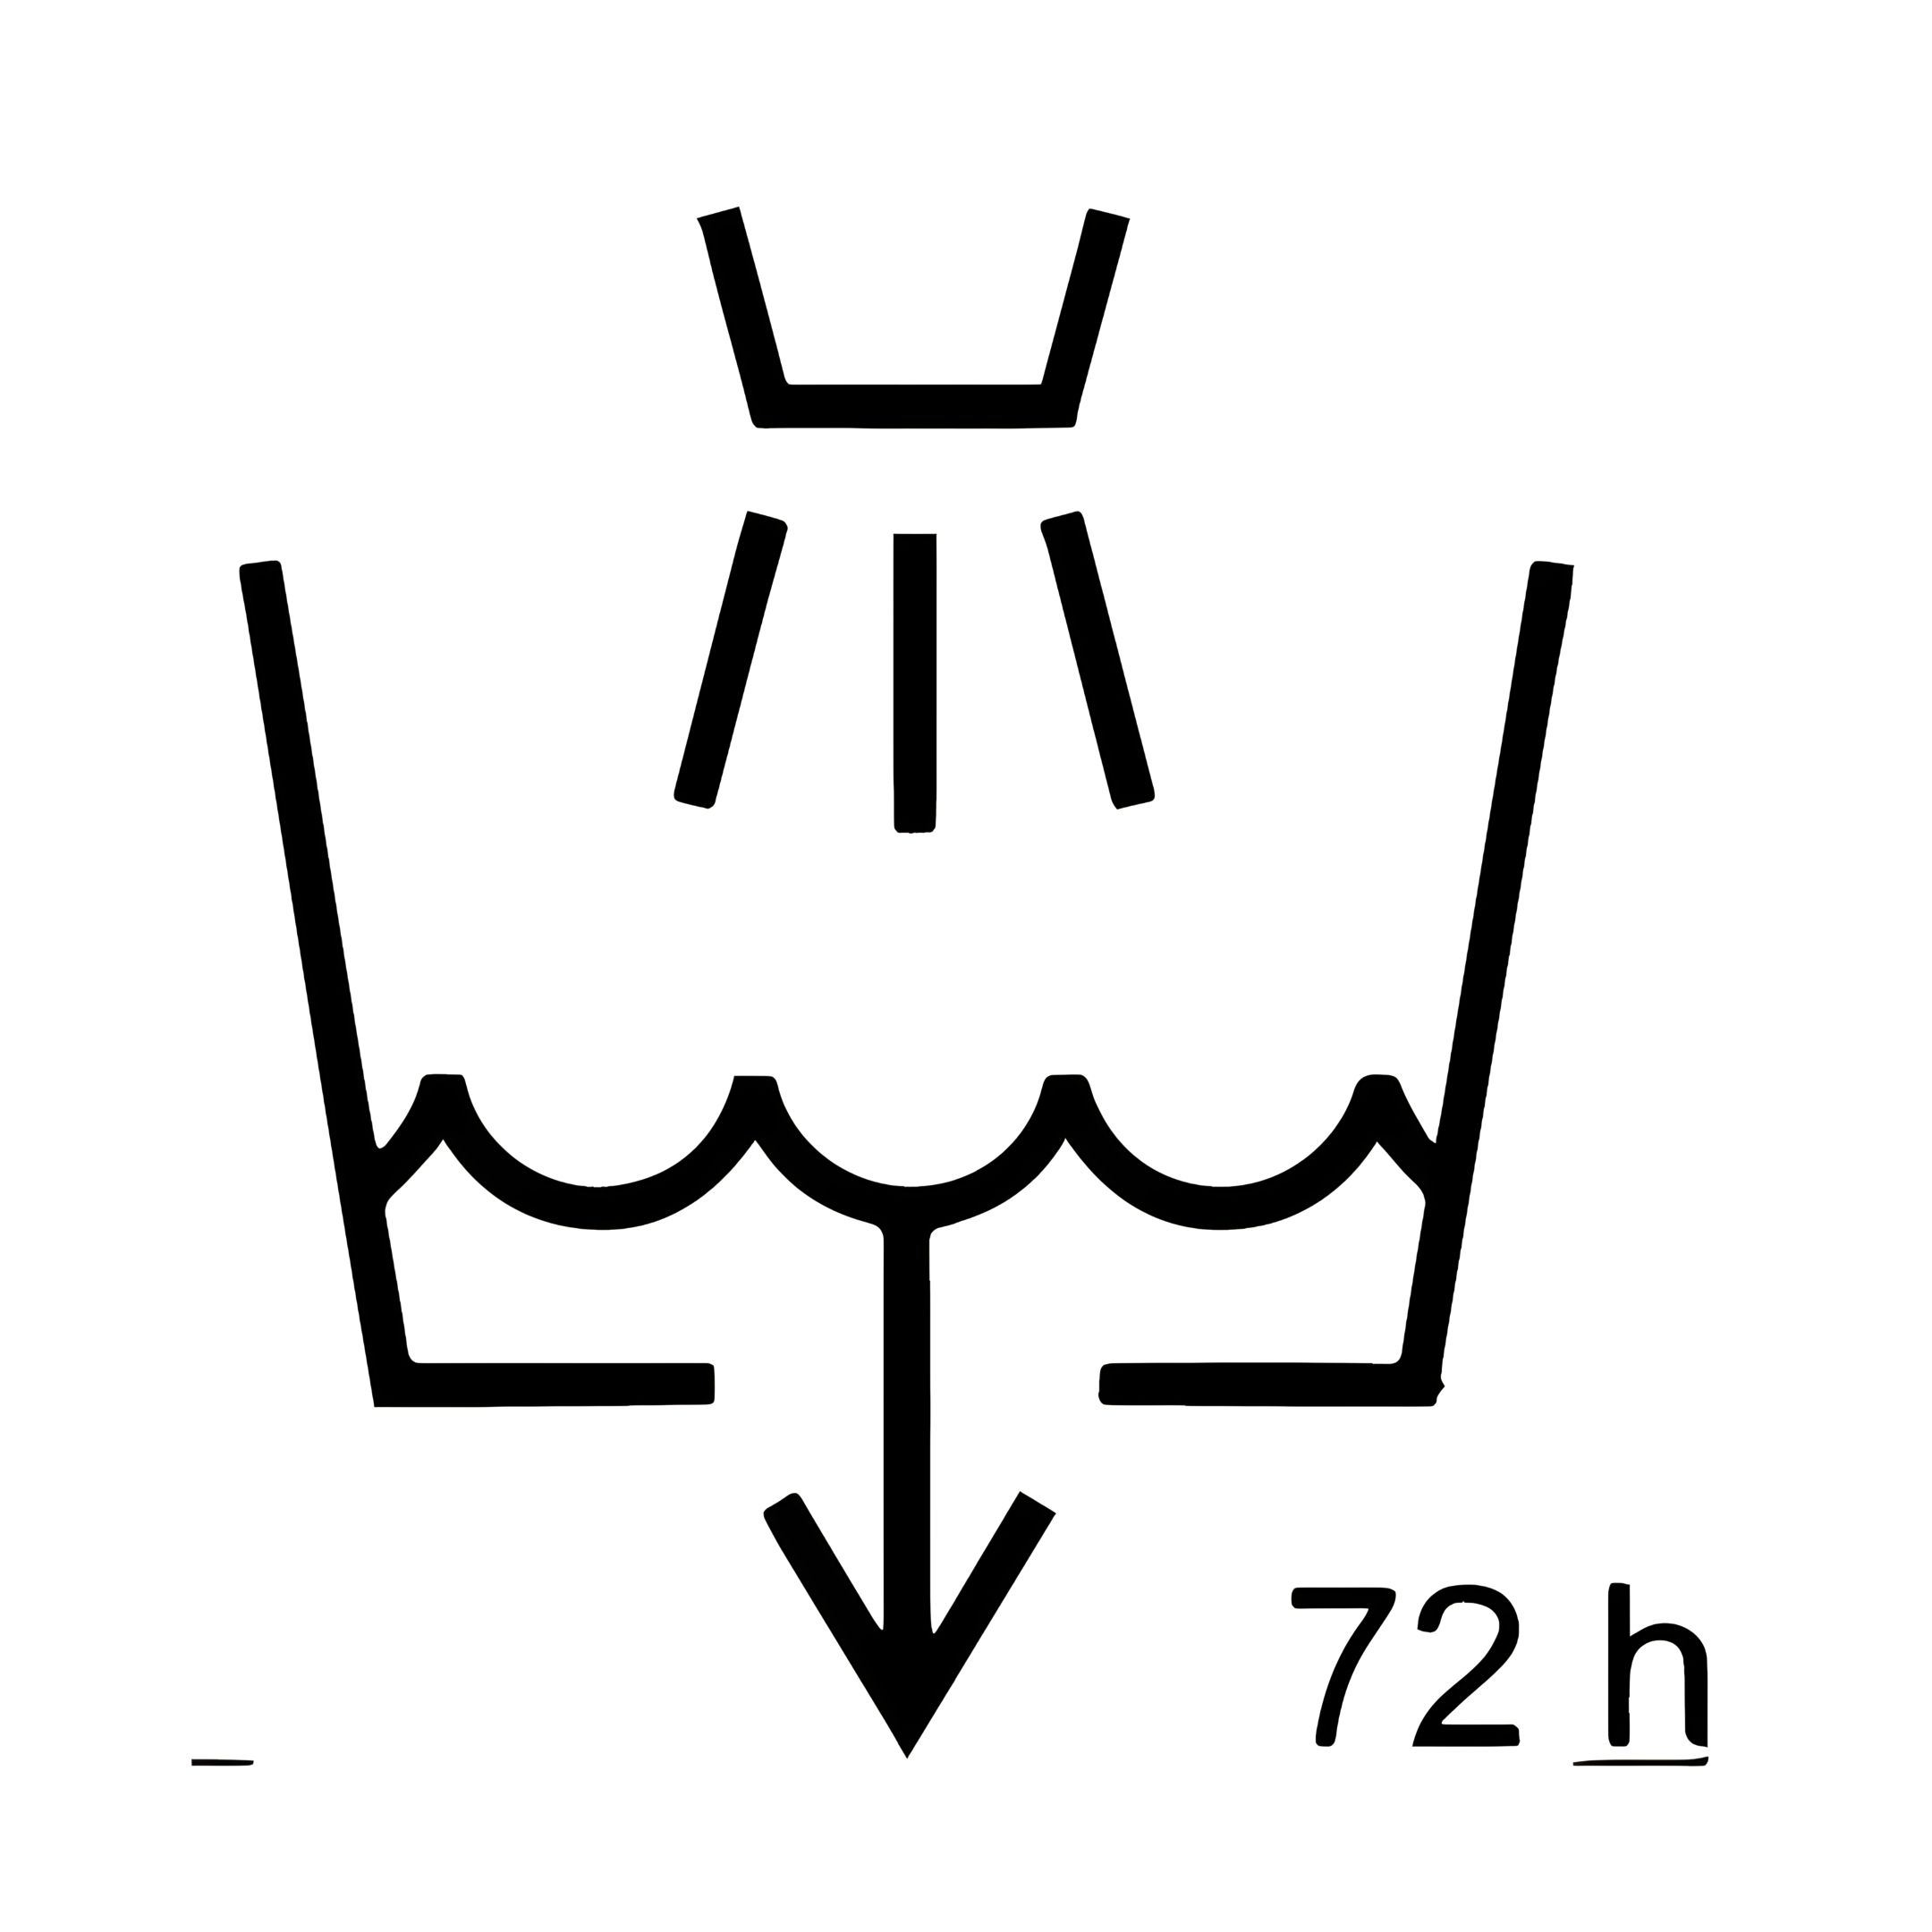
Top-fill ultrasonic cool mist with magnetic suspension technology
Water output
250 ml/h
Water tank volume
2 L
Dimensions (H x W x D)
254 x 170 × 170 mm
Power supply
AC 100-240 V ~ 50-60 Hz
Cable length
1.5 m
Power consumption
22.5 W
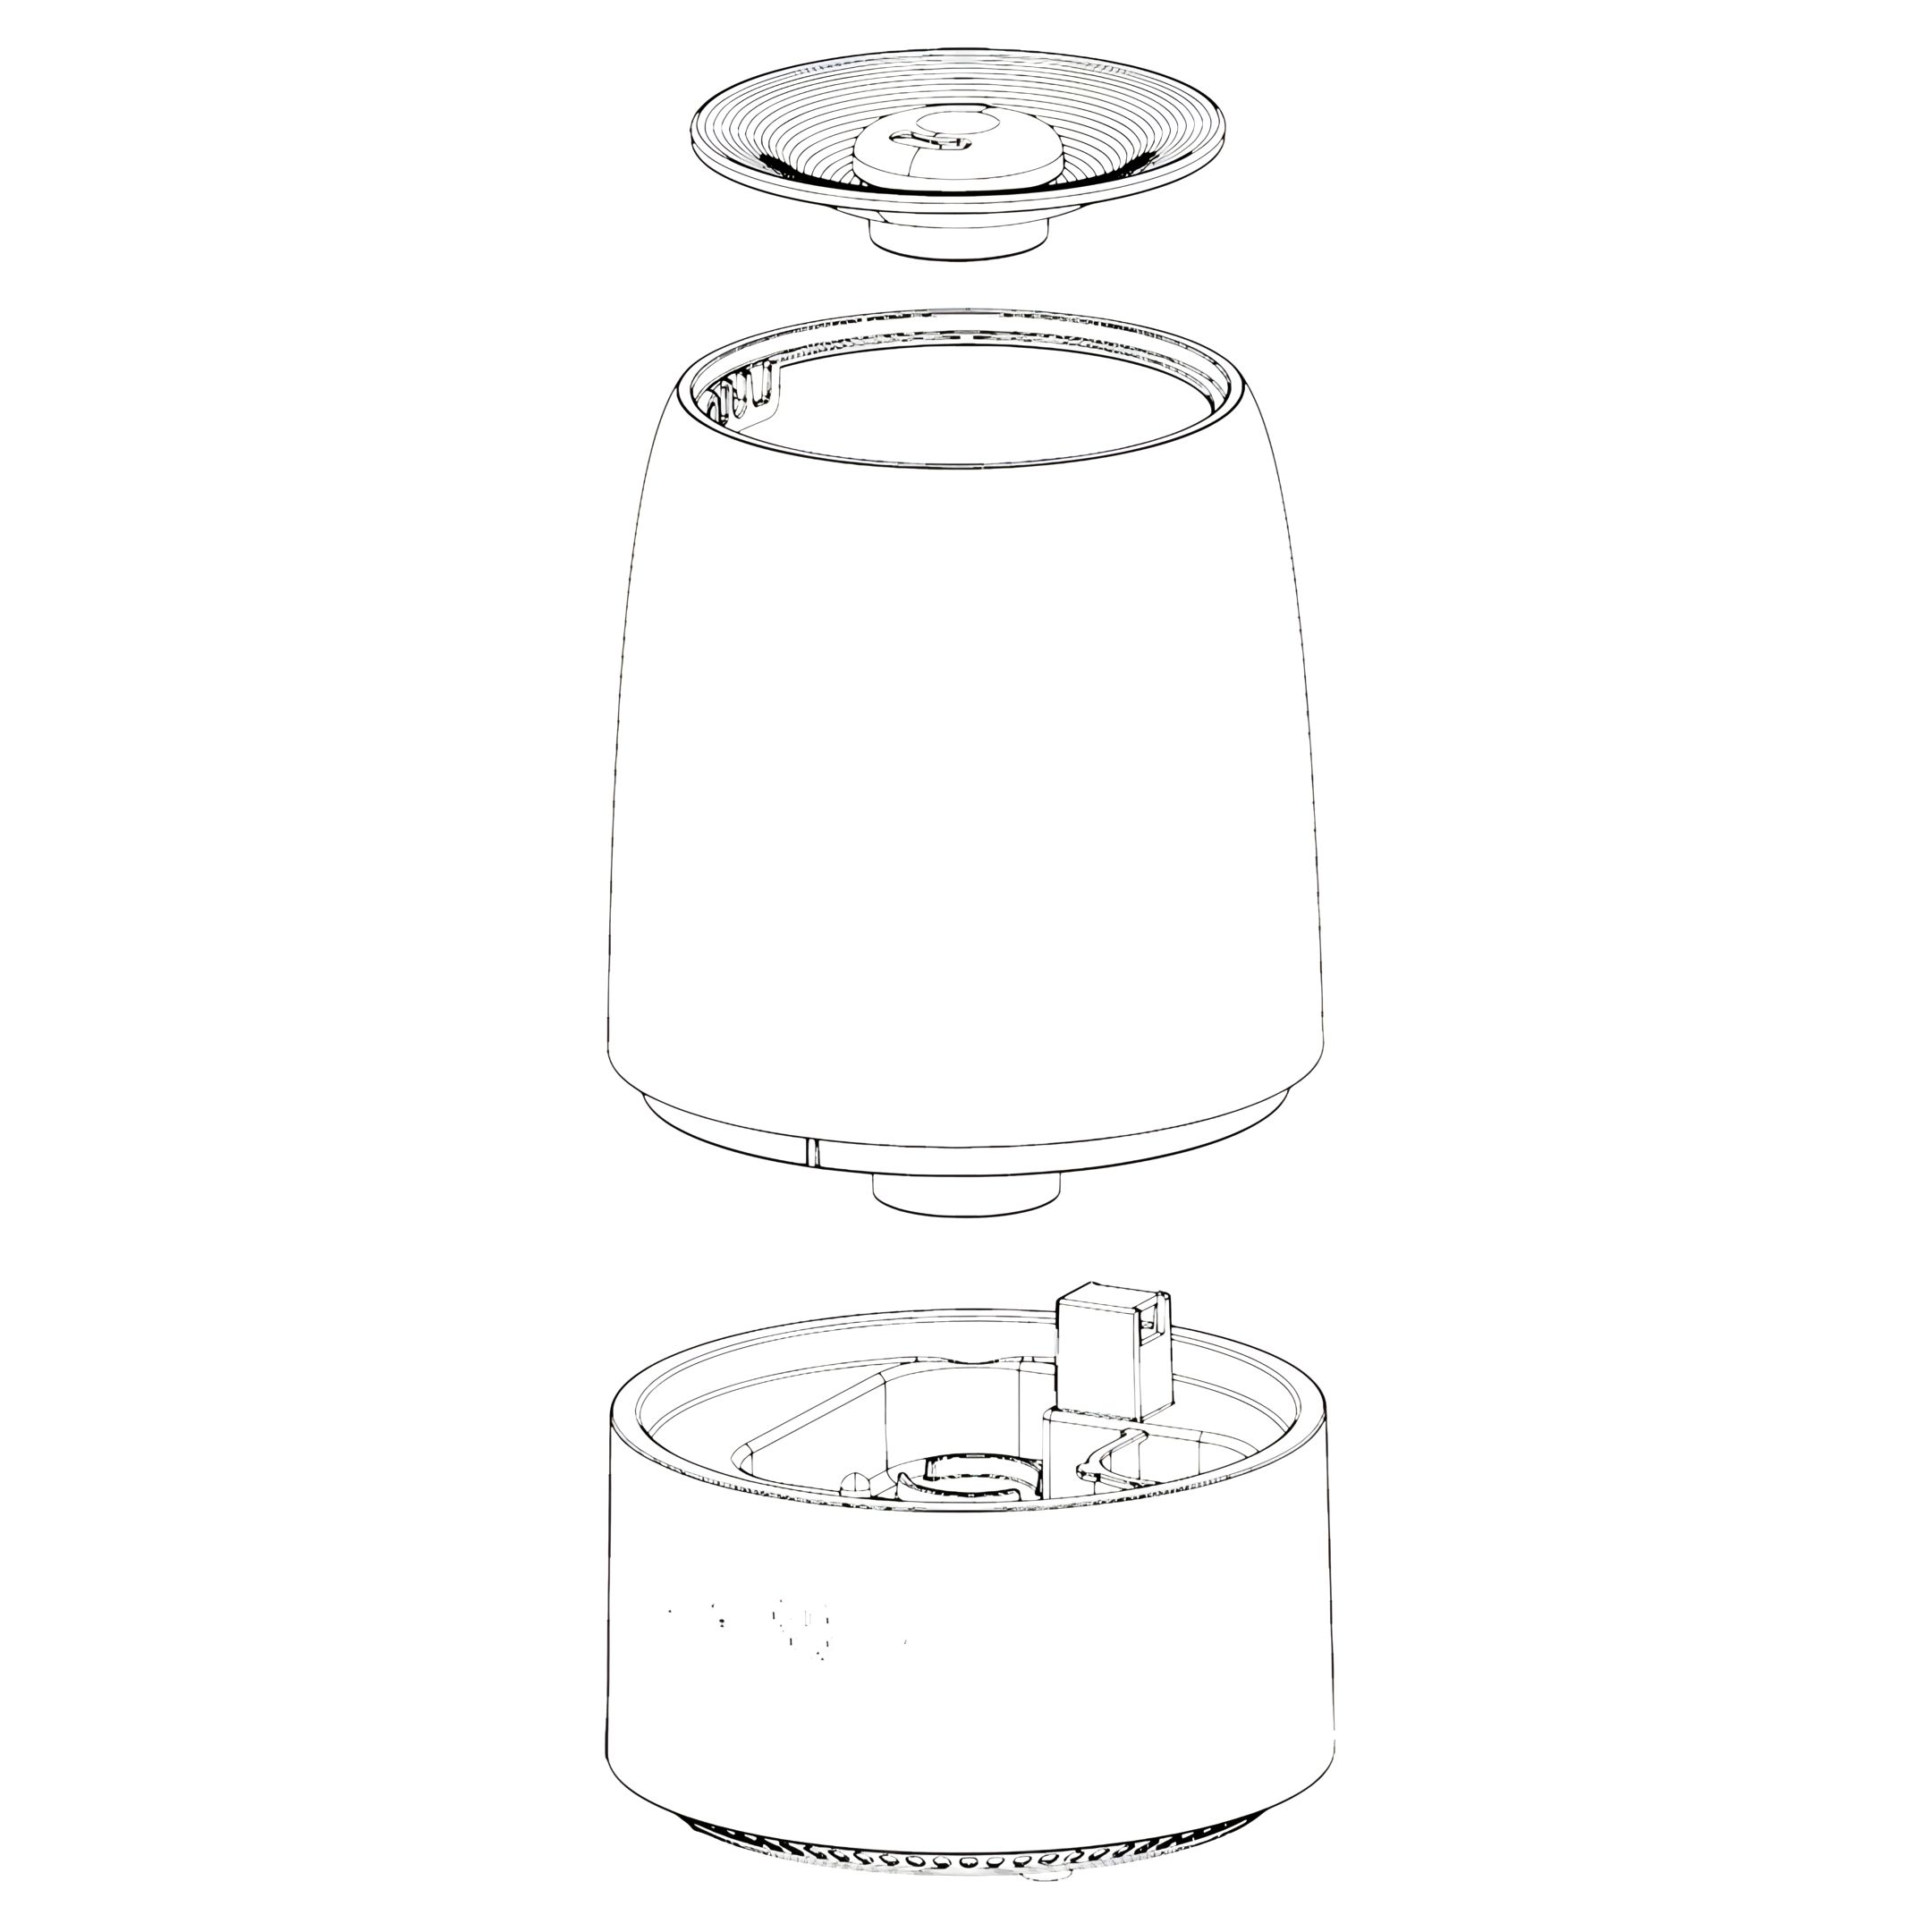
Materials
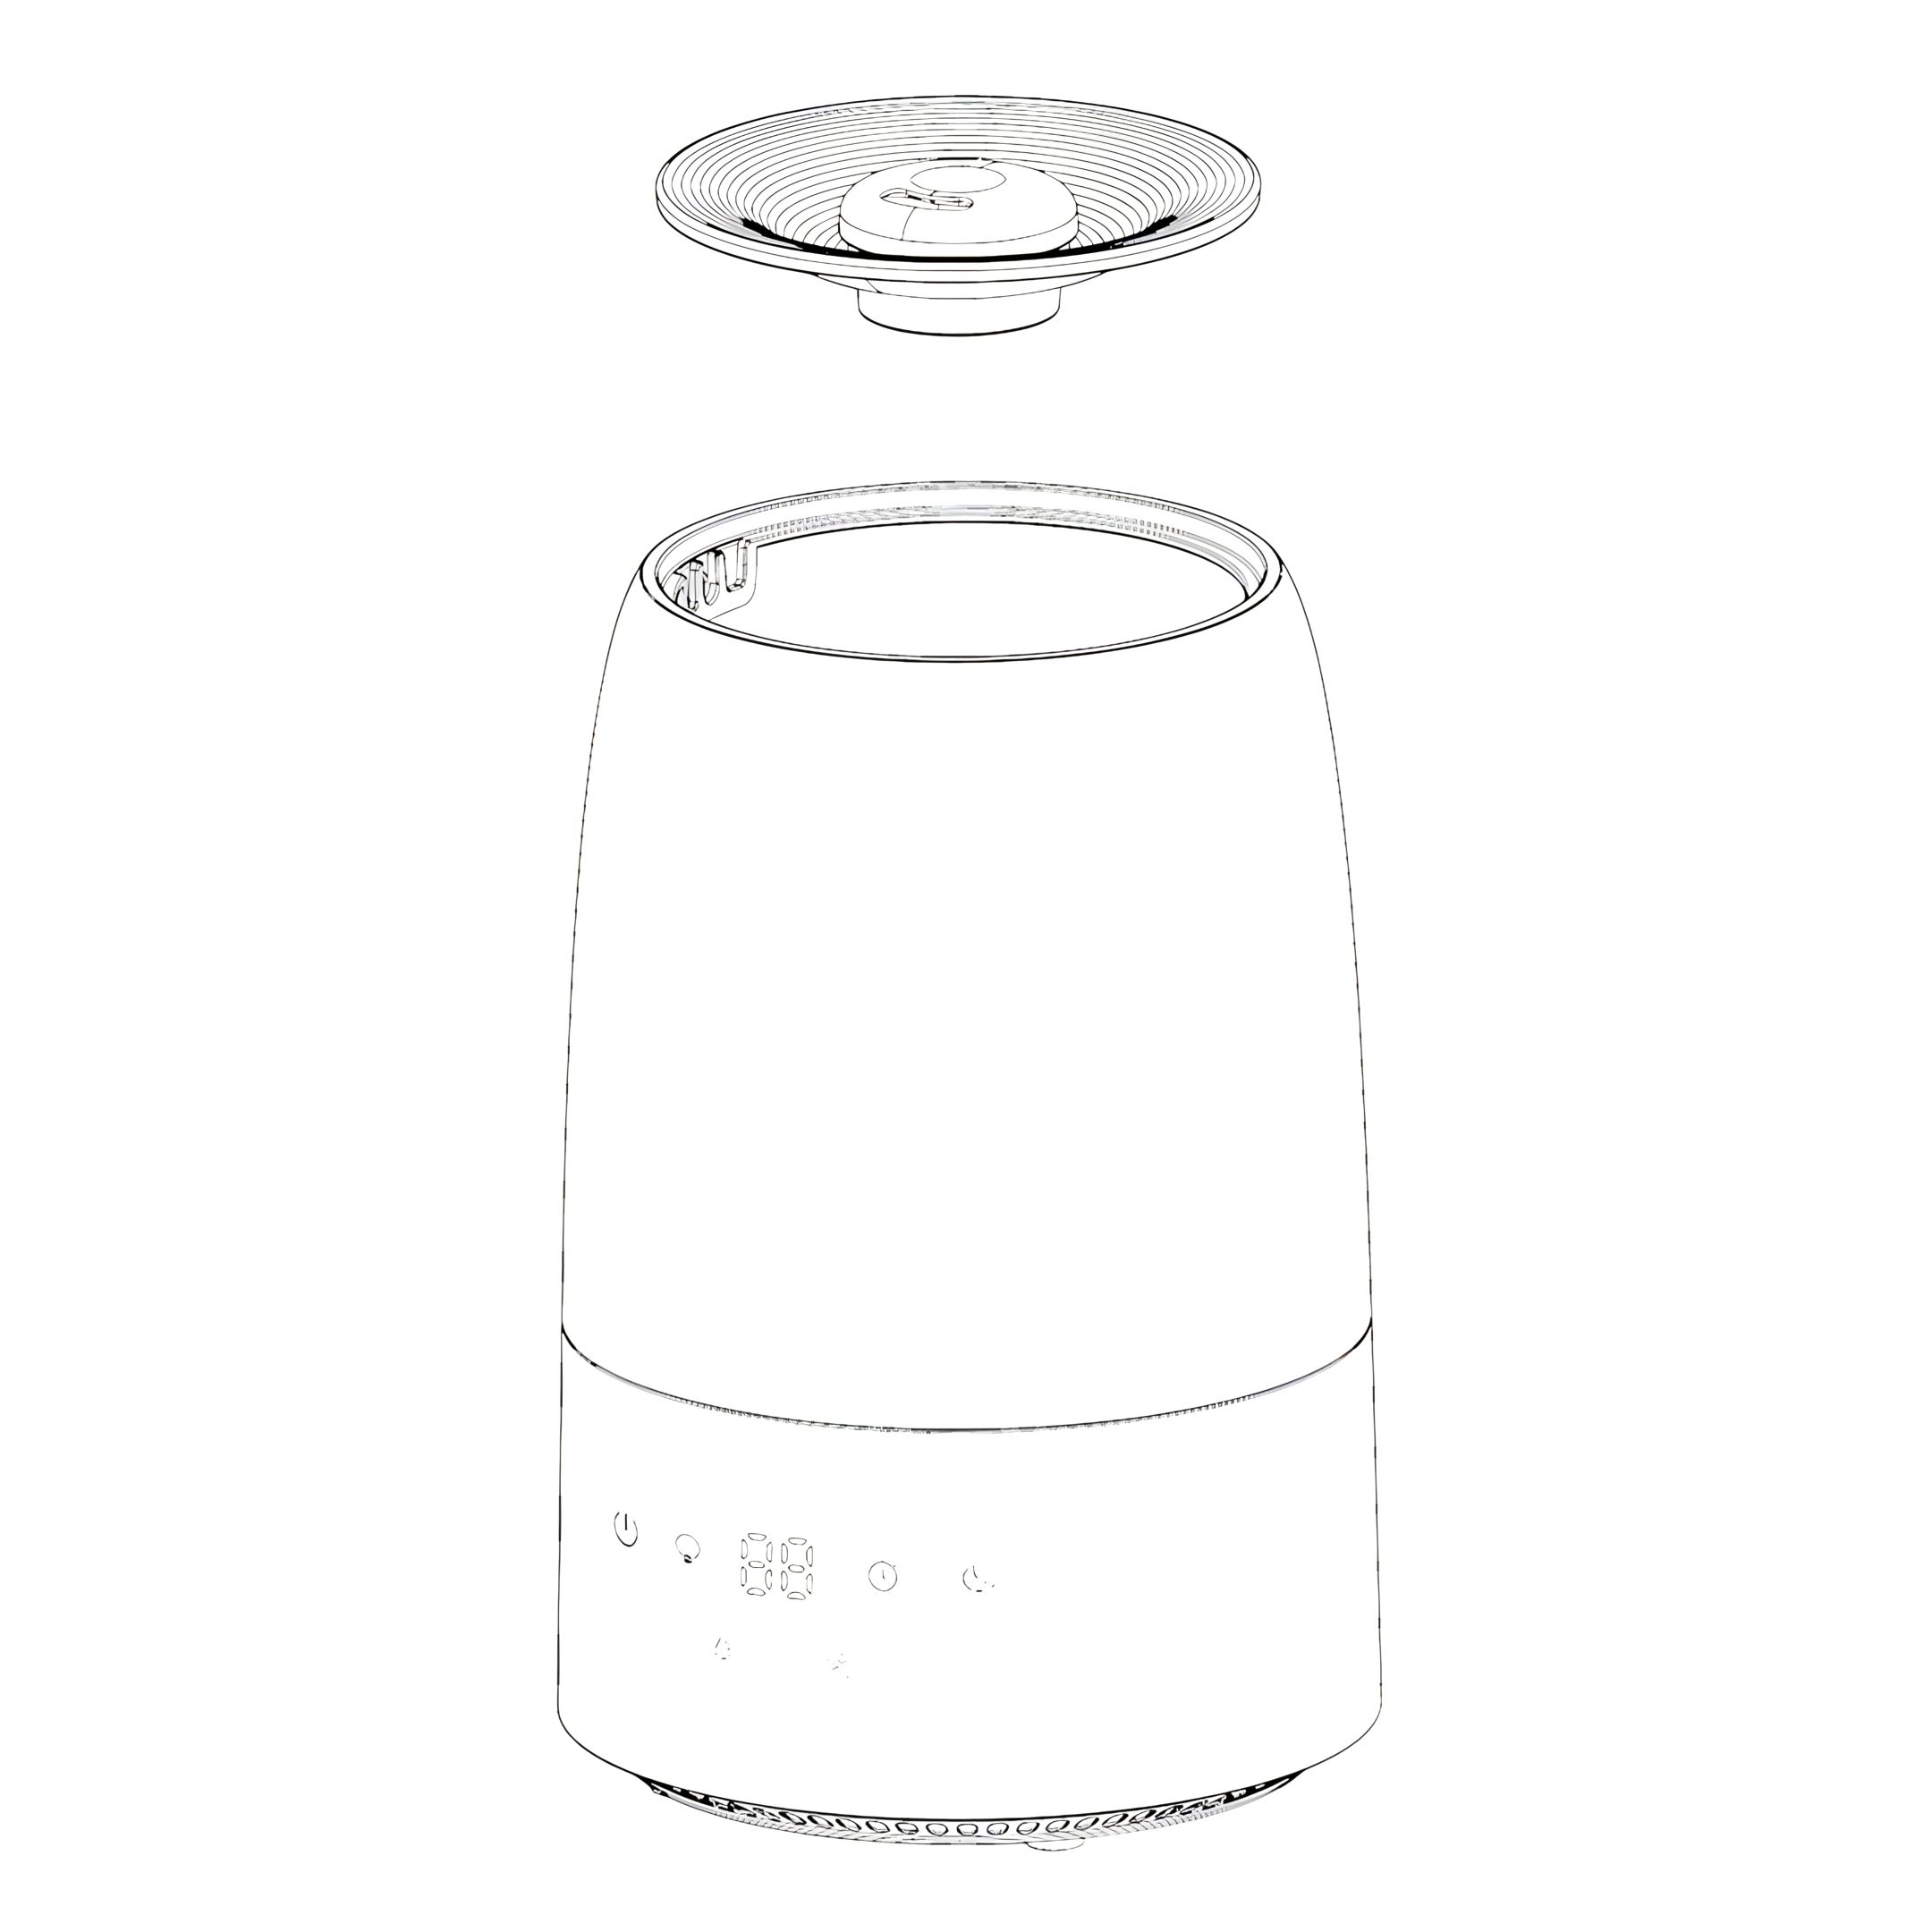
1
Lid
2
Water Tank
3
Base Unit
Operating Instructions
1. Setup
Choose a firm, level, and flat location - at least 15 cm away from a wall or object to allow good air circulation.
Place the humidifier on a waterproof surface, as water can damage furniture and some types of flooring.
Do not place the device directly on carpets, towels, blankets, or other absorbent surfaces.
2. Filling
Ensure the device is disconnected from the power supply.
Remove the top cover
Pour cool, clean water directly into the tank, ensuring the water level does not exceed the MAX mark.
Finally, replace the top cover and switch on the humidifier.
Important: Ensure no water enters the mist tube. It is important that the water from the water tank enters the lower water container in the base unit in the intended manner.
Functions
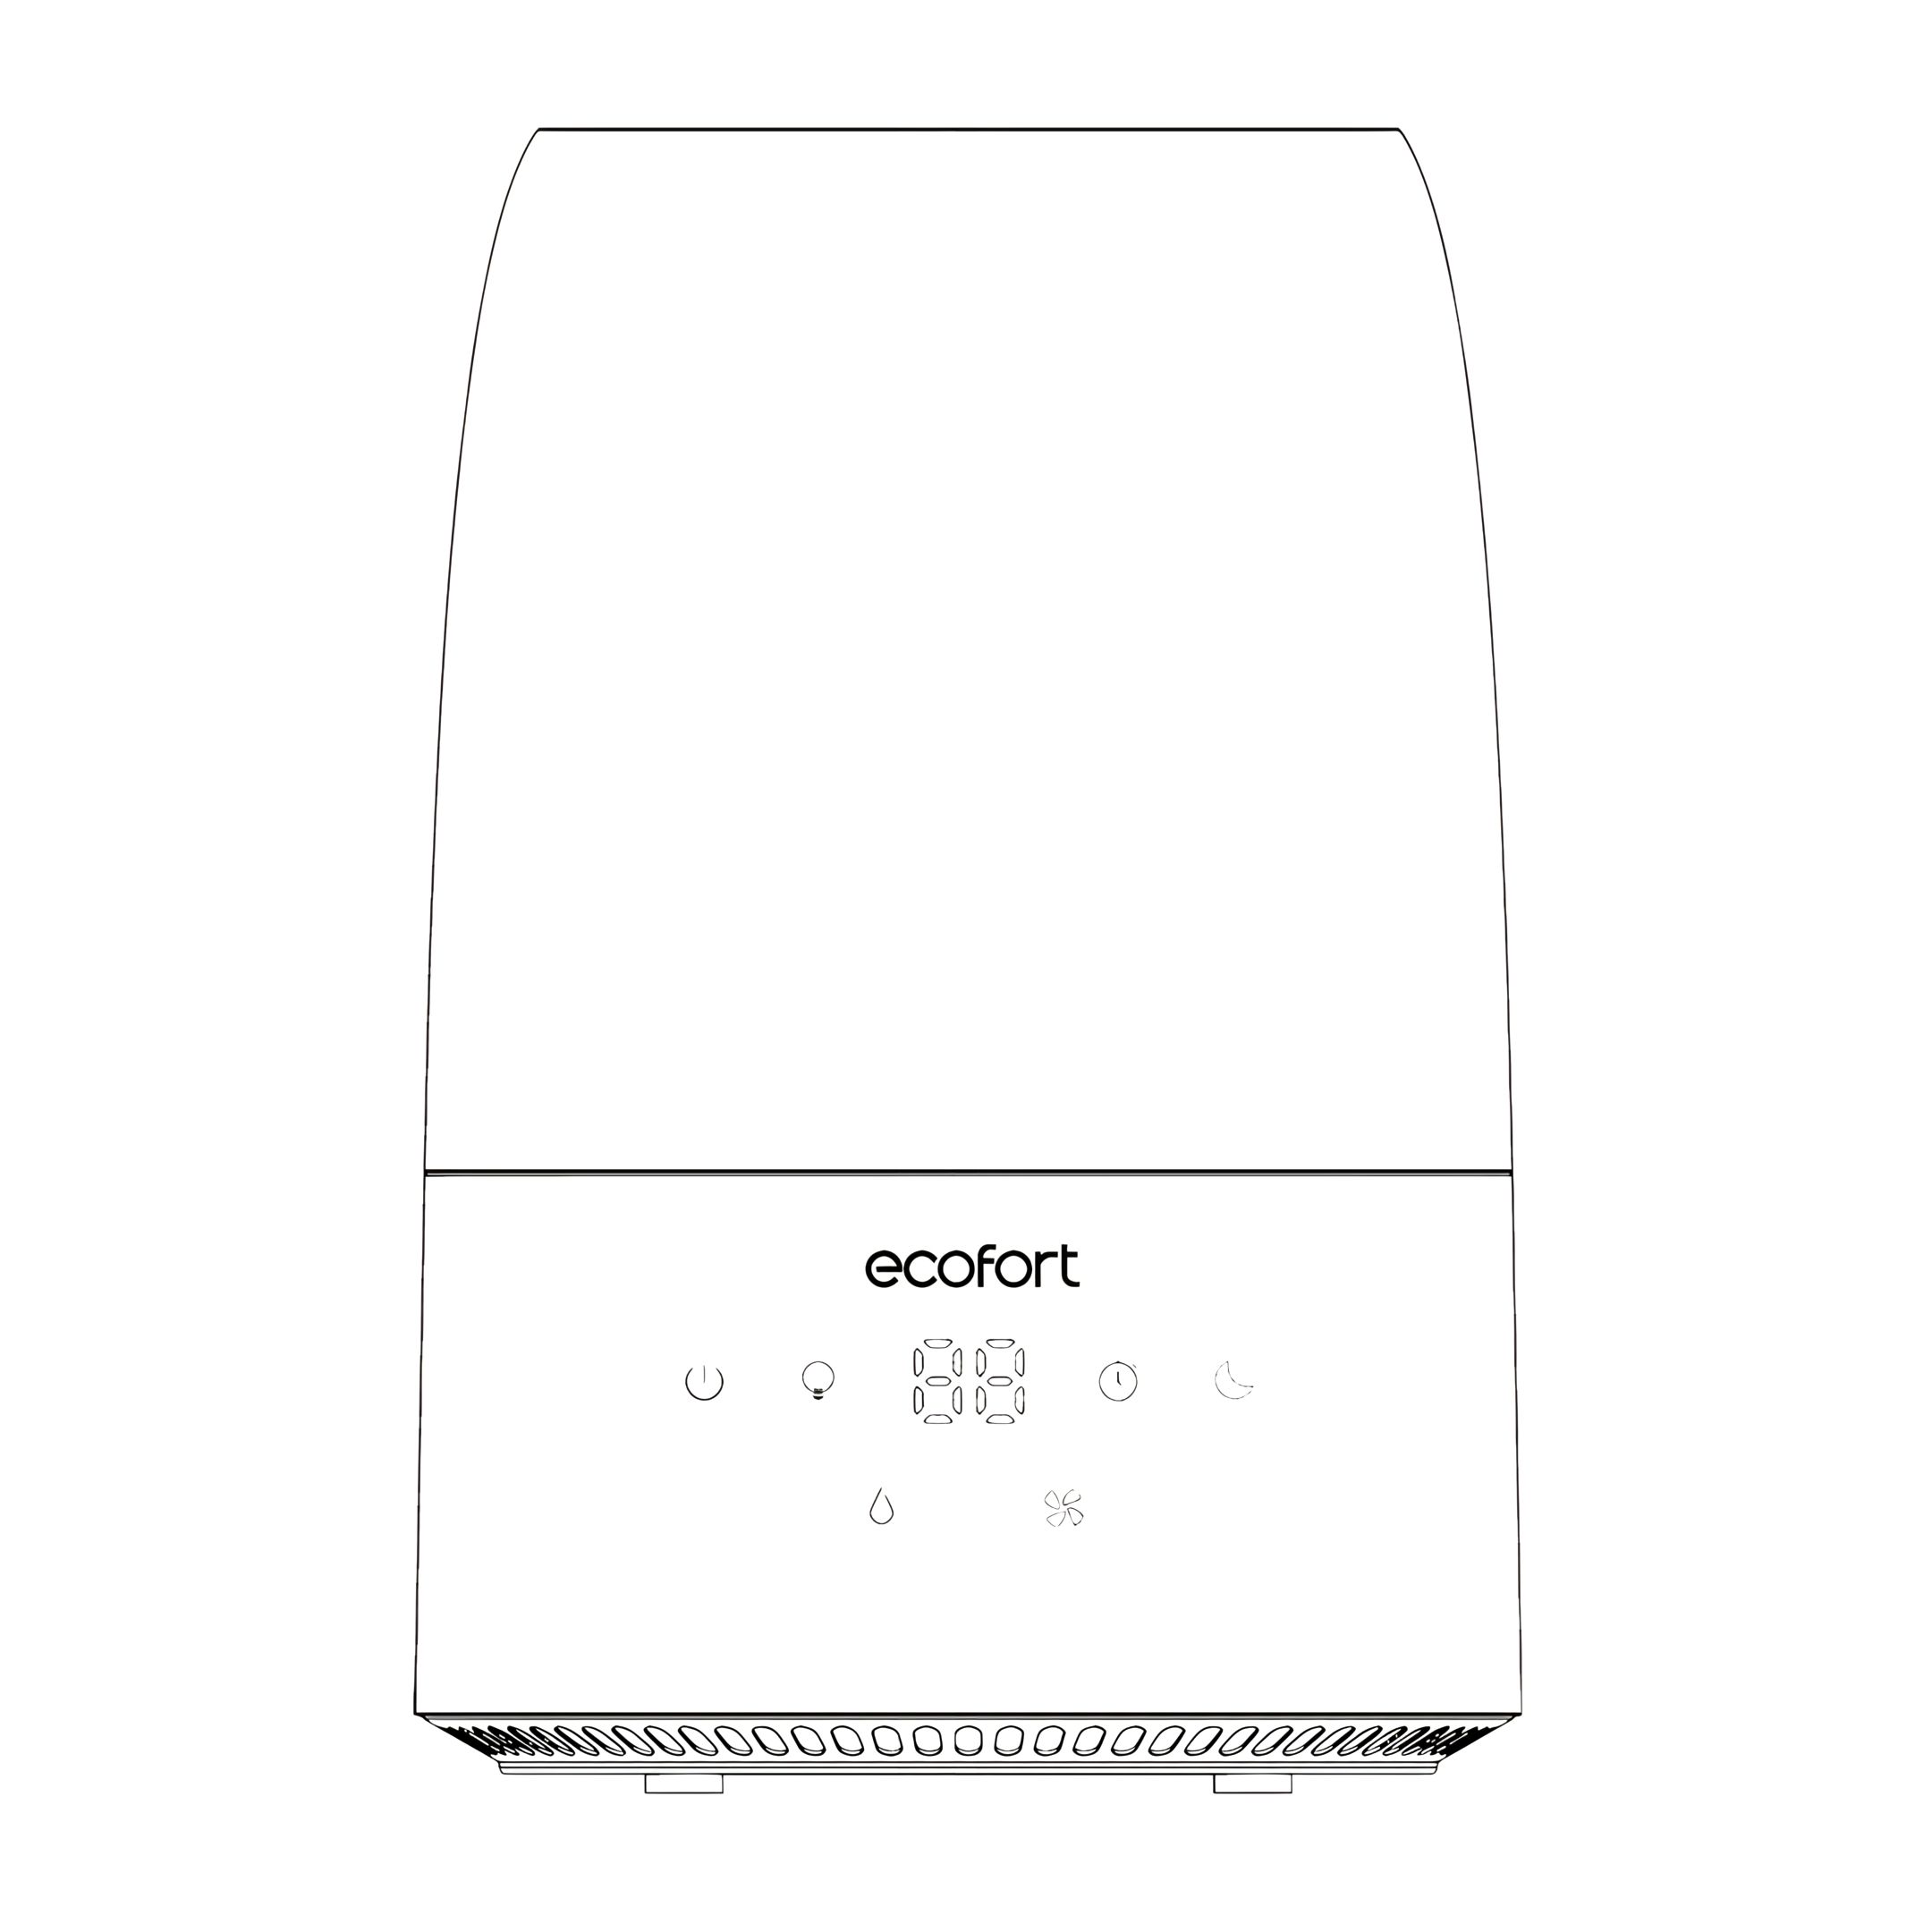
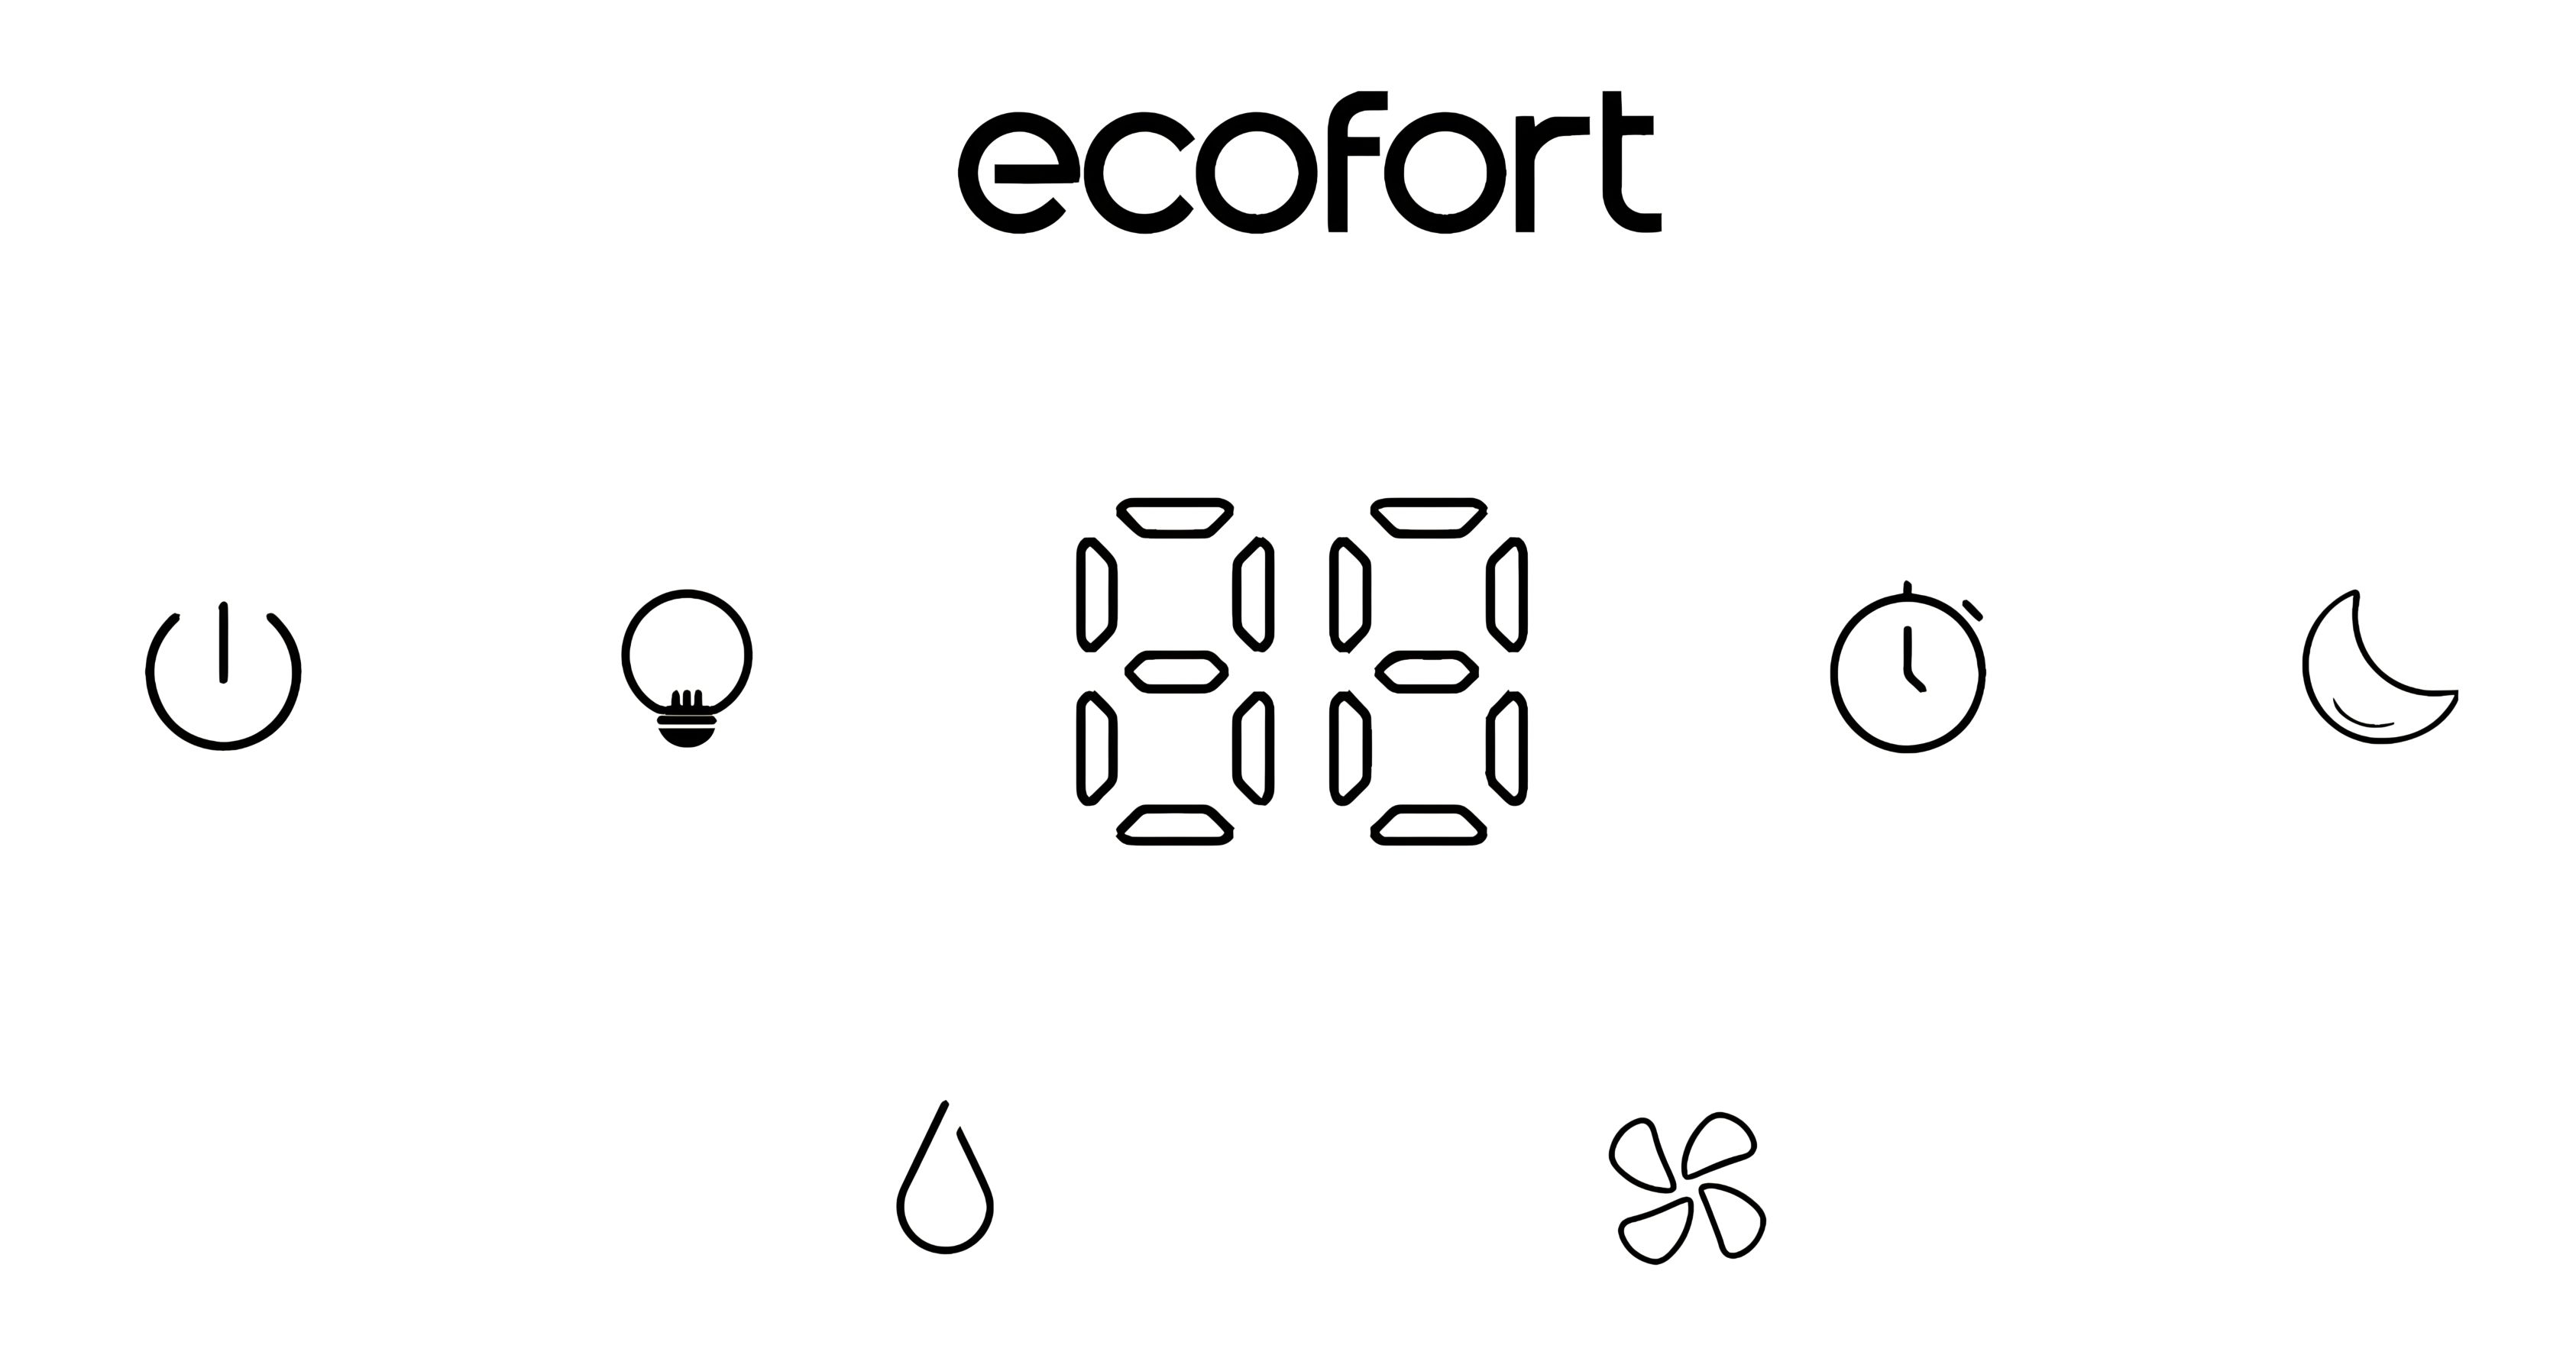
3. Display
4. On/Off
Turn the device on or off.
Touch the on/off button once to turn on the humidifier. The current relative humidity of the environment will be displayed.
Touch the on/off button a second time to turn off the humidifier.
5. Sleep Mode
Touch: The display shows “SP”, after 5 seconds the device enters sleep mode. It continues to produce mist at the lowest level, the mood light turns off, and all indicator lights except the sleep mode button go out.
Touch: The sleep mode is exited, and the device returns to the default settings.
Note:
The sleep mode can be exited by touching any button except the on/off button.
In sleep mode, the relative humidity of the environment is not monitored by the device, and it will therefore only turn off when another mode is selected or the water tank is empty.
6. Setting the Humidity (AUTO Mode)
Touch to set the desired target humidity in %. The value will be displayed on the screen while you adjust the desired humidity. After a few seconds, the display will automatically revert to the currently measured value.
If the ambient humidity is higher than the set humidity, the humidifier will automatically stop mist production.
Once the currently measured humidity falls 3% below the set target humidity, the humidifier will resume mist production.
The relative target humidity can be set from 40% to 75% in 5% increments: CO-40%-45%-50%-55%-60%-65%-70%-75%-CO
7. Mood Light
The mood light can be controlled separately.
1st touch:
The mood light automatically cycles through 7 colours (the indicator light on the touch button is on).
From the 2nd to the 8th:
Touch sets the mood light to one of the following colours:
Light Skin - Skin Pink - Lotus Purple - Pink Purple - Sky Blue - Ice Blue - Light Lake Blue
9th touch:
The mood light is turned off.
8. Timer
Touch to set the desired operating time.
The set remaining operating time will be displayed for 3 seconds while you set the timer.
Select between 1 and 12 hours or CO for continuous operation (no timer activated): CO-1-2-3-4-5-6-7-8-9-10-12-CO
The device will stop operating once the set time is reached.
9. Setting the Mist Intensity
Touch to select the mist intensity.
When the device is turned on, the default setting is medium mist intensity. Touch the button to switch between the settings:
Low - Medium - High
Display Warnings and Error Messages
10. Low Water Level
If there is no water in the water tank, the red indicator light on the POWER button will illuminate and E1 will appear on the display.
11. Water tank not/not correctly inserted
If the water tank is not or not correctly inserted, the red indicator light on the On/Off button will illuminate and E2 will appear on the display.
12. Humidity too low or too high
If the humidity is below 30% RH, the display shows LO.
If the humidity is above 80% RH, the display shows HI.
Cleaning and Maintenance
13. Important
Always unplug the device from the socket before performing any maintenance on it.
14. General Cleaning
Base unit: Pour out any excess water from the device. Wash the device with fresh water, the cleaning brush, and a soft cloth as needed. Do not immerse the base unit in water, and ensure that no water enters the interior through the air inlets or outlet.
Water tank: Remove the top cover and empty the water tank. Clean the inside of the tank with fresh water, vinegar solution, or dishwashing liquid and a cloth or soft brush (a bottle cleaning brush is recommended). Rinse with fresh water after cleaning.
External surface of the device: Wipe the surface of the device with a soft, damp cloth as needed. If you notice a build-up of water during use, reduce the mist intensity and dry the exterior surface with a cloth.
15. Descaling
Depending on usage and water type, cleaning to remove limescale deposits may be required weekly or every two weeks to optimise the device's performance.
If you live in an area with hard water, we recommend using distilled water for your humidifier. This will reduce the emission of minerals or "white dust".
16. Warning
Clean the water tank every three days!
Do not clean the device or the water tank with chemical cleaners of any kind, as they may contain bleach.
Use ONLY dishwashing liquid or vinegar solution.
17. Emptying the Water Tank
Remove the lid of the water tank. Detach the tank from the base unit and pour out the remaining water.
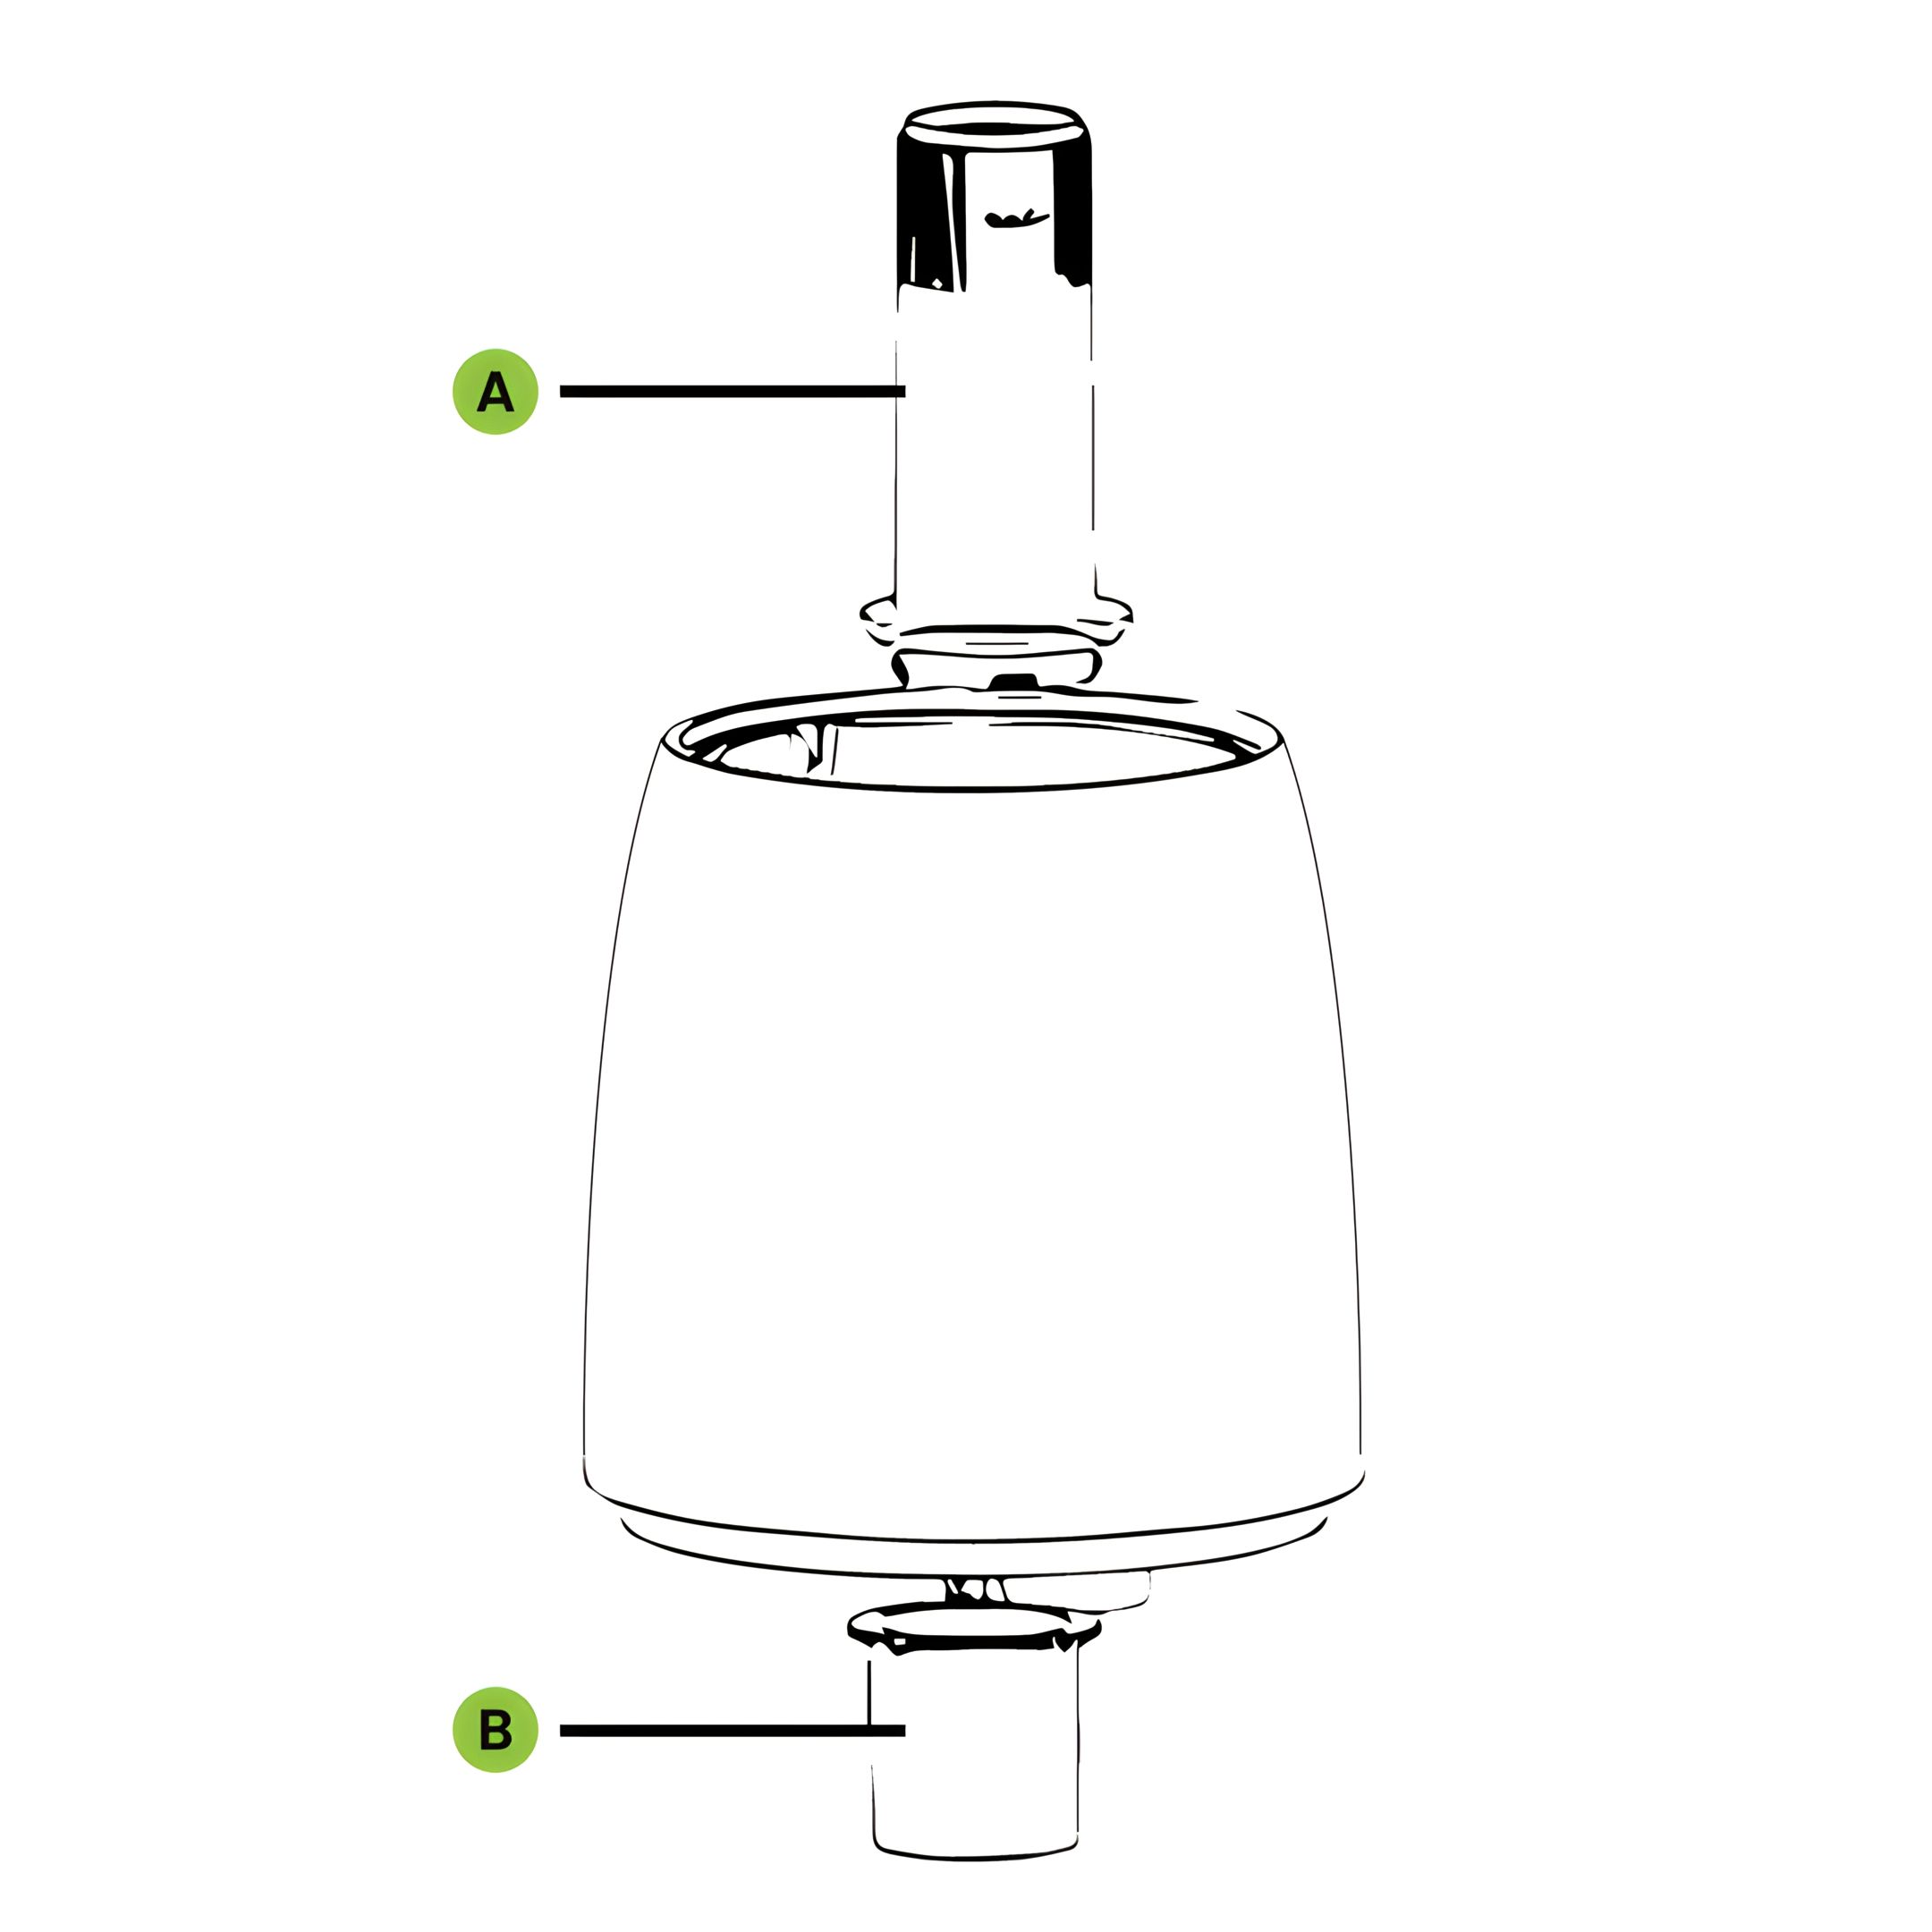
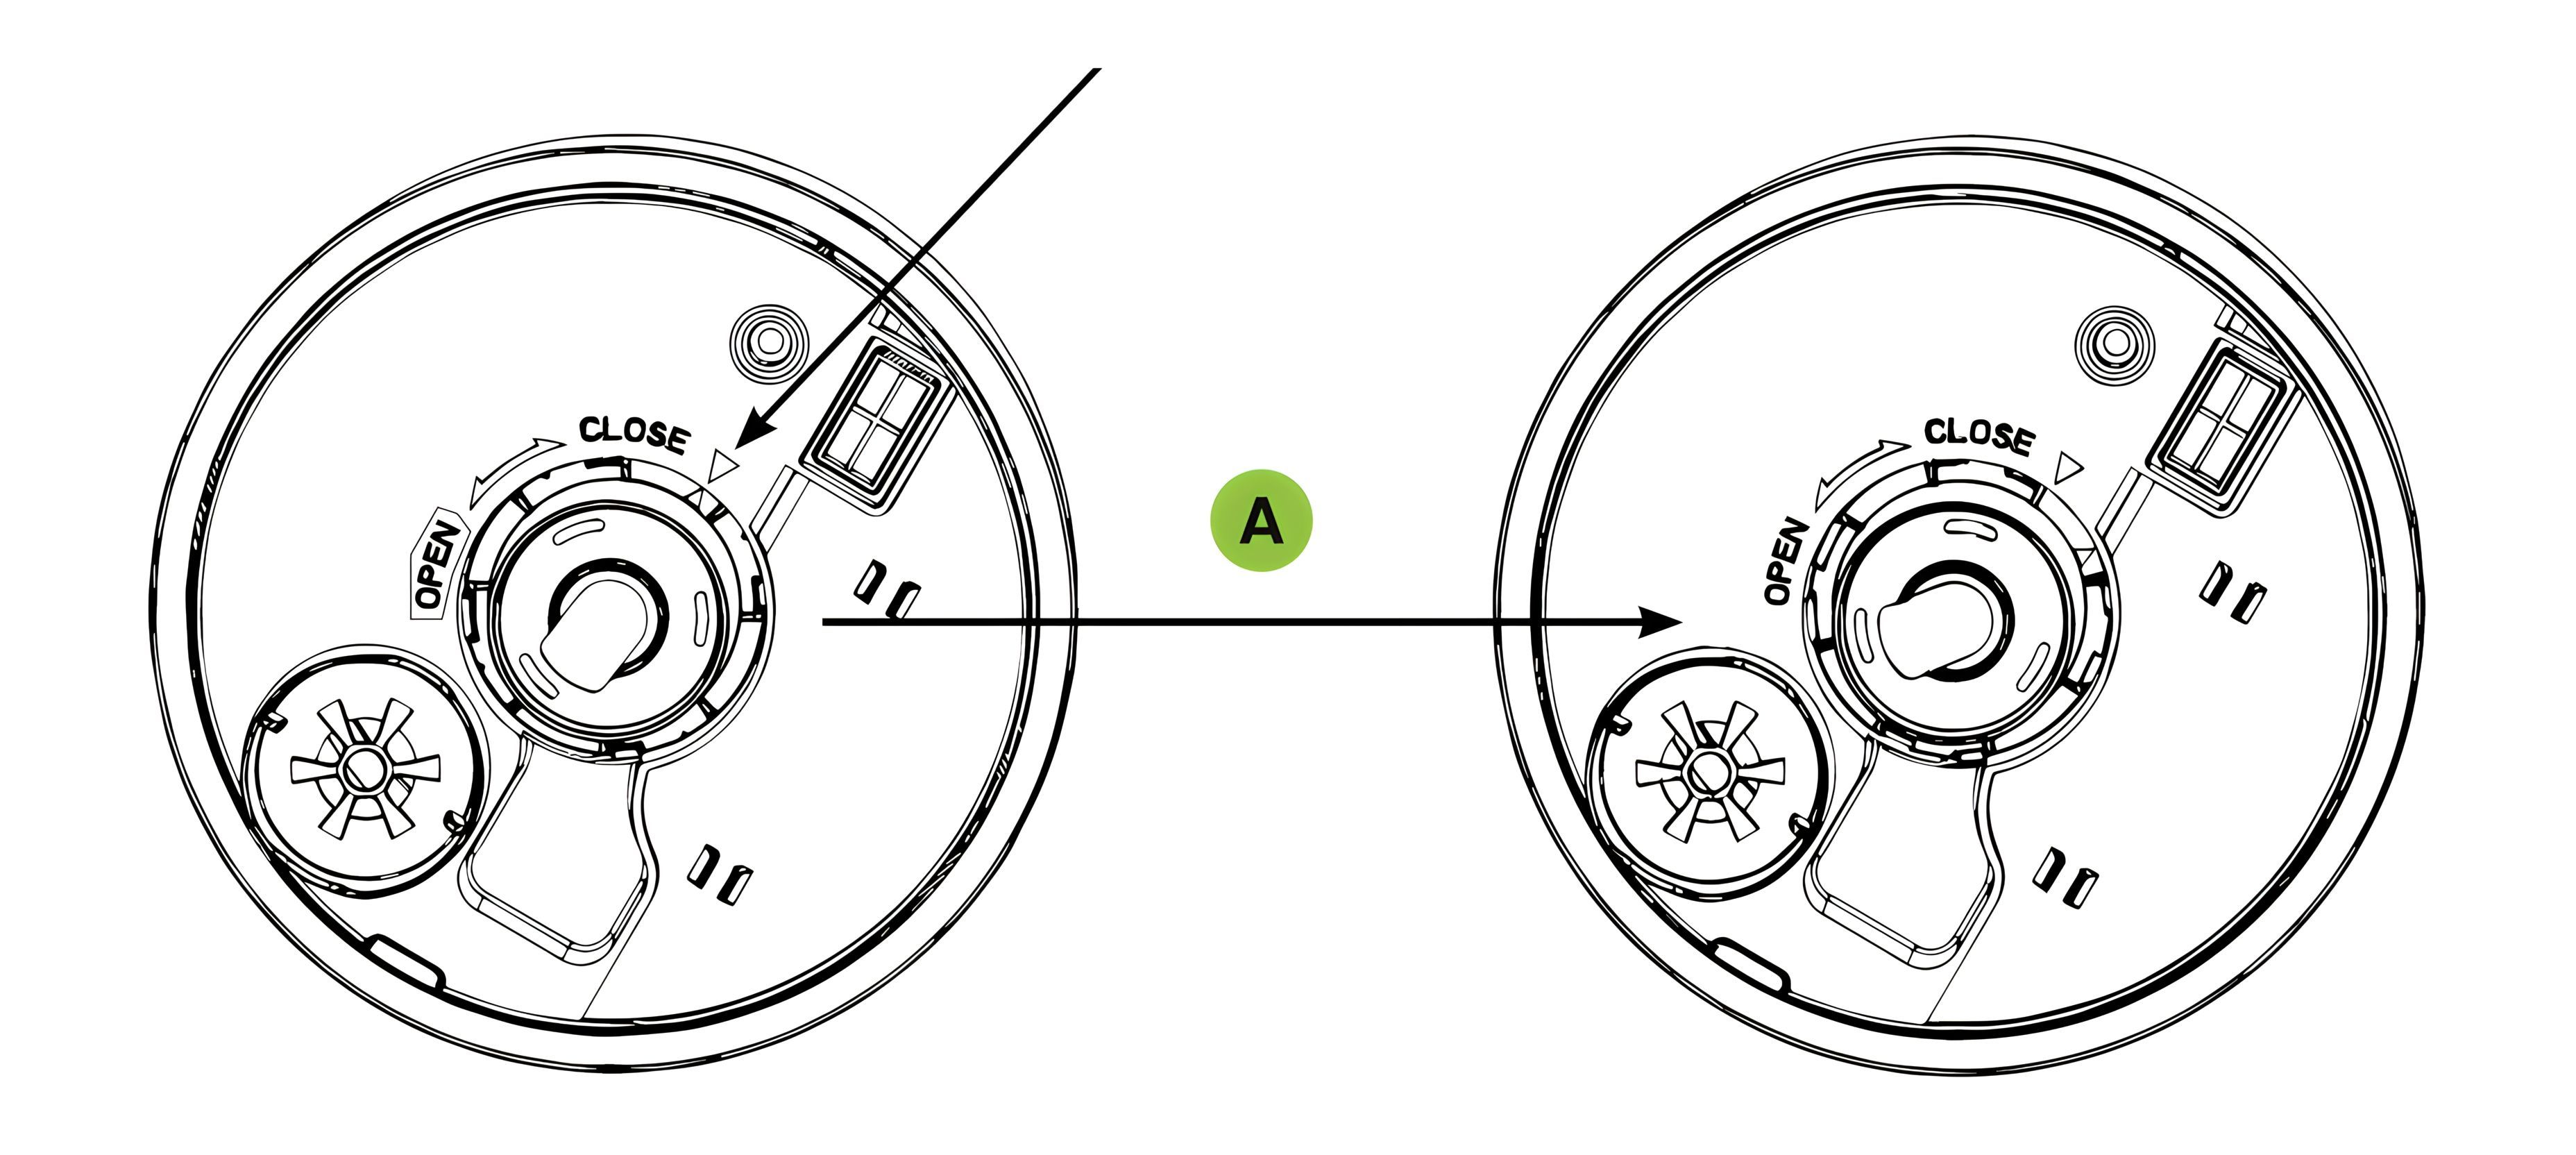
18. Remove mist tube and noise suppression
Remove the mist tube (A) and the noise suppression (B) by turning them to the left towards "OPEN".
19. Align and tighten mist tube
After cleaning, screw the mist tube back in by aligning the wider rib and the three narrower ribs, then turn to the right towards "CLOSE".
Position the mist tube and tighten (A) as shown in the illustration.
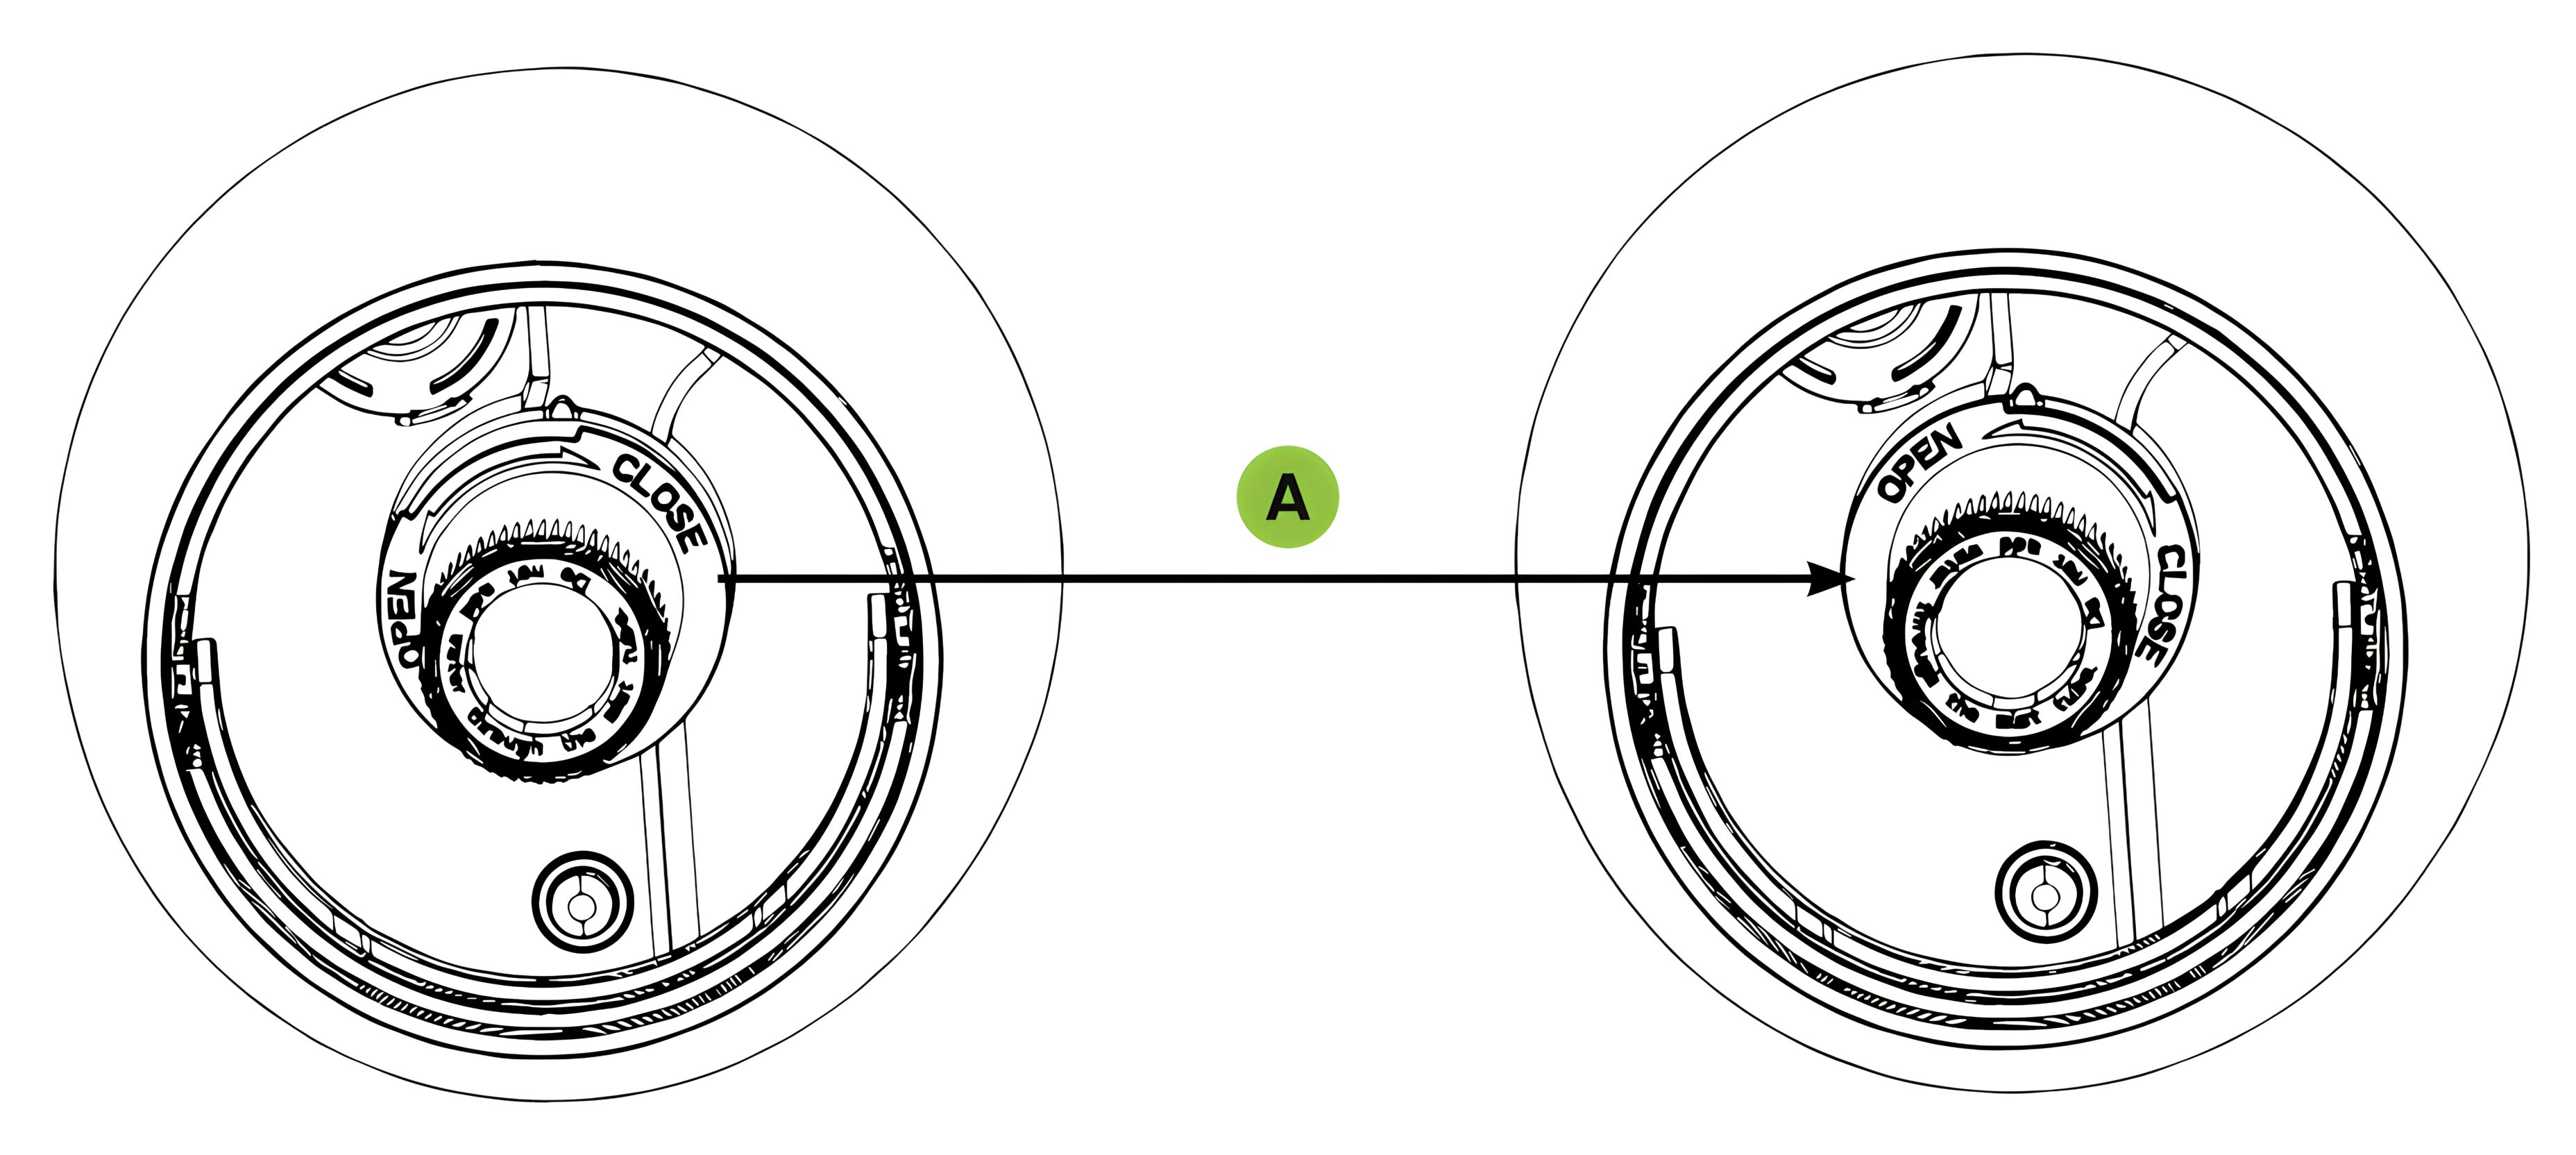
20. Attach noise suppression device
To reattach the noise suppression device, align the two triangles, snap them in, and then turn them clockwise along the arrow OPEN-CLOSE to tighten them (A).
21. Insert and Fill Water Tank
Place the water tank on the base unit.
Ensure the tank is filled with water before turning on the humidifier.
22. Ultrasonic Membrane
Unplug the device.
Remove the water tank and empty all the water from the tank.
Let the water in the base drain according to the marked "drain direction". Ensure that no water can flow into the fan outlet.
You will find the ultrasonic membrane in the centre of the base unit.
Use ONLY the included cleaning brush to gently clean the membrane and remove deposits.
The ultrasonic membrane must not be scrubbed or scratched!
23. Cleaning Limescale Deposits
If the limescale is difficult to remove with a brush:
Fill the base with a mixture of 1 teaspoon of white vinegar and 1 teaspoon of water.
Let the solution sit for 5 minutes.
Using the vinegar in the base, clean all interior surfaces with a soft cloth or brush to remove the limescale.
Also check the mist nozzle and mist tube in the water tank. Clean if necessary.
Rinse the interior of the base unit thoroughly with water to remove limescale and vinegar solution.
24. Storage
Follow the cleaning and maintenance instructions when storing the humidifier at the end of the season.
Dry the humidifier completely before storage. DO NOT store the humidifier with water in the base or water tank.
Pack the device in its original box and store it in a cool, dry place.
Troubleshooting
25. Water mist and humidity are not being produced
Power plug: Ensure that the power plug is firmly inserted.
Power outage: Check if other devices are functioning properly; if not, wait until the power supply is restored and turn the device on.
Inserting the water tank: Ensure that the tank is correctly placed.
The surface of the ultrasonic membrane is dirty: Clean the ultrasonic membrane.
26. Air blows but no water mist is produced
Excess water: Remove some water from the base unit.
There may be detergent residues and/or oil components from cosmetics, etc., in the tank or base: Wash the tank and base unit and try again.
The surface of the ultrasonic membrane is dirty: Clean the ultrasonic membrane.
If you are using hard water, try using softer water.
27. The intensity of the water mist is low
The surface of the ultrasonic membrane is dirty: Clean the ultrasonic membrane.
The water in the device is too cold: Replace it with cool, but not cold, water.
28. Water mist has a bad smell
Poor maintenance or dirty water: Clean the device thoroughly and refill it with fresh water.
29. White dust forms on the furniture and/or the floor nearby
Hard water can deposit a certain amount of white dust. The additional humidity in the room also causes dust in the air to settle; use distilled water if this becomes bothersome. Remember to clean the interior of the device regularly.
30. The device no longer works
No or too little water: Unplug the device and refill the water tank.
31. Water is accumulating outside the device or around the device
Humidity saturation: Reduce the mist intensity or use a lower target humidity setting.
The device is not level and water is accumulating: Unplug and place on a level surface. Keep the mist outlets away from objects. Place the device on a waterproof, level surface about one metre above the floor.
32. Water drips when refilling
Residual water at the bottom of the tank. Wipe the tank or tilt it to drain before transporting.
33. Increased Noise Level
The device must be placed on a flat, level, and hard surface. Ensure that it is NOT placed on a soft or absorbent surface.
34. Red light on the power button
Indicates water shortage. Disconnect the device from the power and refill the tank.
35. General Troubleshooting Guide
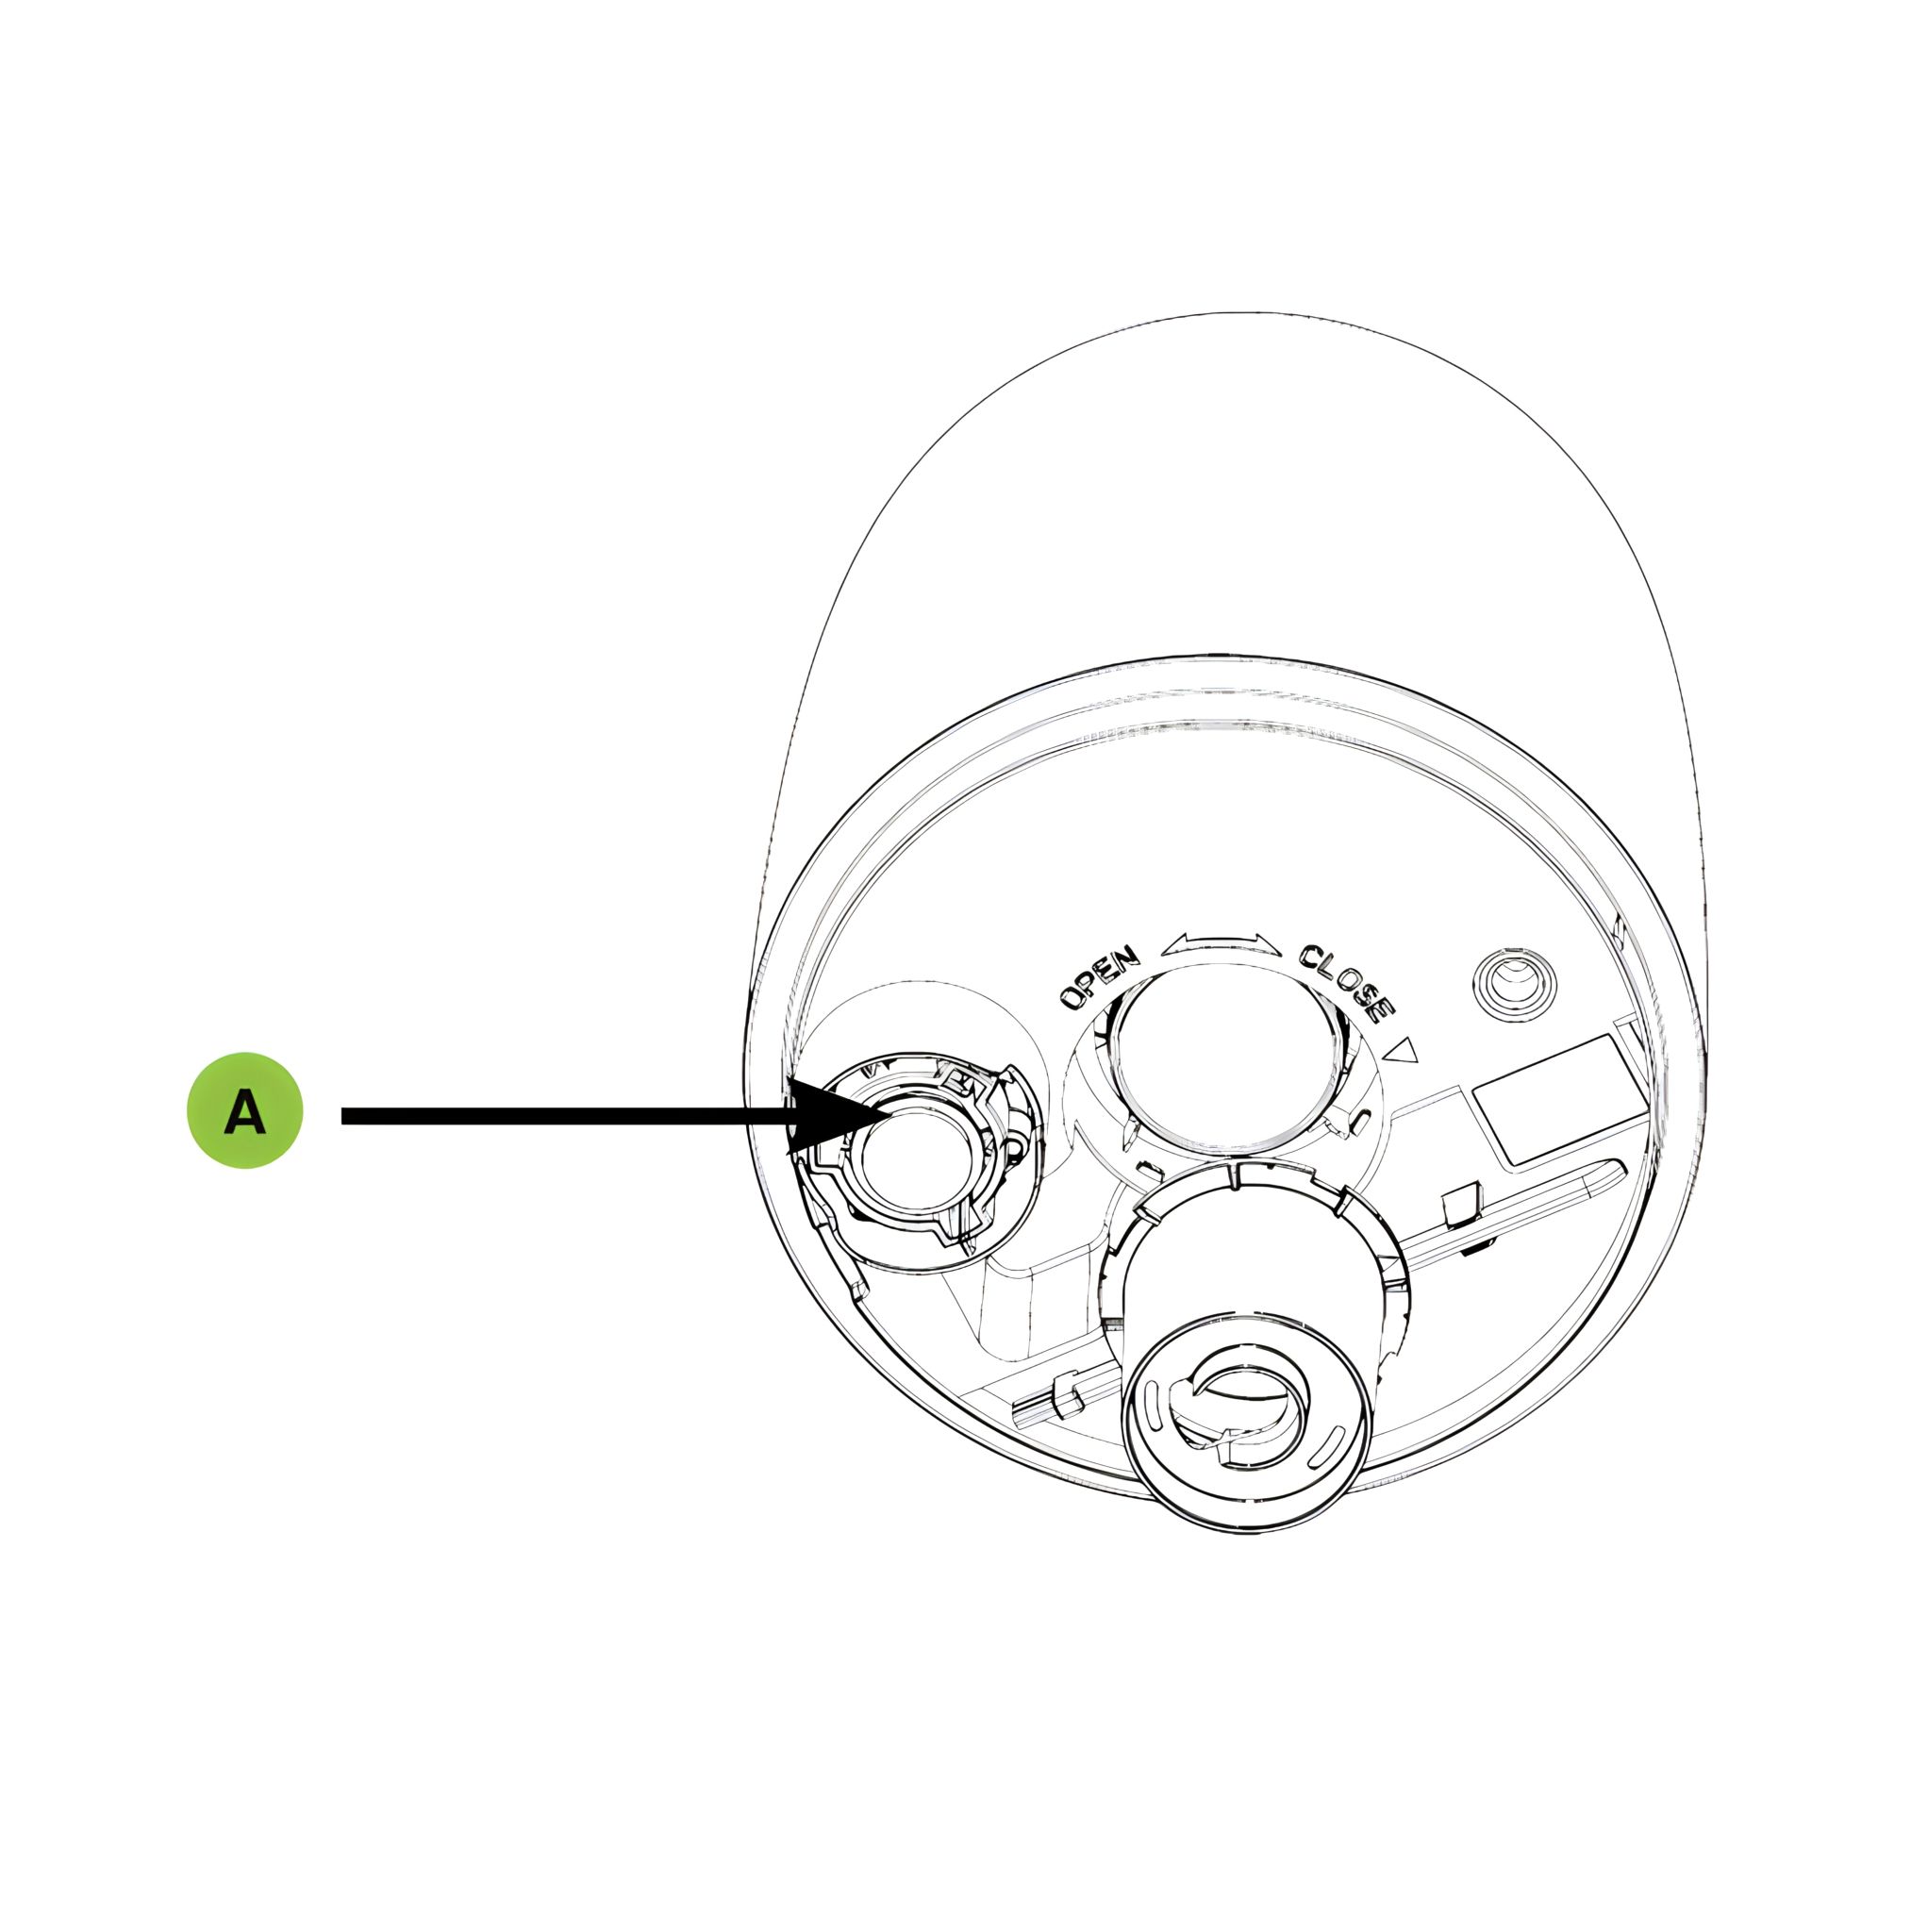
Empty any existing water from the device.
Check if the black valve is working by pressing it upwards a few times. ((A) - Black valve where the water is drained.)
Fill the tank (B) with water. (Ensure no water enters the central tube). Place the tank back onto the base unit (C). The lid can remain on the device during the test.
Switch the device on. Then touch the HUMIDITY SETTING button (D) until CO is displayed on the screen.
If the device still does not produce mist, check if water has entered the container at the bottom of the device (E).
Check the DISPLAY CODE GUIDE.
Display Code Guide
36. Code: E1
Indicates that there is no water in the water tank. Disconnect the device from the power and refill the tank.
After refilling the water tank, the sensor was not reset. Please turn the device off and then on again.
37. Code: E2
Indicates that the water tank is not placed on the device or not placed correctly: Place the water tank correctly.
38. Code: LO
If the humidity is below 30% RH, the display shows LO.
39. Code: HI
If the humidity is higher than 80% RH, the display shows Hl.
40. Code: CO
Means that the humidification is running continuously.
Previous stepCopy link to sharePrint / PDFNext step