Instructions for assembling, installing, and using the 7-in-1 Games Table bench. It includes safety advice, operational guidelines, and maintenance tips.
Product Information
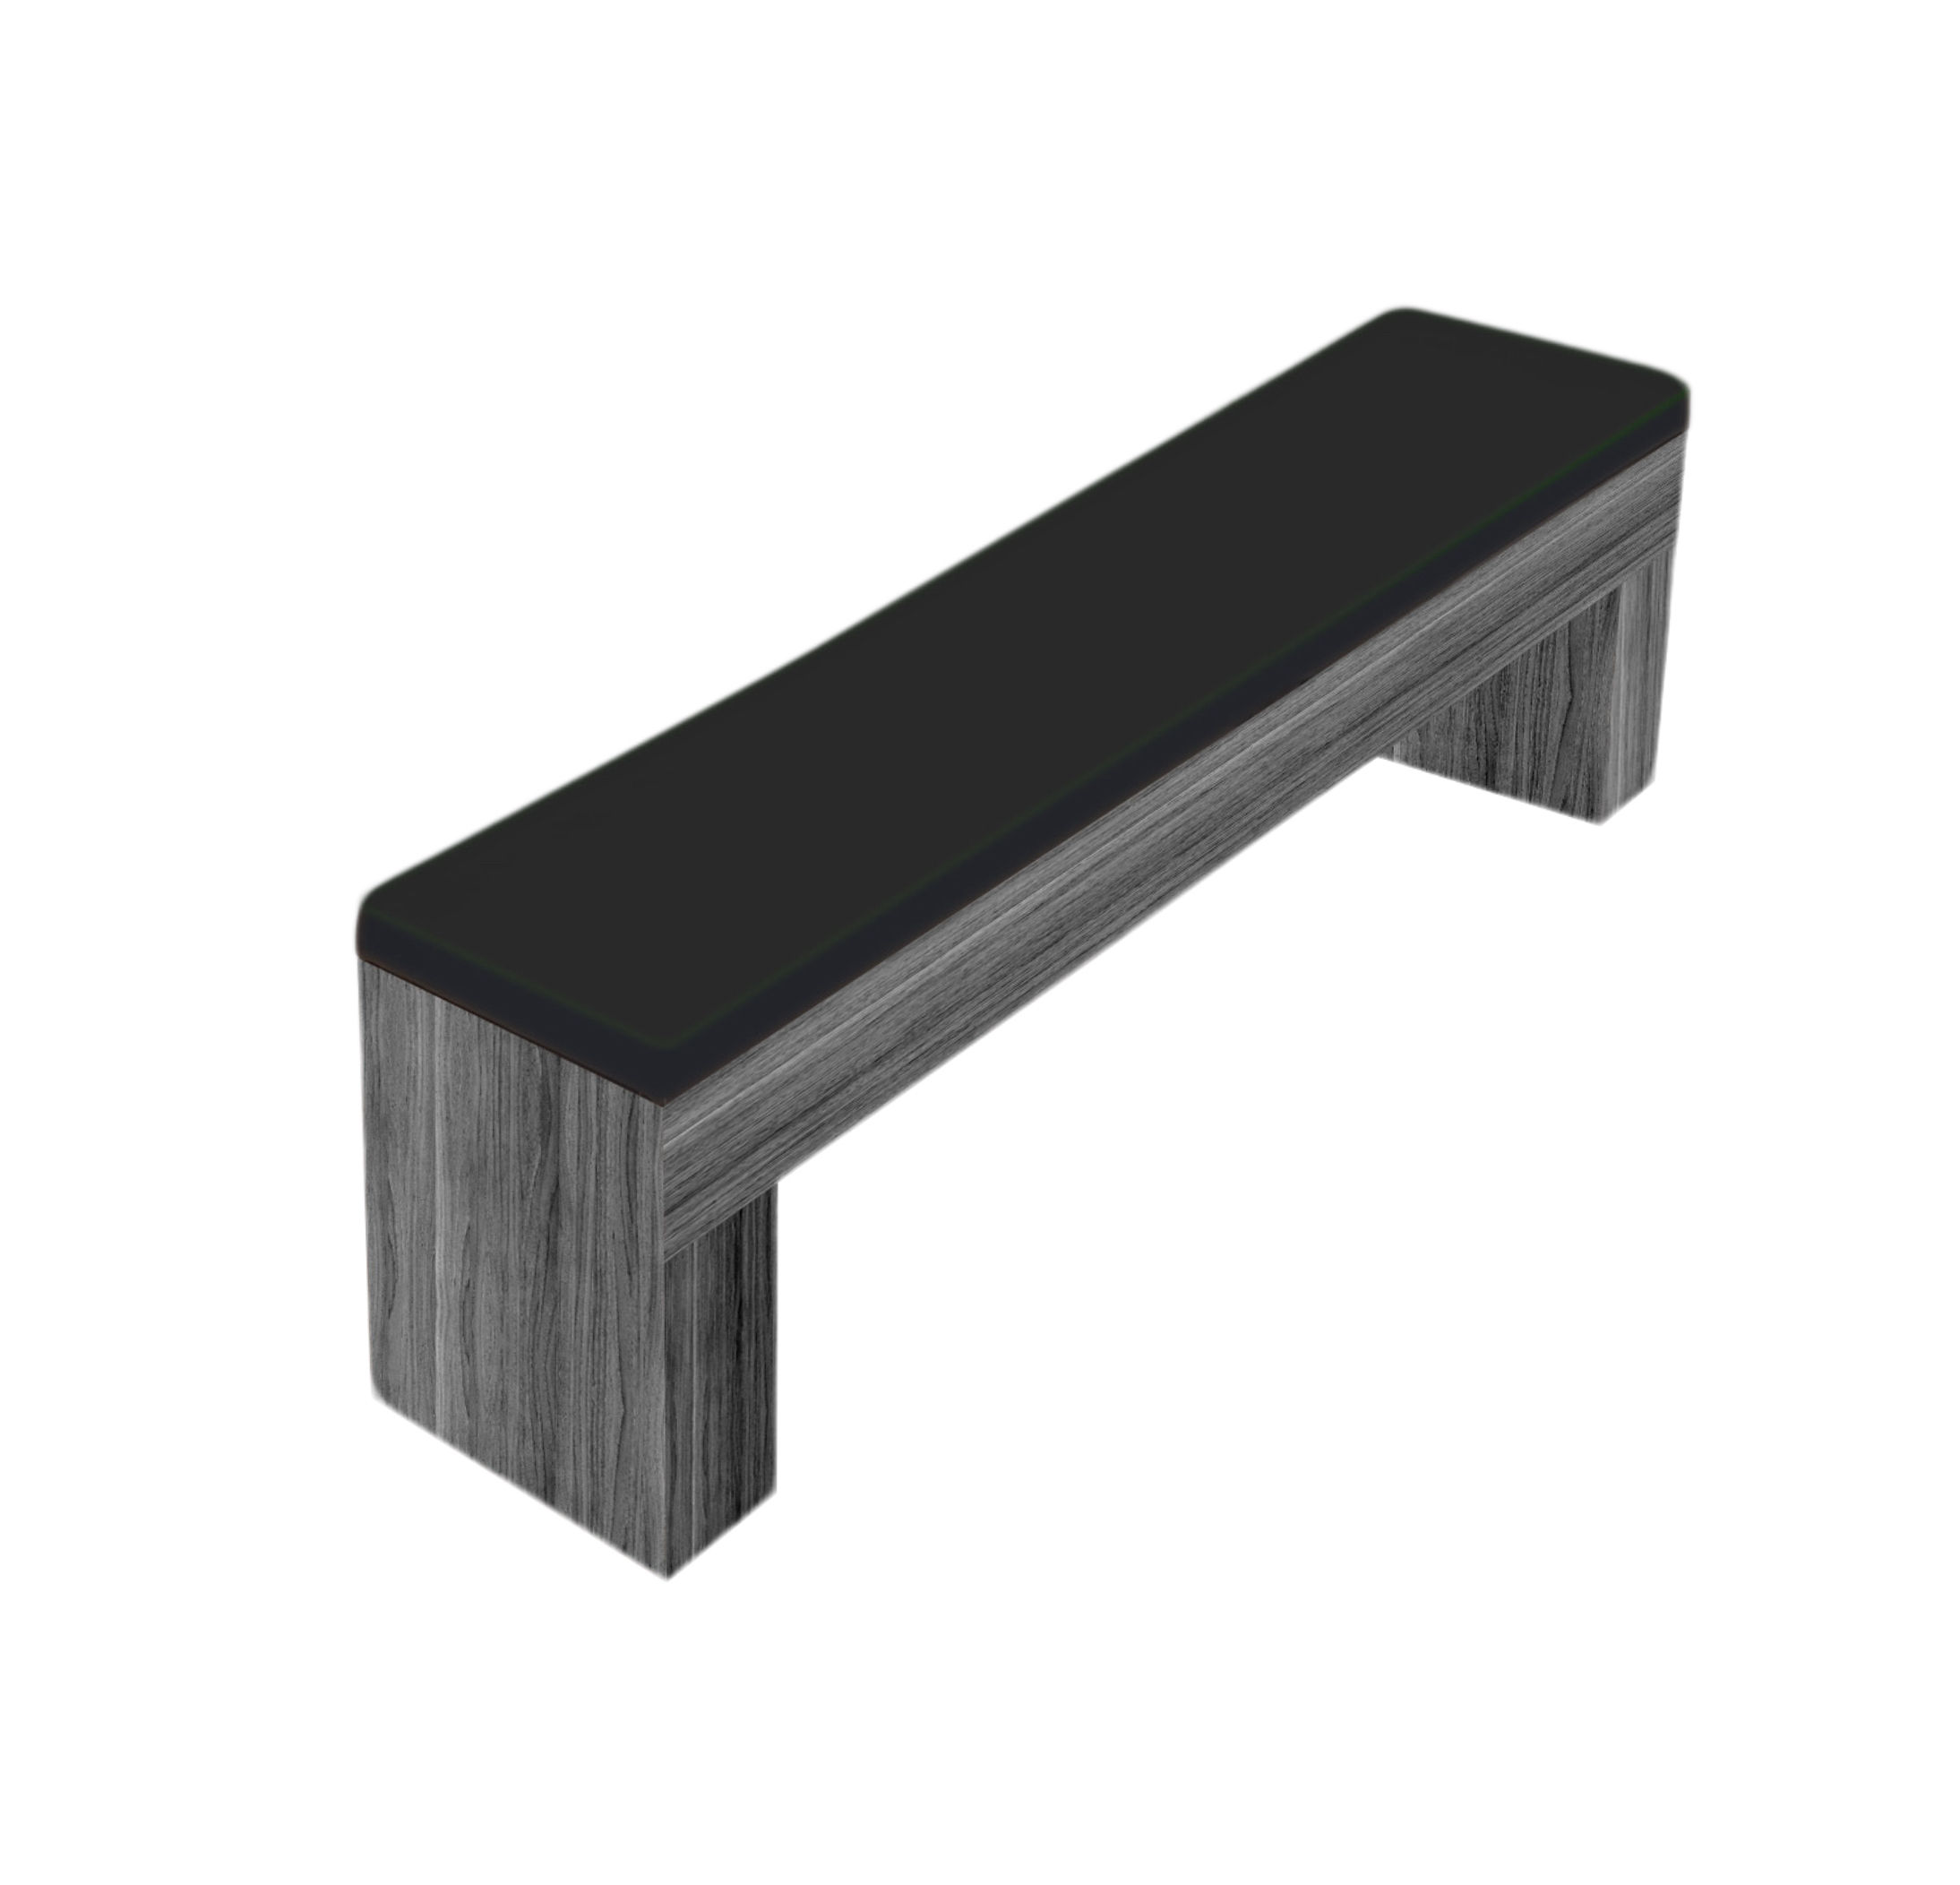
7-in-1 Games Table Bench
This versatile bench is designed to complement our 6-in-1 games table with dining table option, offering a stylish and practical seating and storage solution. Available in both Oak and Grey finishes, it blends seamlessly with a range of interiors.
SKU
216198,216199
Dimensions
L x W x H = 160cm x 30cm x 40cm
Materials
MDF, PU Leather, Metal Hardware
Weight
18kg
GPSR Information
UK
Manufacturer:
Monster Group UK Limited, Monster House
19-23 Alan Farnaby Way,
Industrial Estate Sheriff Hutton,
York
YO60 6PG
Person Responsible:
Rana Harvey, Monster Group UK Limited,
Monster House
19-23 Alan Farnaby Way,
Industrial Estate Sheriff Hutton,
York
YO60 6PG,
England,
+441347878880
EU
Manufacturer:
Monster Group BV,
Van Heemskerckweg 28A & B,
Venlo 5928LL
Netherlands
+441347878880
Person Responsible:
Rana Harvey,
Monster Group BV,
Van Heemskerckweg 28A & B,
Venlo 5928LL,
Netherlands,
+44134787888
Materials
Assembly
1. Before you start:
Check that all parts and hardware are included.
Use the Allen key (H7) provided for bolts.
Lay out pieces on a flat, clean surface.
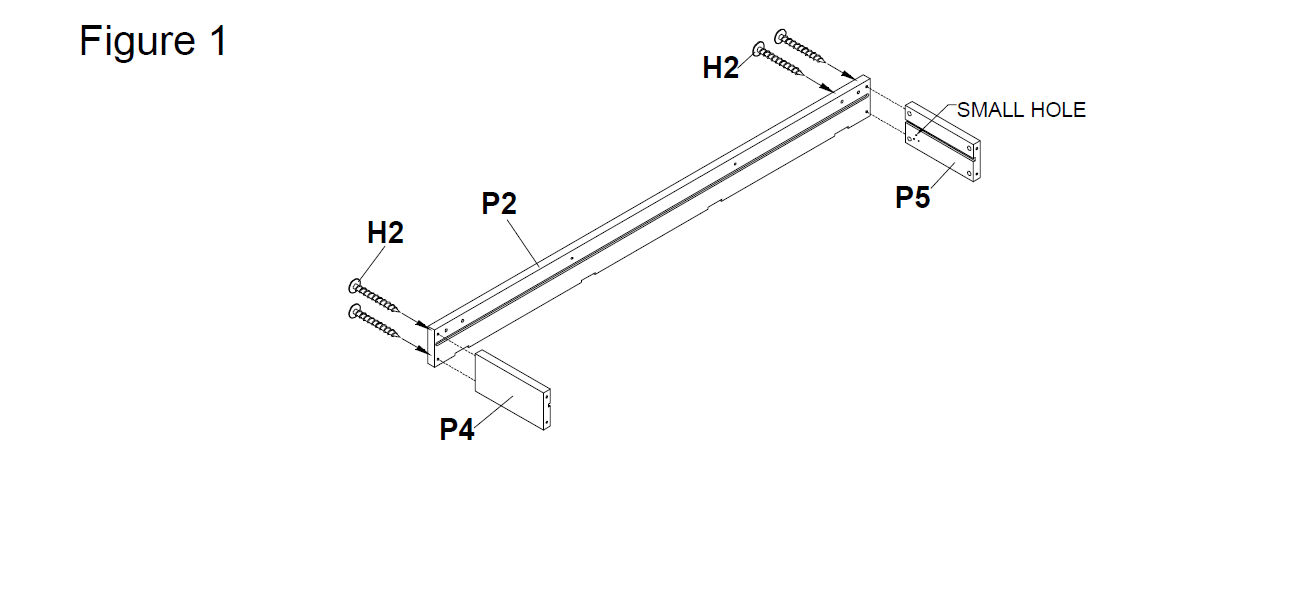
2. Attach Side Panels
Connect Stool Side Panel A (P2) to the Stool End Panels (Left & Right – P4 & P5).
Use 50mm screws (H2) to secure them as shown in Figure 1.
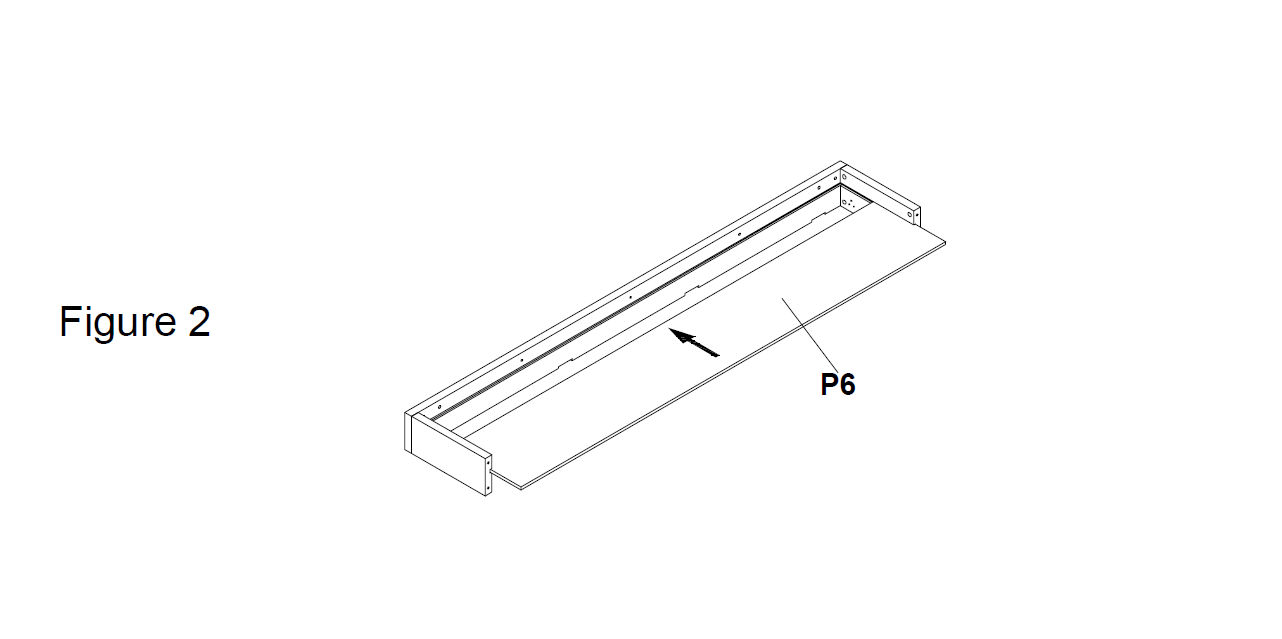
3. Fix the Bottom Plate
Insert the Stool Bottom Plate (P6) into the frame.
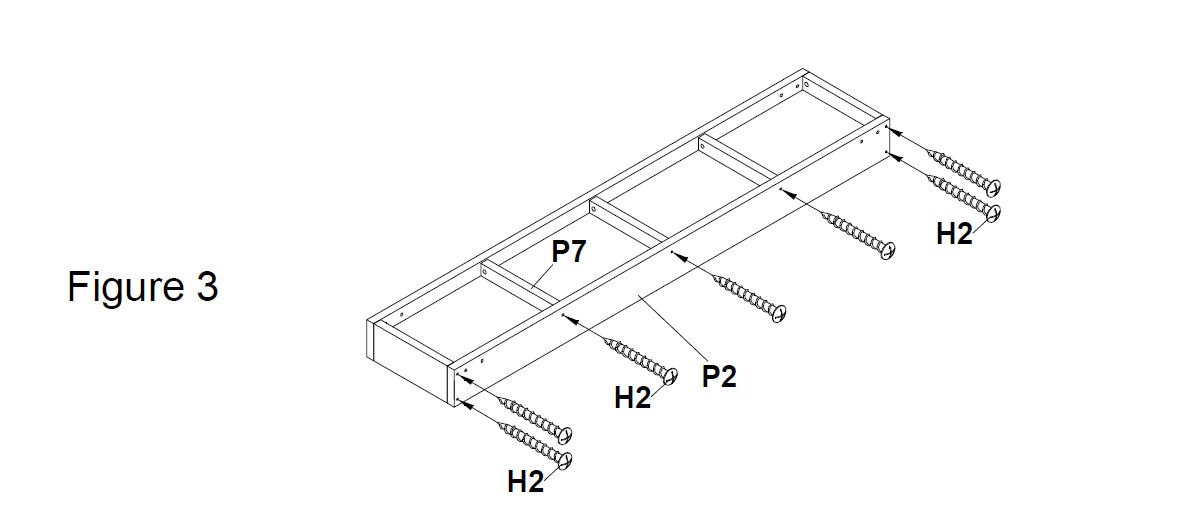
Secure it with 50 mm screws (H2) through the pre-drilled holes (Figure 3).
4. Add Support Braces
Use 50mm screws (H2) to attach the Support Braces (P7) across the underside of the bench. (Figure 3).
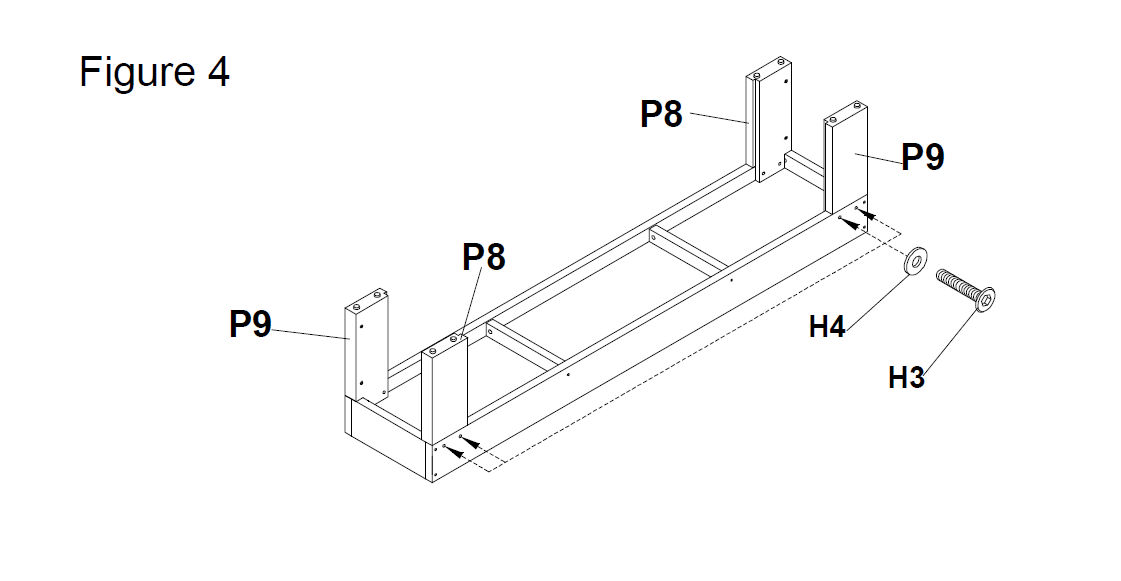
5. Install Legs
Connect Stool Leg A (P8) and Stool Leg B (P9) to the structure.
Secure them using 1/4" Washers(H4) and 1/4" x 1-3/4" Bolts (H3) through the pre-drilled holes (Figure 4).
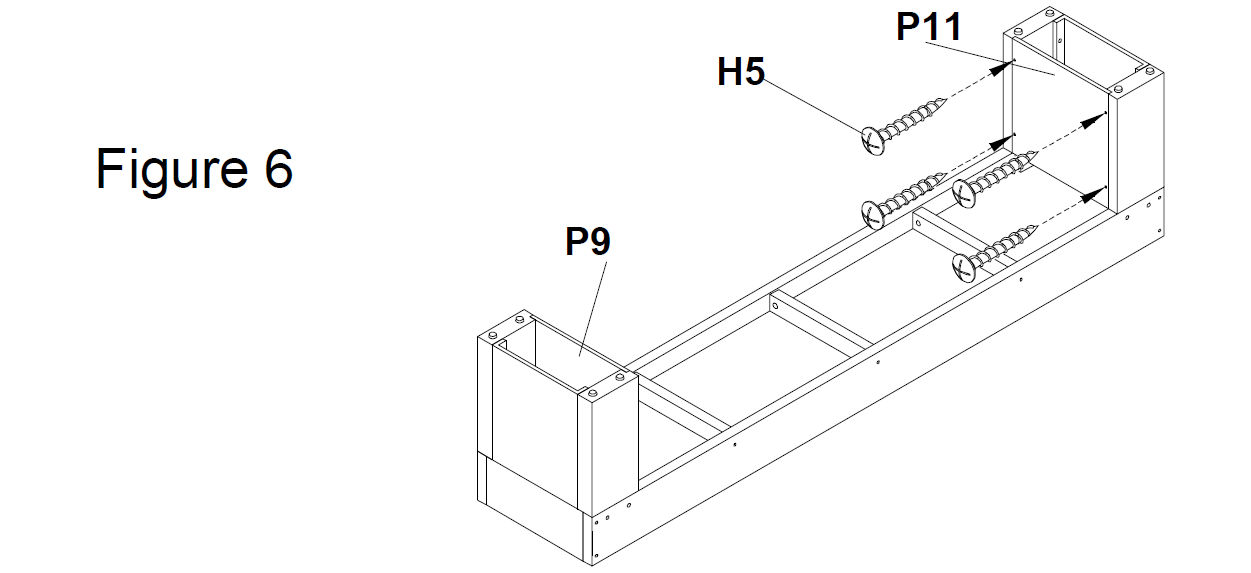
6. Assemble Leg Panels
Attach Stool Leg Panels A (P10) and secure them using 1/4" Washers(H4) and 1/4" x 1"Bolt (H6)(see Figure 5)
Then attach Stool Leg Panels B (P11) and use 25mm screws (H5) to secure them. (see Figure 6)
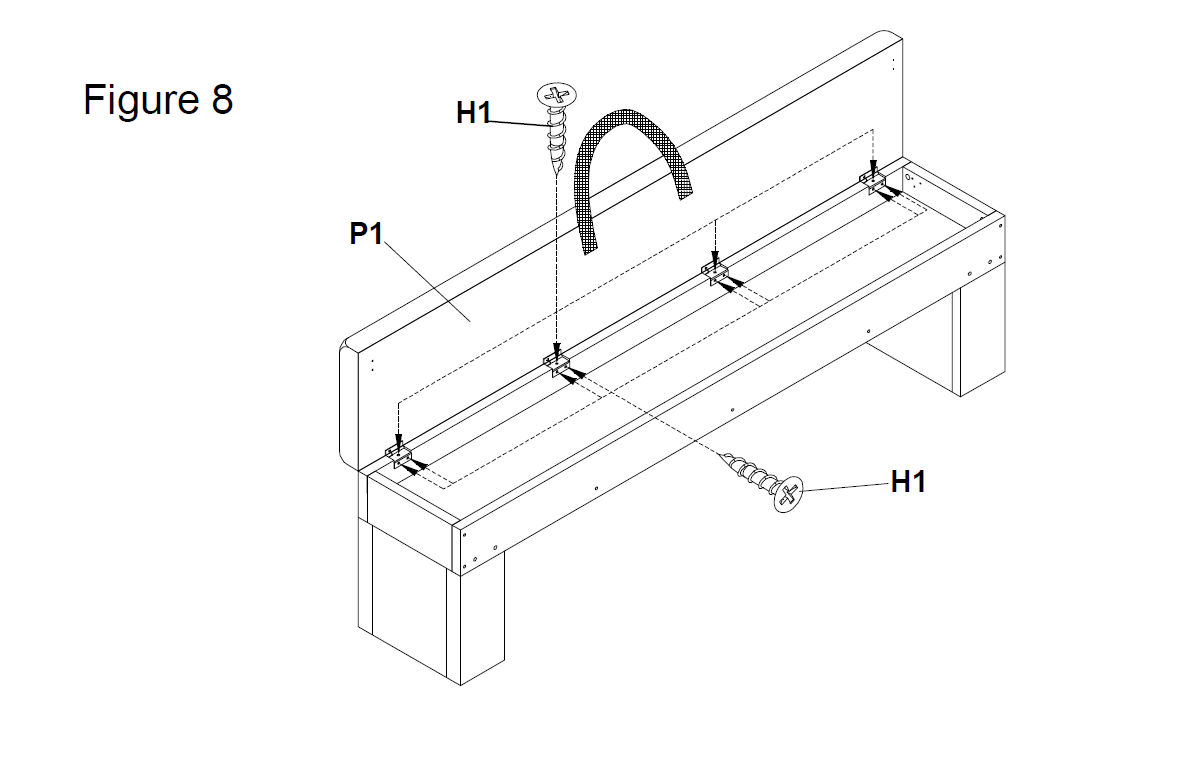
7. Add Hinges and Lid
Fix the hinges (P12) onto the inside of the seat panel (P1) using 15mm screws (H1) (See Figure 7)
Fix the other side of the hinges (P12) to the bench frame using 15 mm screws (H1)(See Figure 8)
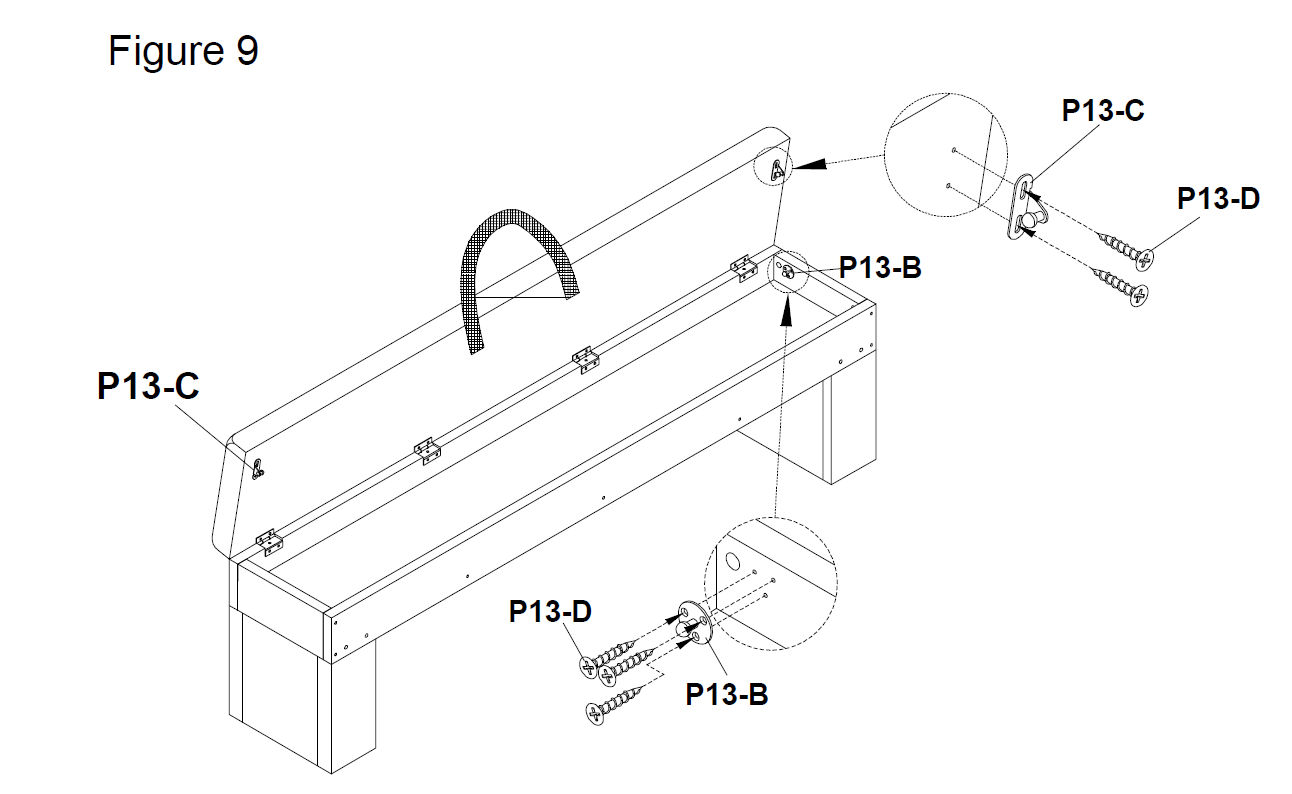
8. Add Hydraulic Strut
To attach the Hydraulic strut (P13) see Figures 9-10.
First, position part (P13-C) to the inside top corners of the seat panel and secure each in place with screws(P13-D).
Then attach part(P13-B) to both stool end panels (P4/P5) using screws(P13-D).
Finally, see Figure 10, to fix part (P12-A) to parts (P13-C) and (P13-B).
Maintenance
9.
Do not use cleaning products containing ammonia, bleach, or solvents on the bench. Wipe clean with a damp cloth and mild detergent only.
Previous stepCopy link to sharePrint / PDFNext step