The Rattan Storage Boxes are the perfect solution for stylish and practical outdoor storage.
Product Information
Rattan Storage Boxes
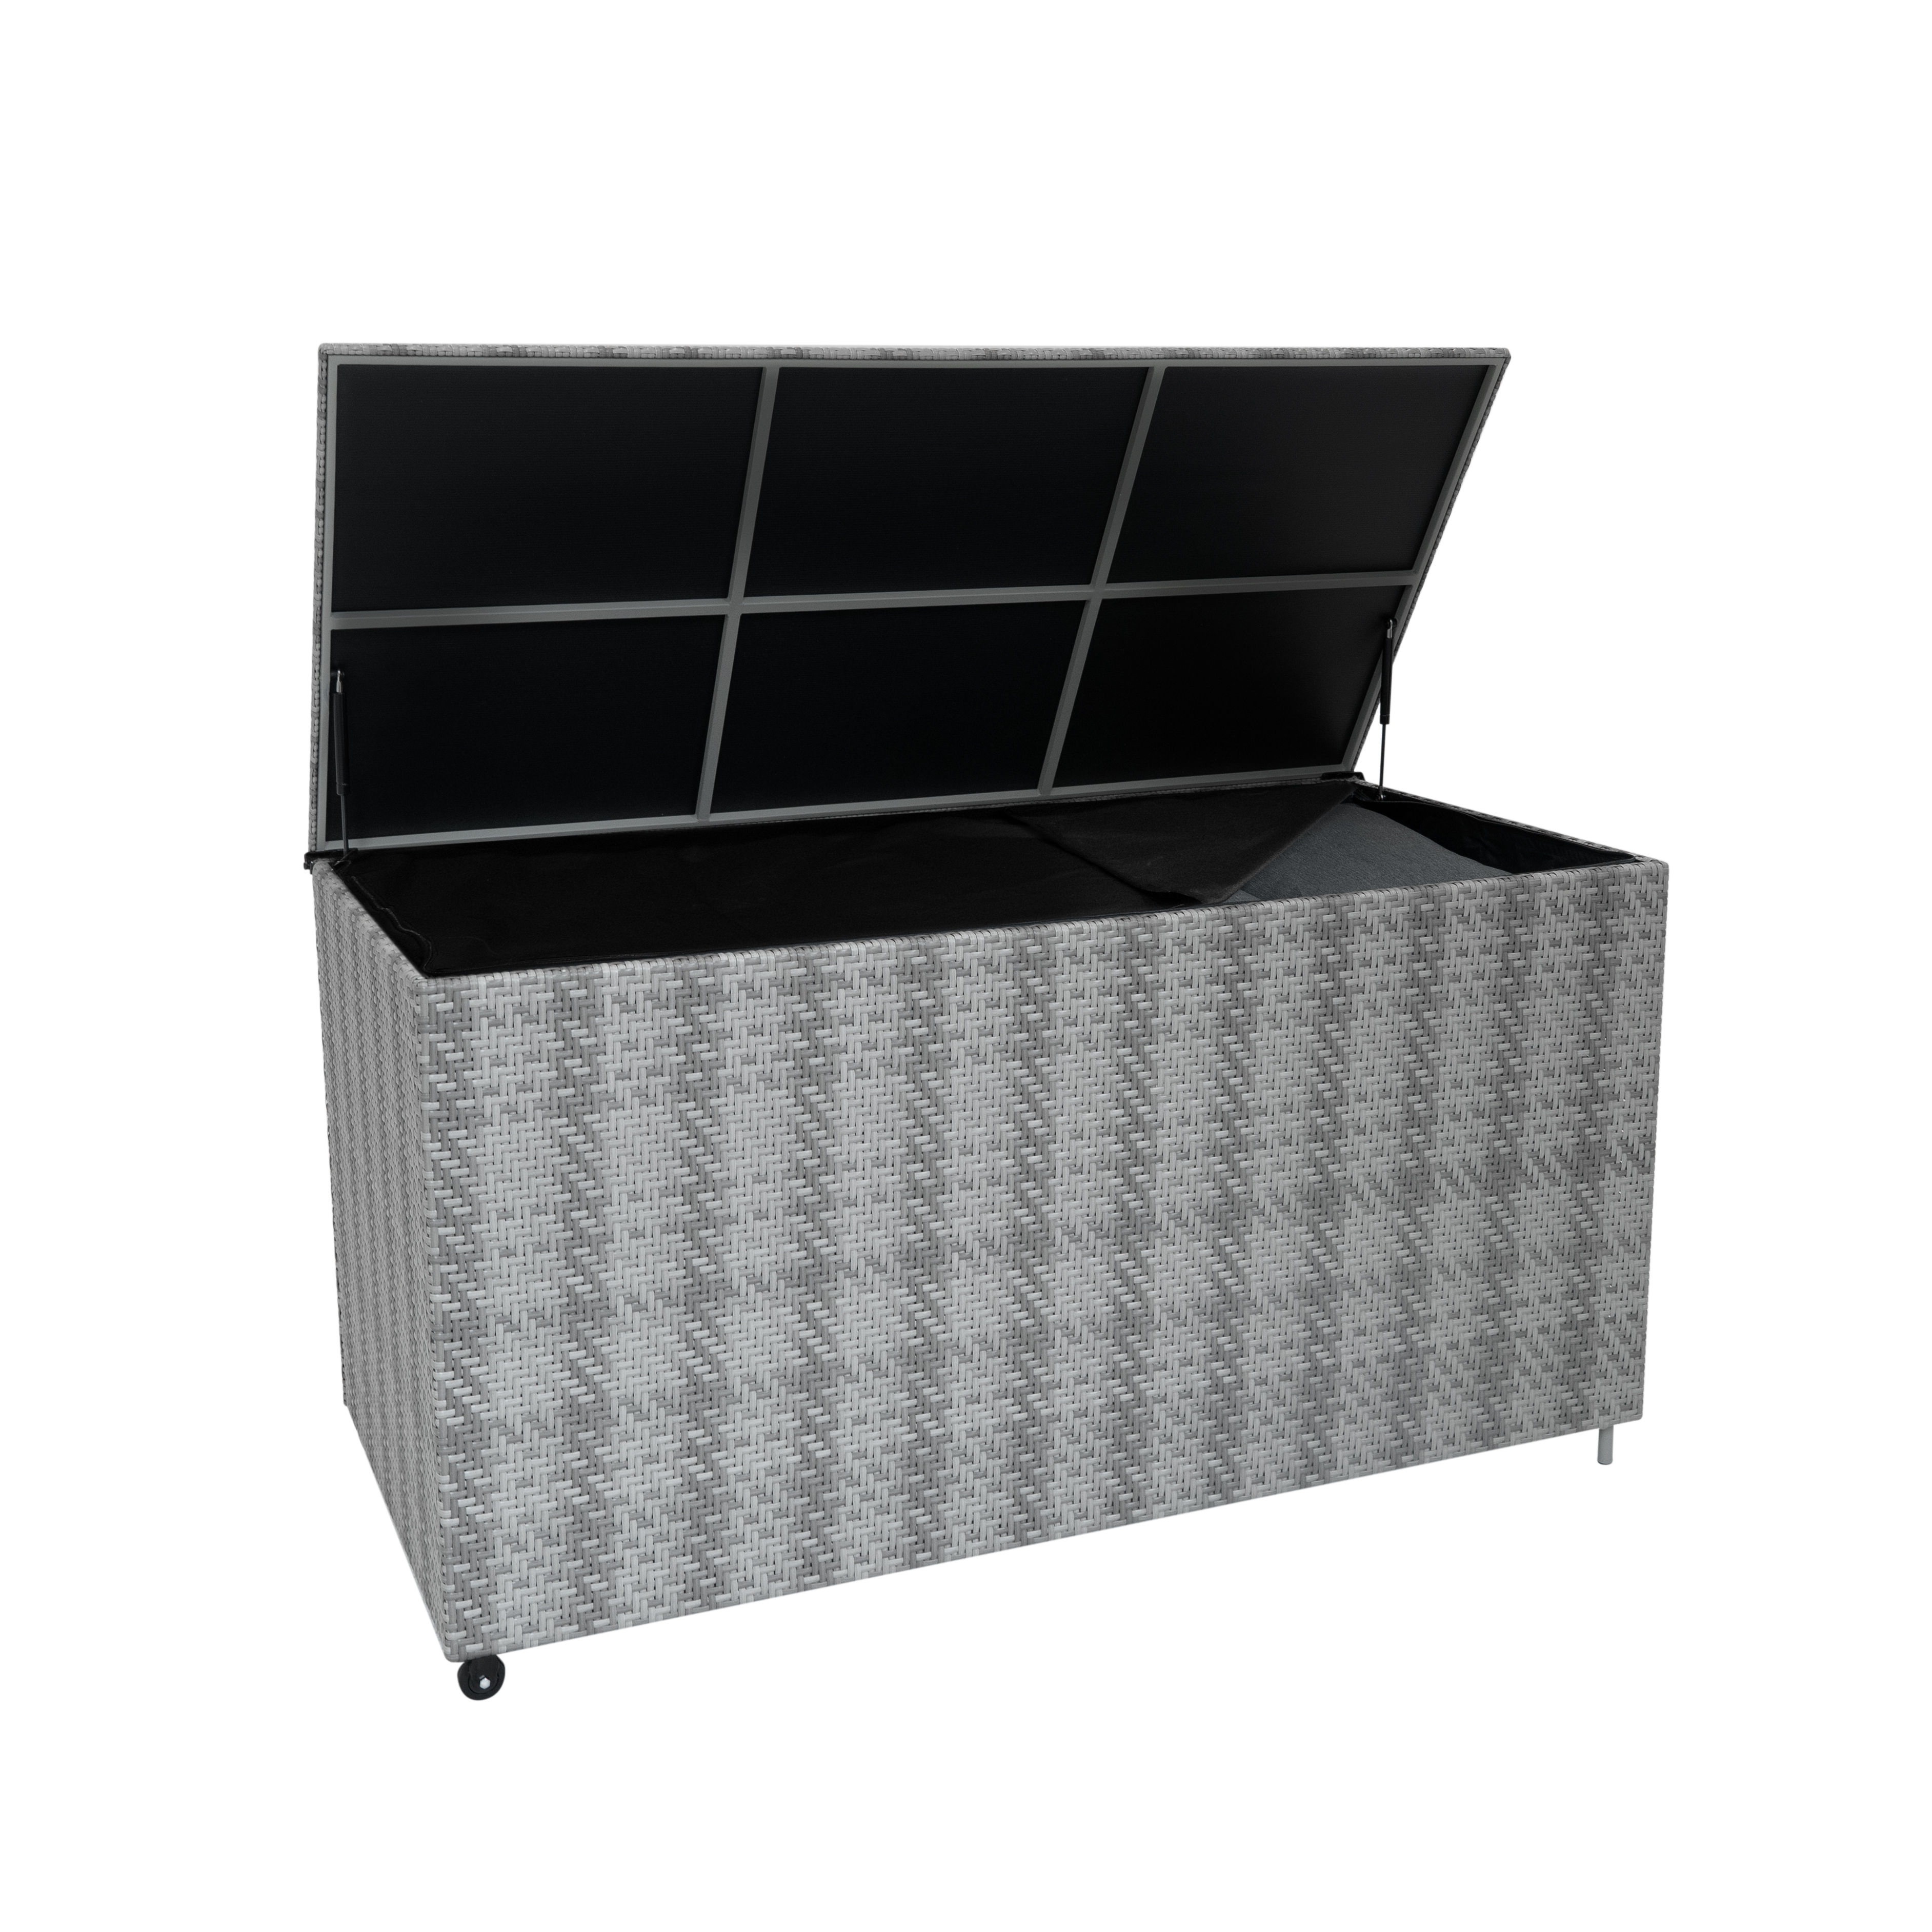
The Rattan Storage Boxes are the perfect solution for stylish and practical outdoor storage. With a large capacity, they are ideal for keeping cushions, garden essentials, or other items neatly organised and protected. Each box features a waterproof lining with a secure zip to safeguard your belongings from the elements. Designed to compliment the modular furniture range, their sleek black and grey finishes ensure they blend seamlessly with any outdoor decor, offering both functionality and elegance for your garden space.
SKU
216644,216645,216641,216643,212733,212734,212735
GPSR Information
UK
Manufacturer:
Monster Group UK Limited, Monster House
19-23 Alan Farnaby Way,
Industrial Estate Sheriff Hutton,
York
YO60 6PG
Person Responsible:
Rana Harvey, Monster Group UK Limited,
Monster House
19-23 Alan Farnaby Way,
Industrial Estate Sheriff Hutton,
York
YO60 6PG,
England,
+441347878880
EU
Manufacturer:
Monster Group BV,
Van Heemskerckweg 28A & B,
Venlo 5928LL
Netherlands
+441347878880
Person Responsible:
Rana Harvey,
Monster Group BV,
Van Heemskerckweg 28A & B,
Venlo 5928LL,
Netherlands,
+44134787888
Materials
Steps
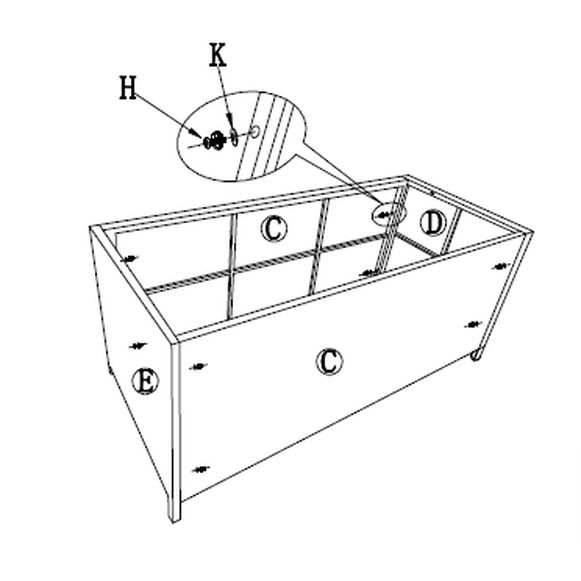
1. Step 1 - Build the Box Frame
Lay out the panels
Place the two side panels (C) parallel to each other.
Position the two end panels (D and E) at each end to form a rectangle.
Stand them upright
Make sure all panels are upright with the finished side facing outward.
Line up the pre-drilled holes
Match the holes at the corners where the panels meet.
Insert the screws (H)
Push the screws through the aligned holes from the outside.
Secure with the washers (K)
Attach and tighten the connectors on the inside.
Don’t fully tighten until all corners are connected.
Check alignment
Make sure the frame is square and sitting evenly.
Then fully tighten all bolts.
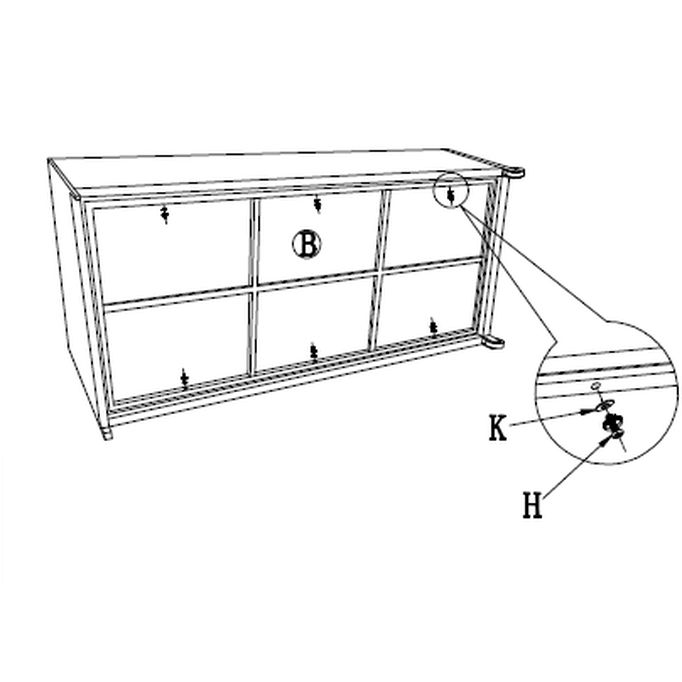
2. Step 2 - Attach the Bottom Panel
Flip the frame
Carefully turn the box frame upside down so the bottom is facing up.
Place panel B
Lay the bottom panel (B) inside the frame.
Make sure it sits flat and lines up with the edges.
Align the holes
Match the holes in panel B with the holes in the frame.
Insert screws (H)
Push the bolts through the holes from the outside of the frame.
Secure with the washers (K)
Attach and tighten from the inside.
Start all screws first, then fully tighten once everything is aligned.
Double-check
Make sure the bottom panel is snug and flush with the frame.
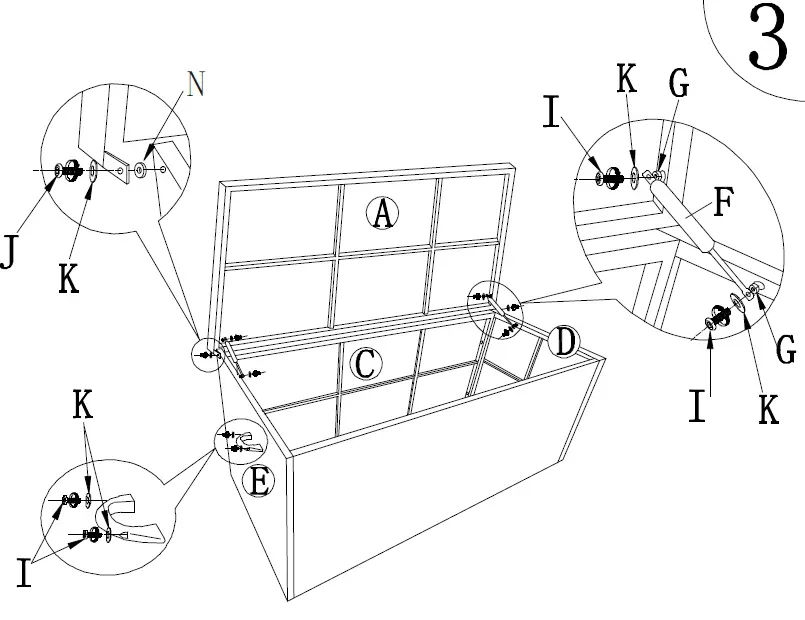
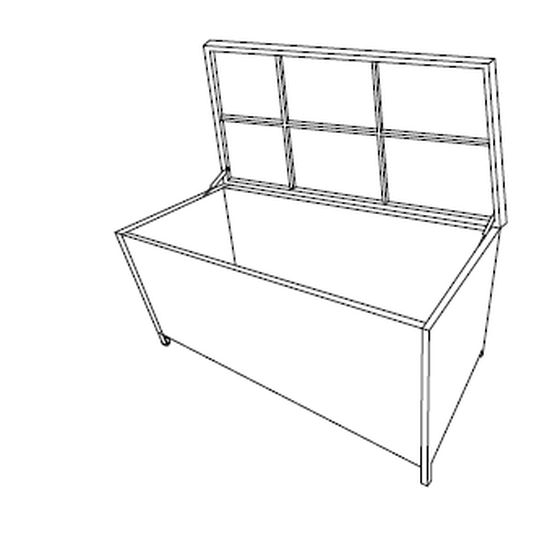
3. Step 3 - Install the Lid and Support Arms
Position the lid (A)
Place the lid (A) on top of the box.
Line up the hinges at the back edge of the box.
Attach the hinges
Insert screws (I) through the hinge holes.
Secure them with the washers (K) on the inside.
Do not fully tighten yet.
Install the support arm (F)
Attach one end of the support arm (F) to the inside wall of the box.
Use screws (I) and the washers (K) to secure it.
Connect the arm to the lid
Attach the other end of the support arm to the lid.
Secure with the same hardware (I and K).
Make sure the arm can move smoothly.
Install side fittings (E / D area)
Attach any side brackets or fittings shown using the same bolt and connector method.
Tighten once everything is aligned.
Final check
Carefully open and close the lid.
Make sure it moves smoothly and stays open with the support arm.
4. Step 4 - Final Check and Finish
Open the lid fully
Make sure it lifts smoothly.
Confirm the support arm holds the lid open securely.
Check all bolts
Go around the entire box.
Fully tighten any bolts that may still be loose.
Set the box upright
Carefully place the box in its normal standing position.
Make sure it sits level on the ground.
Wipe it down (optional but nice)
Remove any dust or fingerprints from assembly.
Maintenance
5. Maintenance
The Rattan Storage Box should be stored indoors for adverse weather conditions including heavy rain and low temperatures.
Ensure cushions are fully dry before storing, to avoid potential growth of mould or mildew.
Check screws and bolts regularly to ensure the product is maintaining its sturdiness.
We recommend cleaning with a soft, damp cloth and a mild detergent, avoiding abrasive cleaners or harsh chemicals to prevent damage to the material.
Troubleshooting
6. Troubleshooting
Please read through the guide below if you have any issues or faults with your device. The information covers and resolves the majority of frequently asked questions.
Q: There are parts missing from my order. A: If there appears to be any part missing from your package contact our Customer Support team via the details on the Contact Us page within 7 days of receipt.
For all other issues please contact our Customer Support department via the details on the Contact page.
Previous stepCopy link to sharePrint / PDFNext step