 Instructions by time4sleep Brookes Wooden Ottoman Storage Bed Assembly instructions for Brookes Wooden Ottoman Storage Bed by Time4Sleep. -
1. Preparing the Headboard Assembly
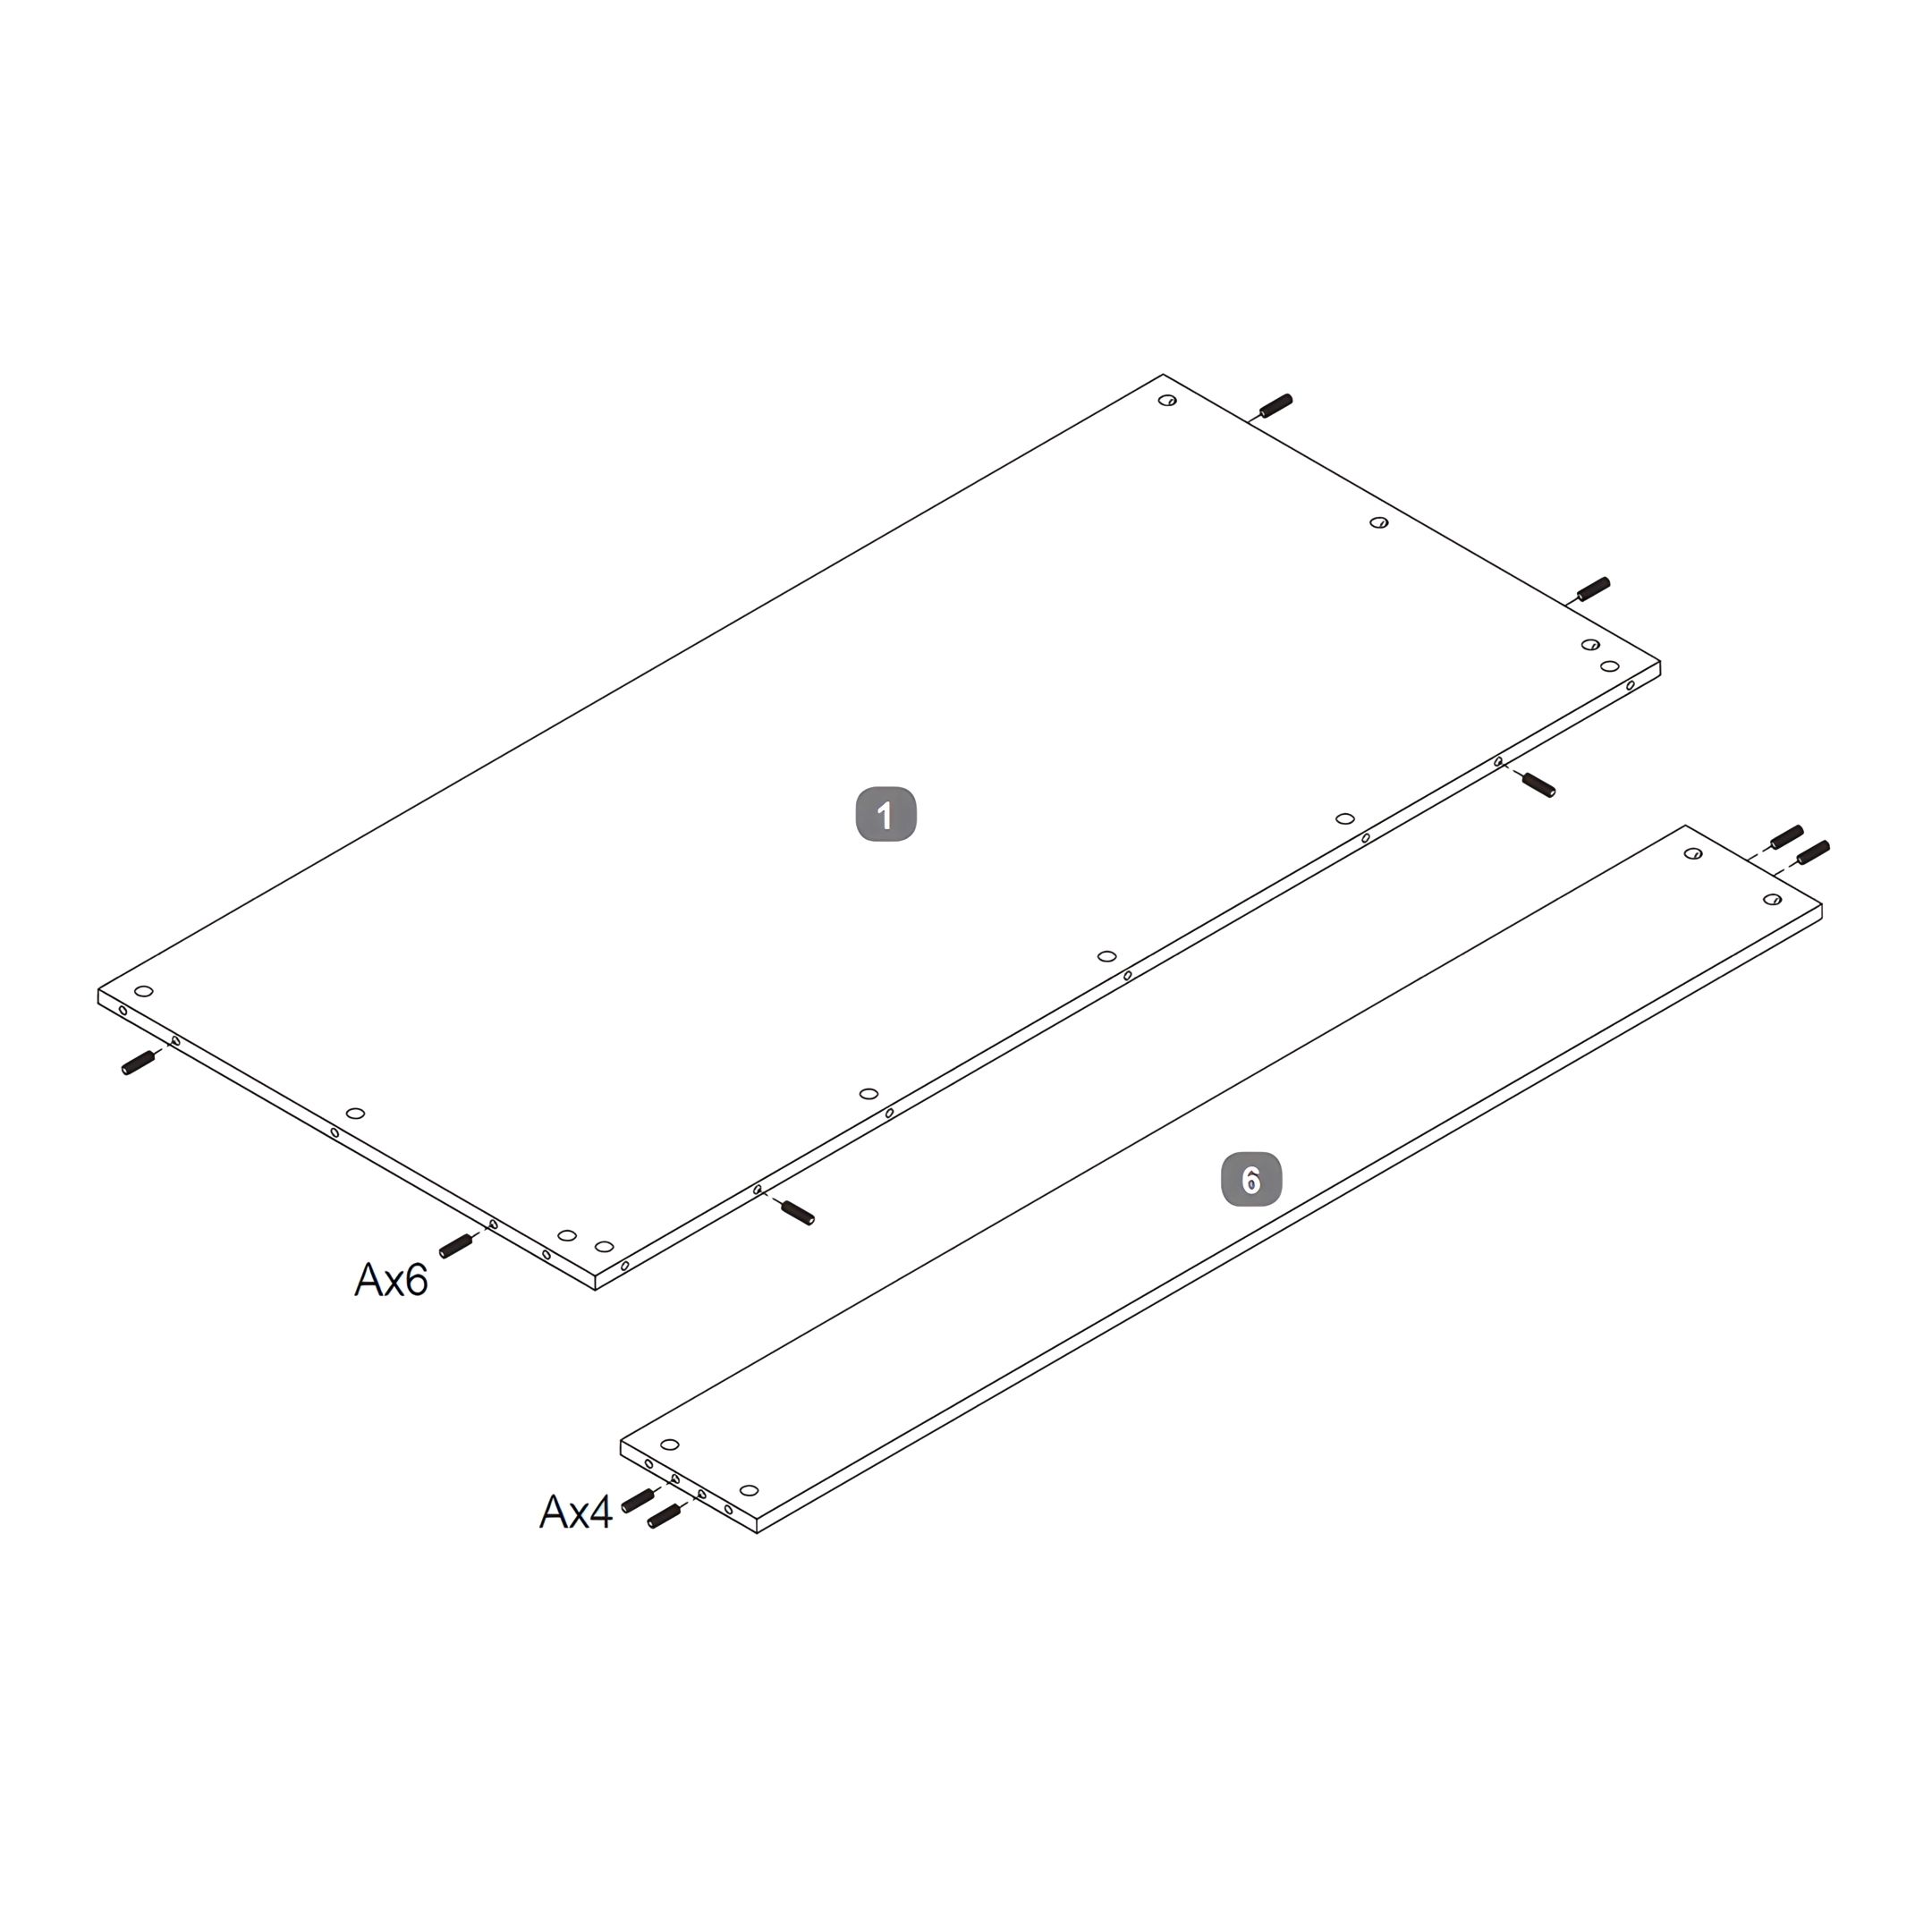
- Identify the Inner Panel for the Headboard (1) and the Bottom Rail for the Headboard (6).
- Refer to the provided image to locate the pre-drilled holes on these components.
- Insert ten Dowels (C) into the pre-drilled holes, ensuring each dowel is fully seated and aligned correctly for a secure fit.
-
2. Assembling the Headboard Structure
- Identify the Headboard Legs (2 & 3) and the Top Rail for Headboard (4).
- For the Headboard Legs (2 & 3), use 5 Cam Bolts (A). Align the screws with the pre-drilled holes and tighten them using a Philips Head Screwdriver.
- For the Top Rail for Headboard (4), use 7 Cam Bolts (A). Align the screws with the pre-drilled holes and tighten them using a Philips head screwdriver.
-
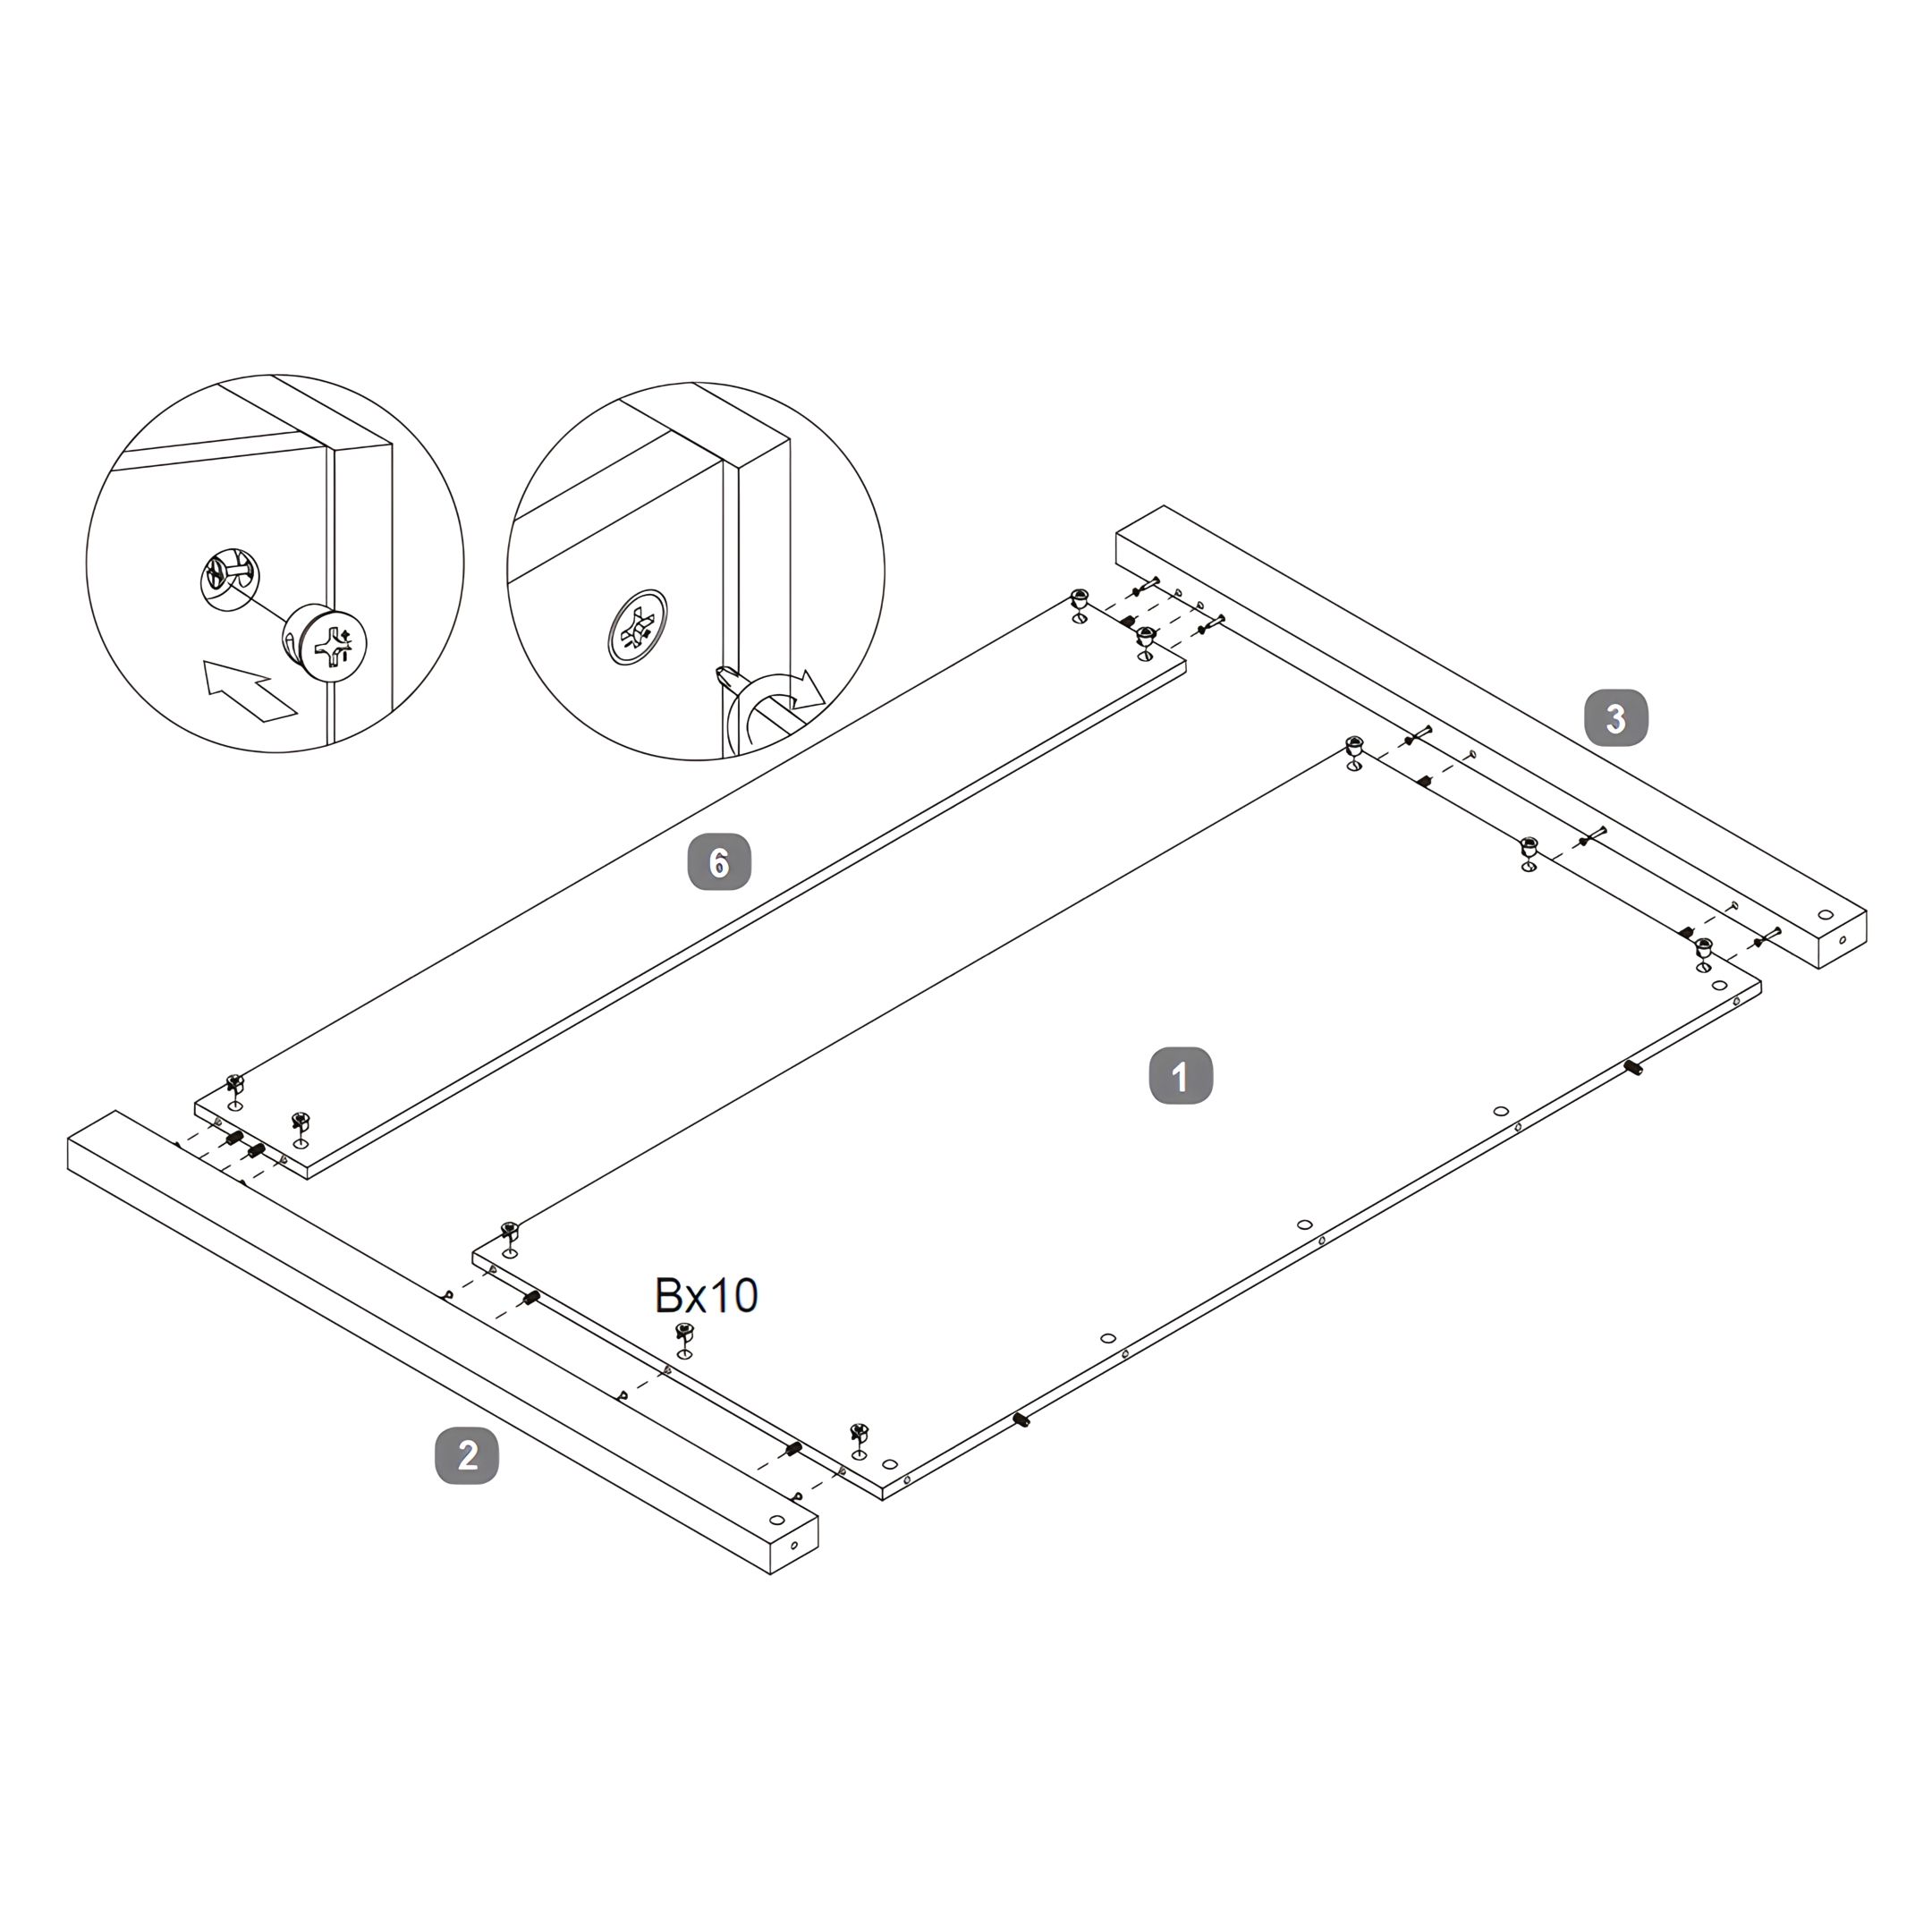
3. Securing the Headboard Frame
- Align the Headboard Legs (2 & 3) with the Dowels and the Cam Bolts installed in the Inner Panel (1) and the Bottom Rail for the Headboard (6). Ensure the alignment is precise to facilitate smooth insertion.
- Attach 10 Cam Locks (A) at the marked points to firmly secure the Headboard Legs to the Bottom Rail and the Inner Panel. Rotate each Cam Lock using a screwdriver to lock it in place, ensuring a tight fit.
Ensure all connections are tightened properly but do not over-tighten, as this might strip the threads or damage the material.
-
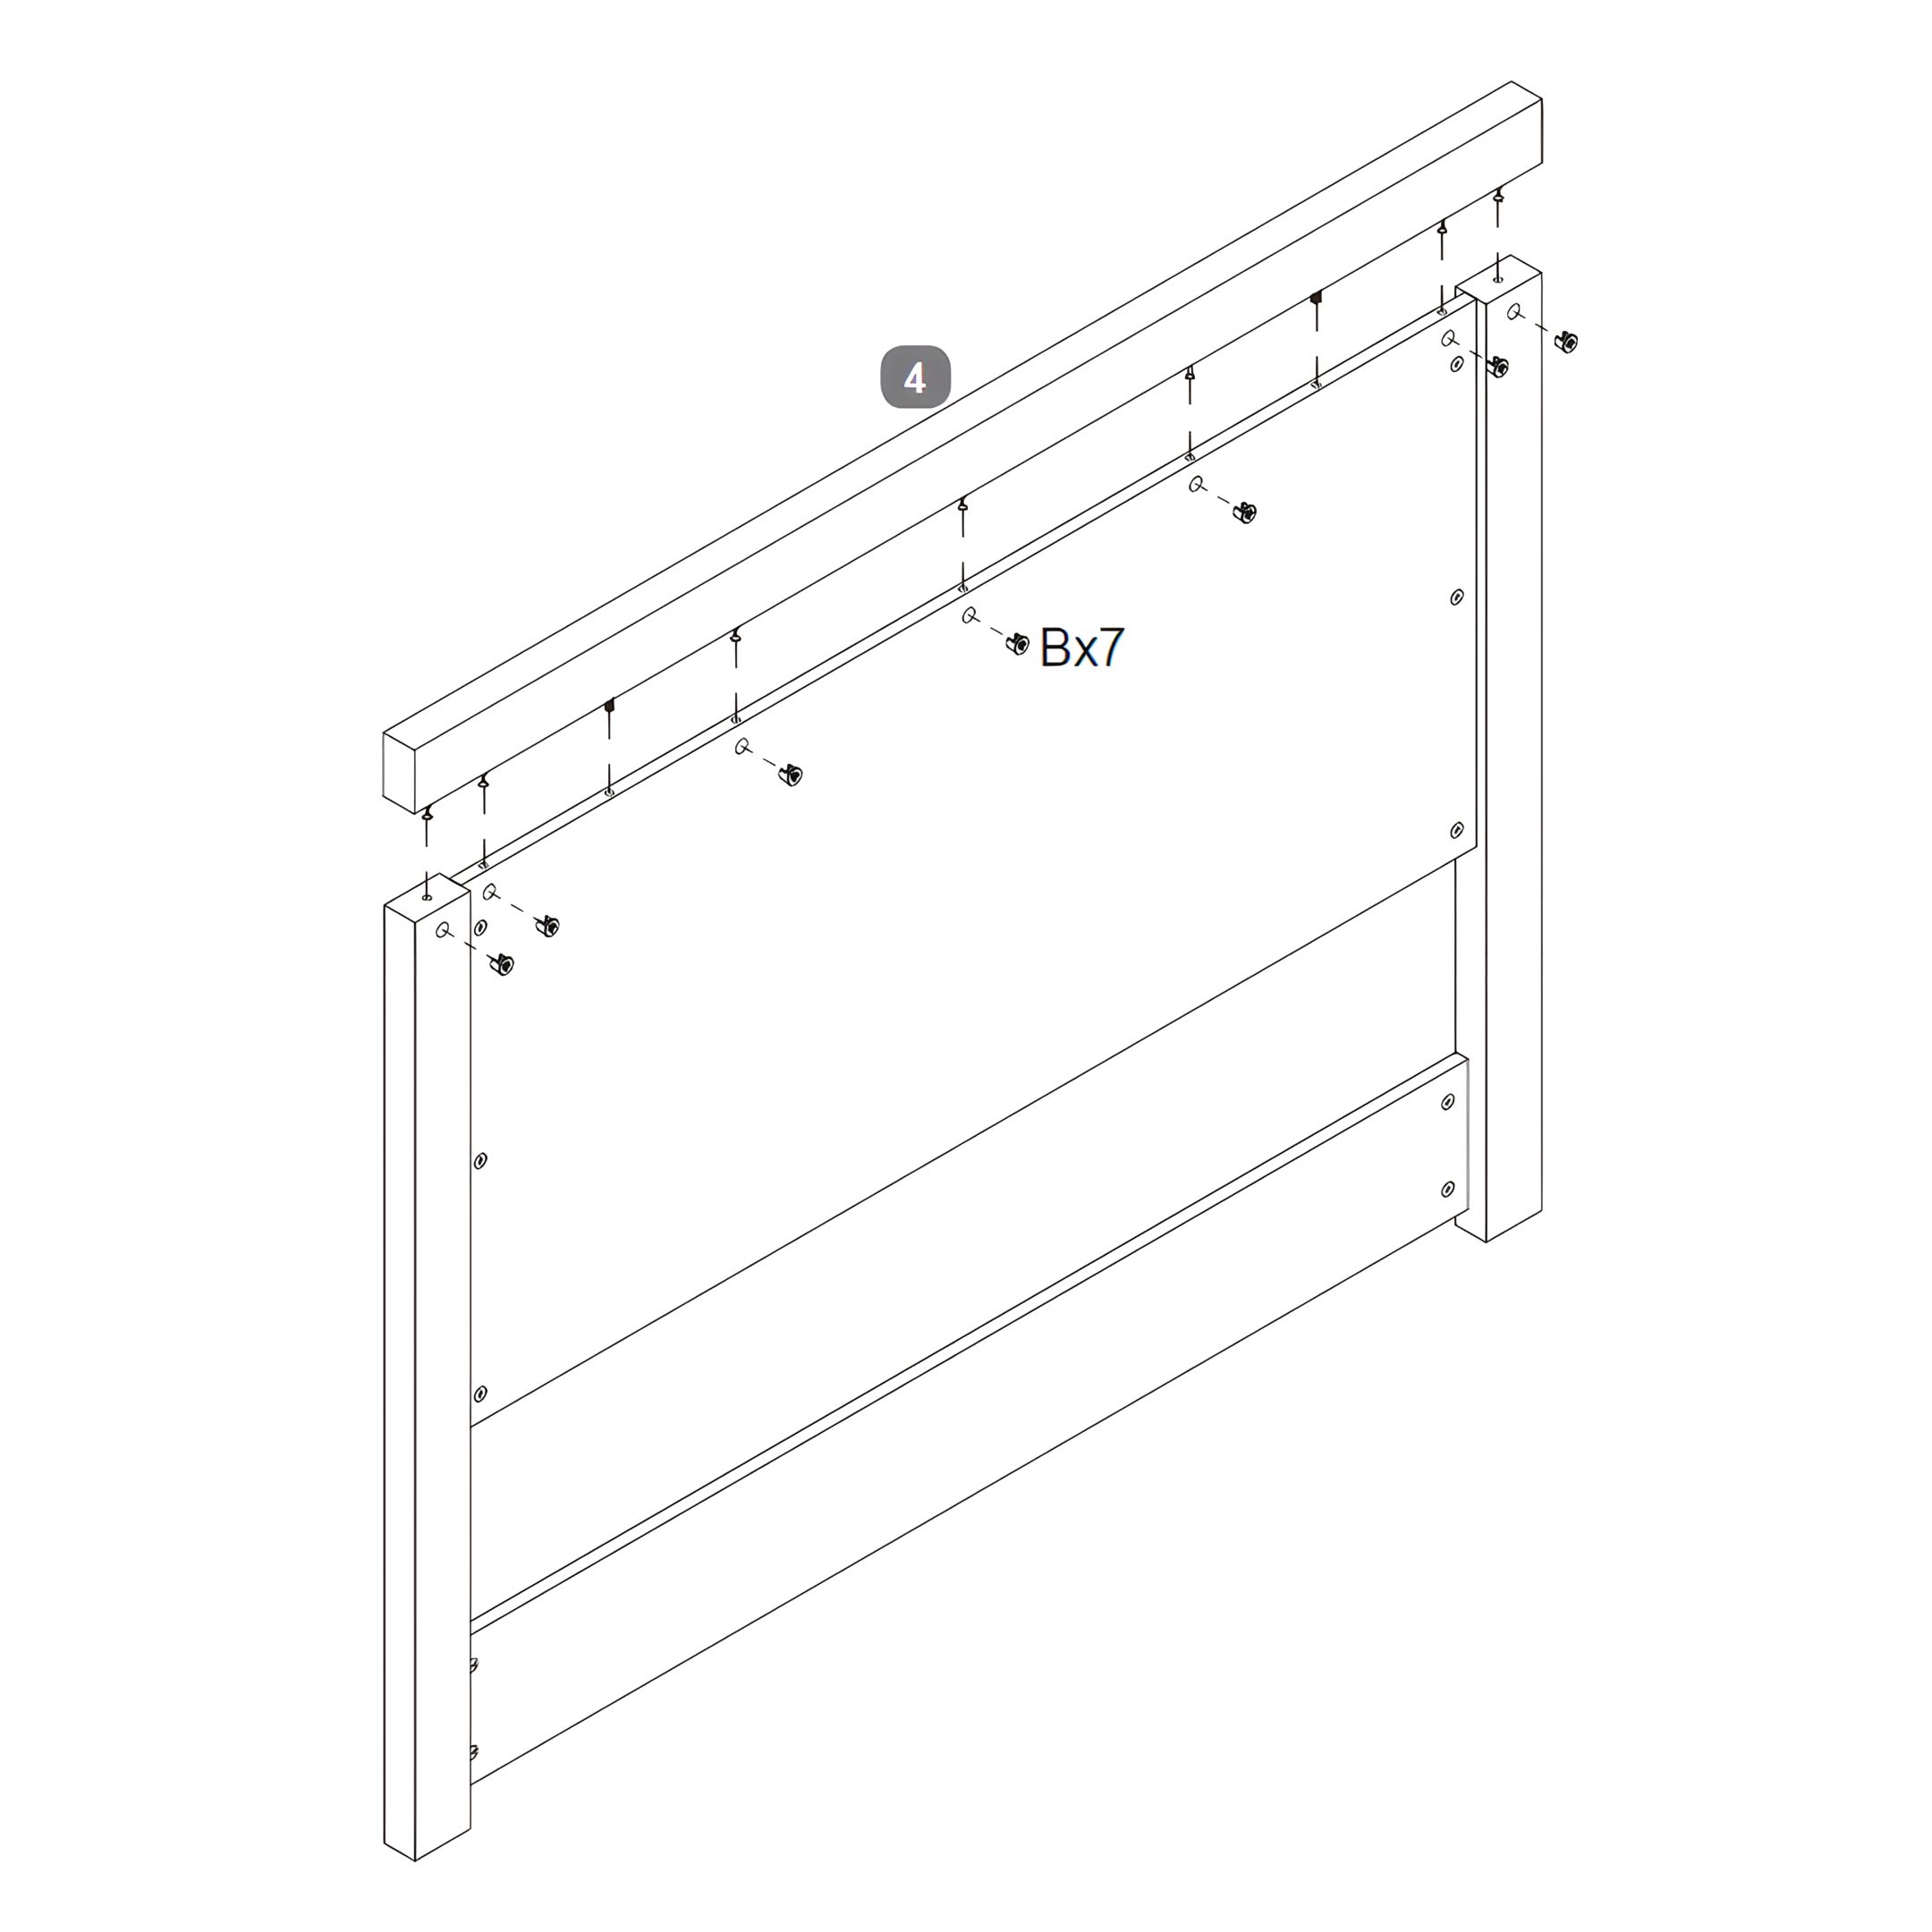
4. Installing the Top Rail of the Headboard
- Align the Top Rail of the Headboard with upper edges of the Headboard Legs and the Inner Panel.
- Fasten the Top Rail to the Headboard Legs and Inner Panel by inserting and tightening seven Cam Locks (B) through the pre-drilled holes. Use a screwdriver to turn each Cam Lock until it is firmly secured.
-
5. Preparing the Headboard and Footboard Panels
- Identify the Headboard Panel (1) and the Footboard (5).
- Insert four Threaded Studs (D) into the pre-drilled holes on each panel.
- Ensure the dowels are securely placed to provide stability during assembly.
-
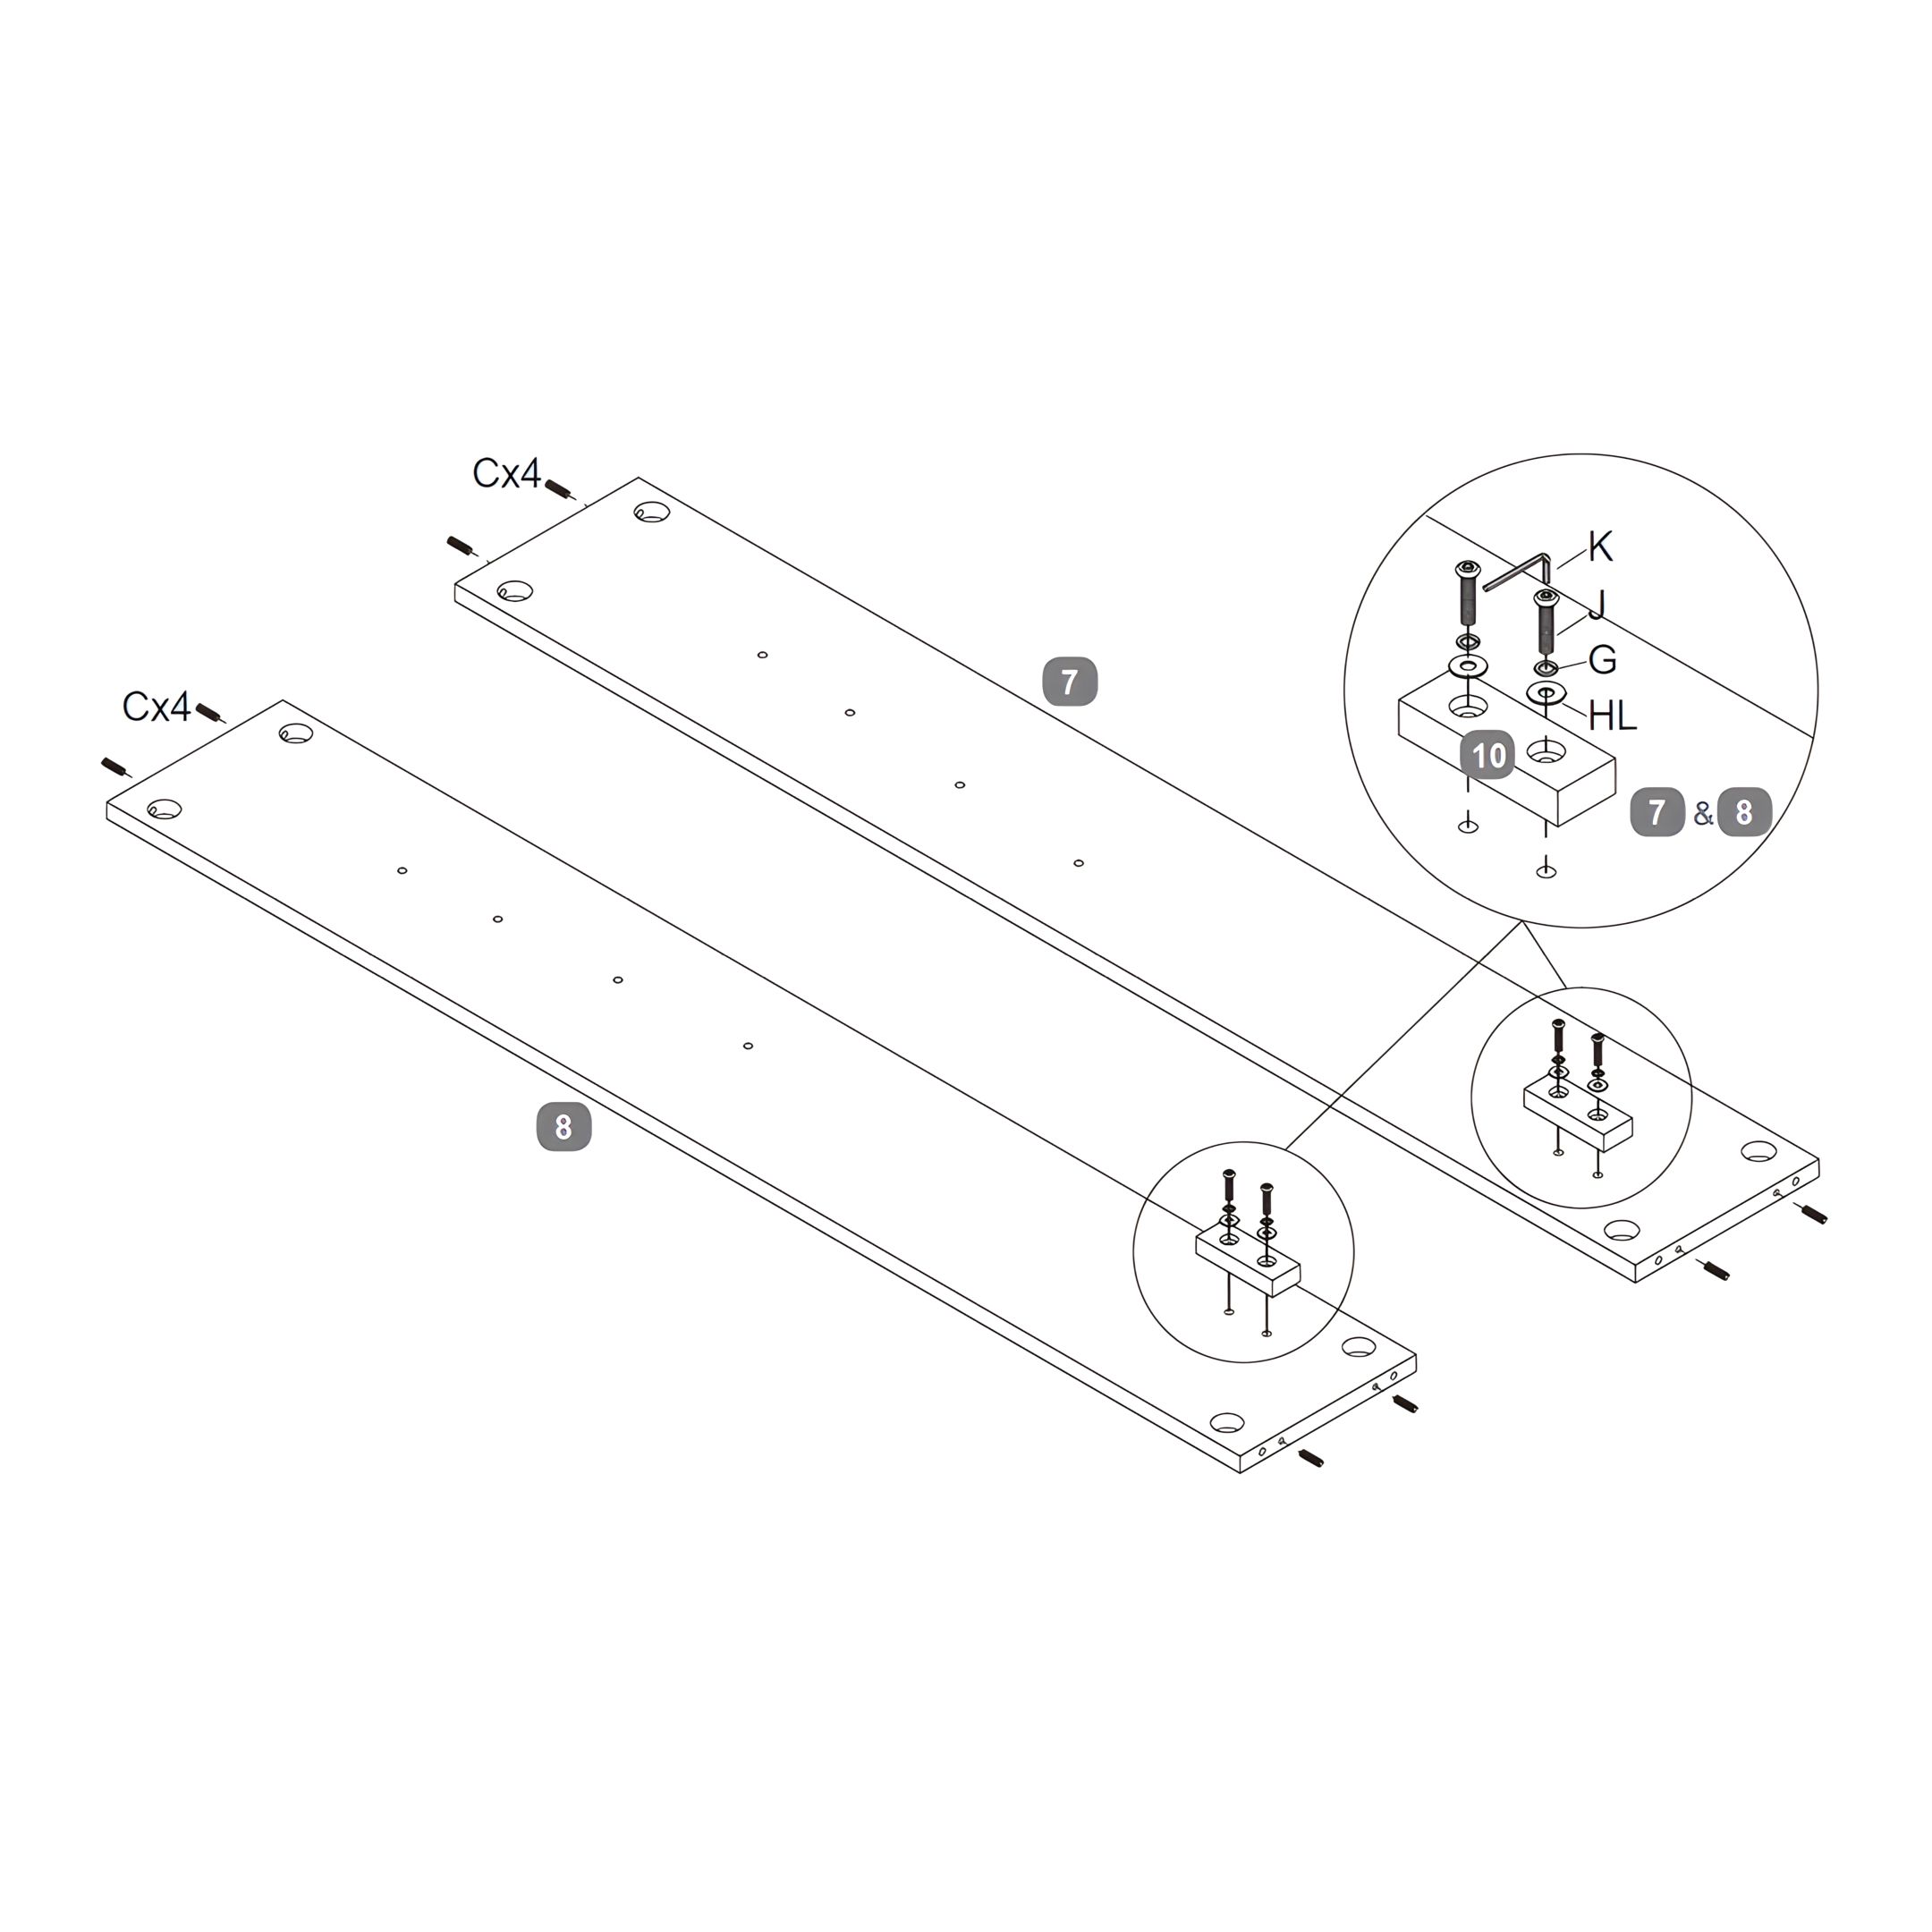
6. Assembling Support Blocks
- Identify the Left-Hand Side Rail (7), Right-Hand Side Rail (8), and the Support Blocks (10).
- Insert eight Dowels (C) into the pre-drilled holes located on the side edges of both Side Rails.
- Align the Support Blocks (10) with the corresponding pre-drilled holes on the Side Rails. Secure them using Bolts (J), Spring Washers (G), and Large Flat Washers (HL). Tighten the assembly with the Allen Key (K) to ensure a firm hold.
-
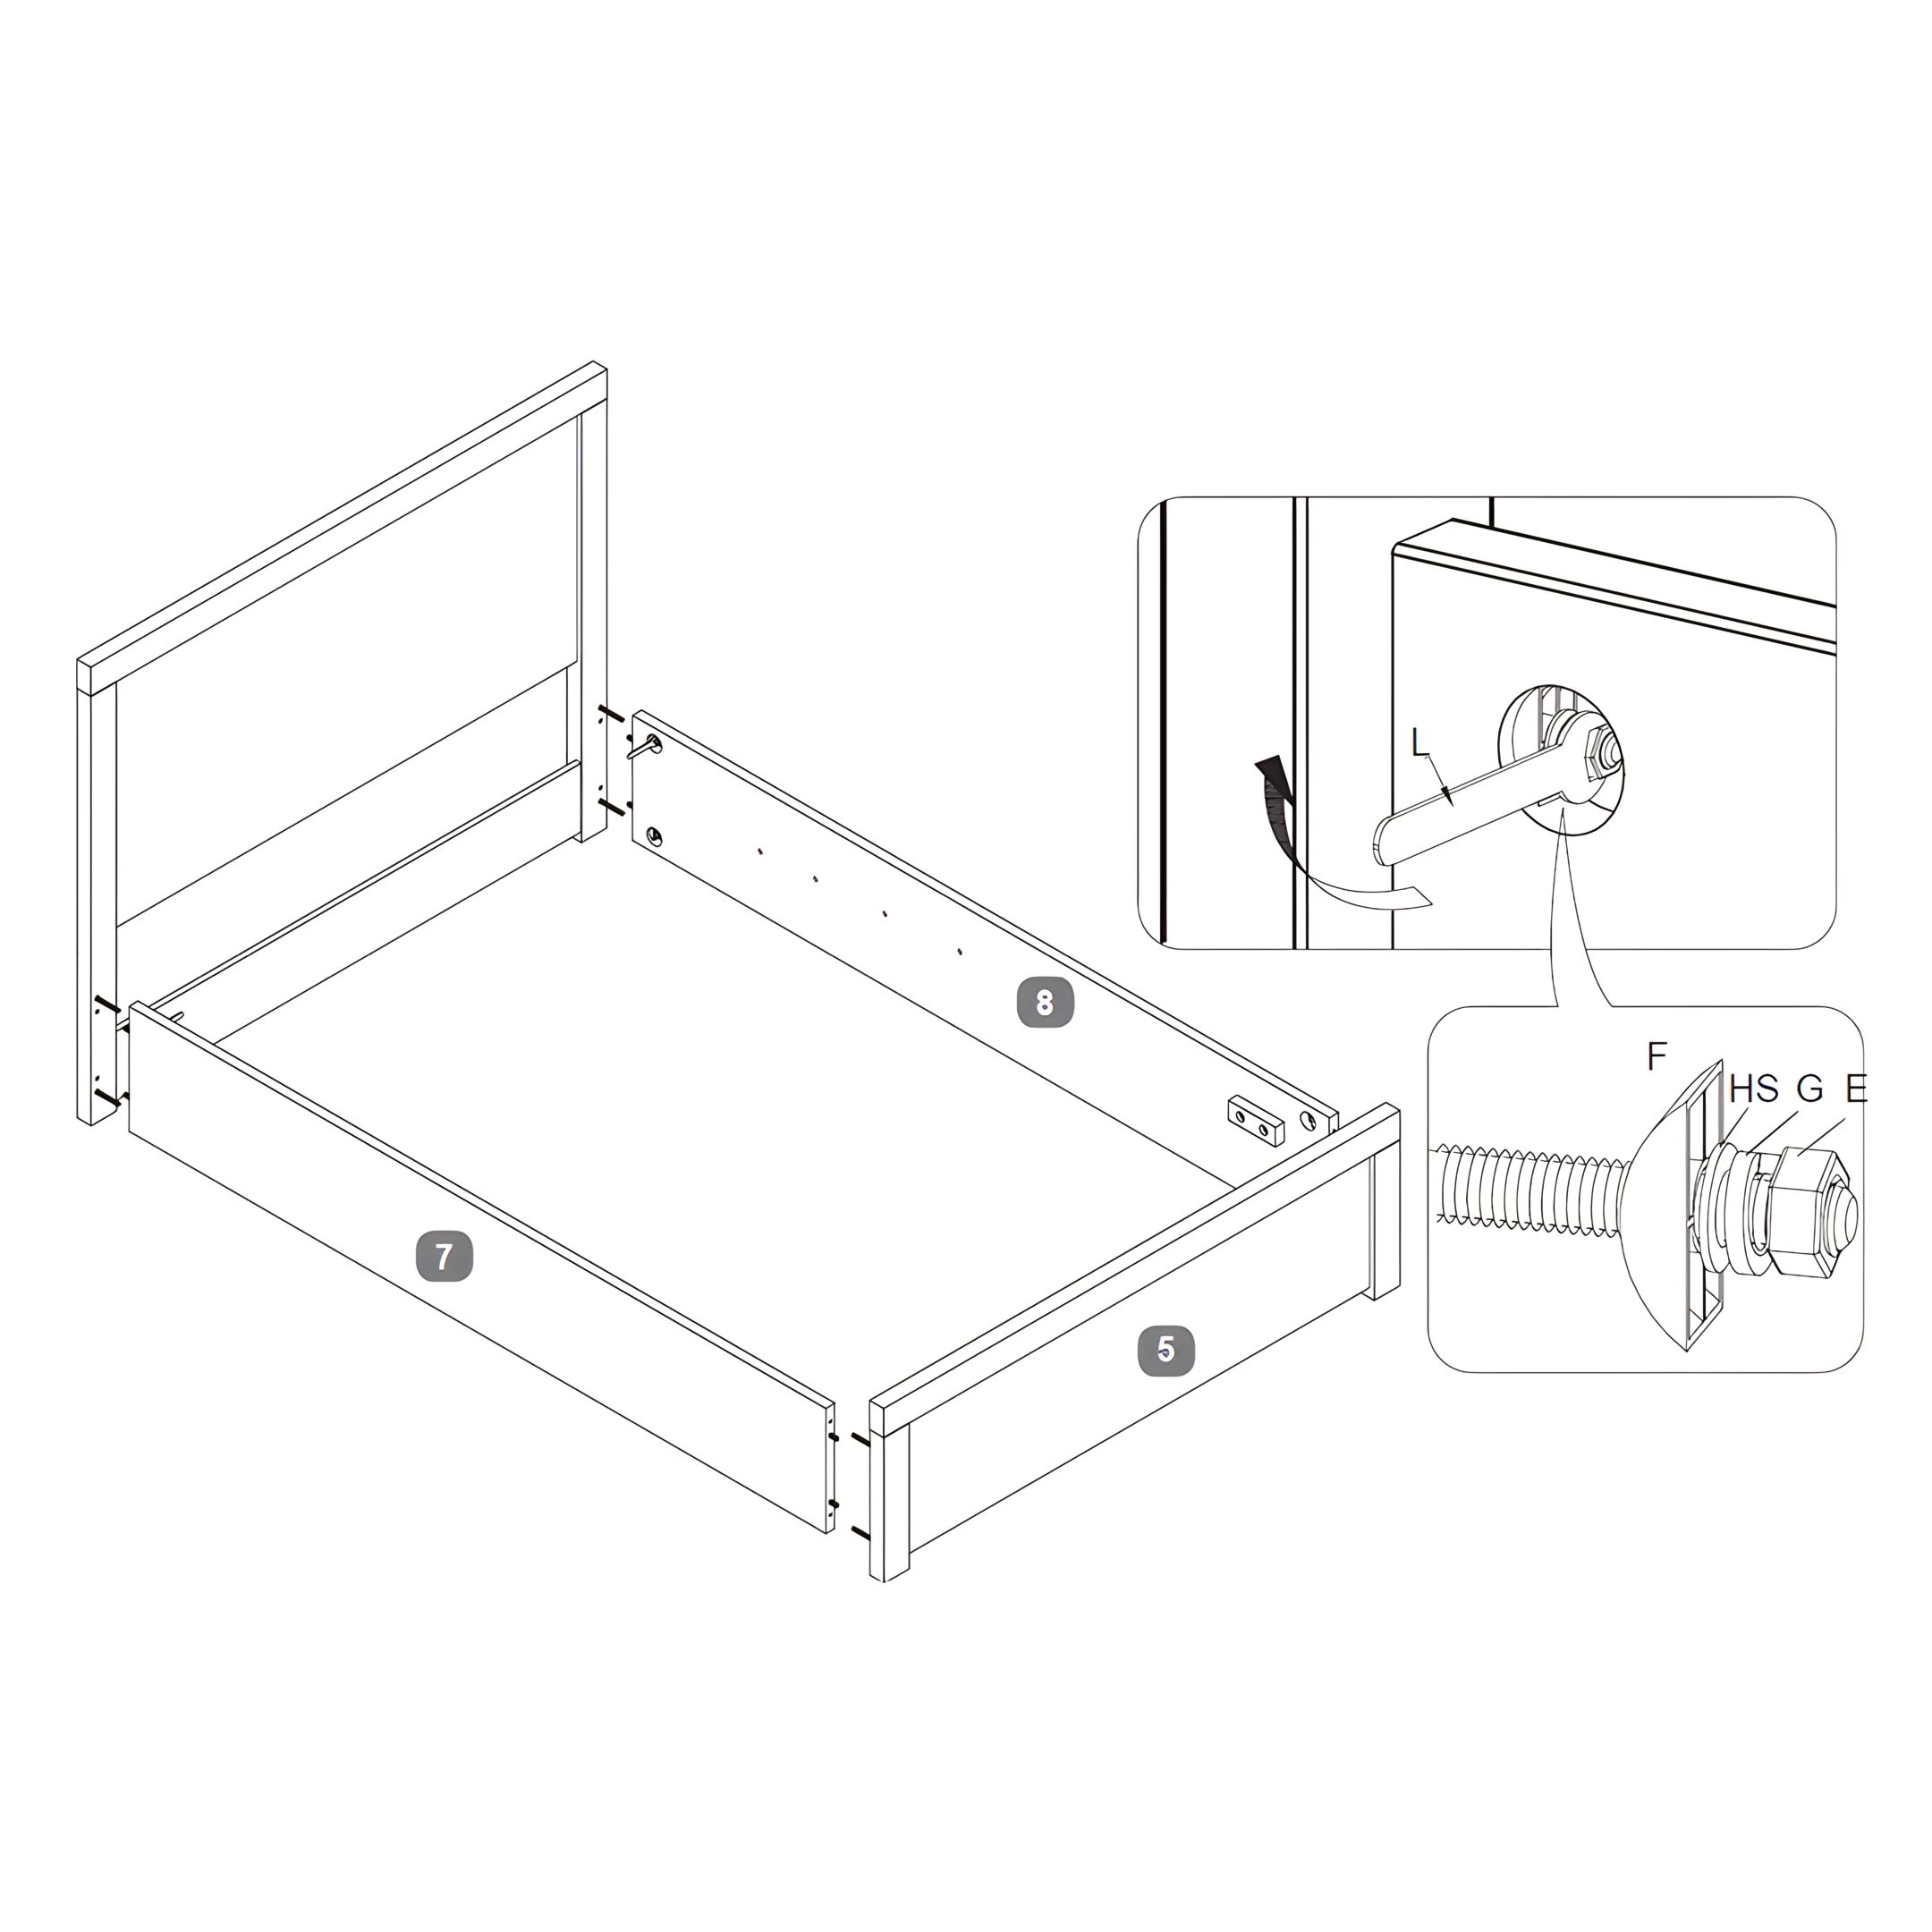
7. Attaching the Side Rails to the Headboard and Footboard
- Position the headboard panel upright.
- Align the Side Rails (7 & 8) with the Headboard, making sure that the Dowels and Threaded Studs fit with the corresponding pre-drilled holes.
- Attach the Side Rails to the Headboard using the provided bolts and washers.
- First insert a Half-moon Bracket (F), followed by a Small Flat Washer (HS), a Spring Washer (G) and tighten with the Nut for bolts (E) using a Spanner (L).
- Repeat the process for the Footboard (5).
-
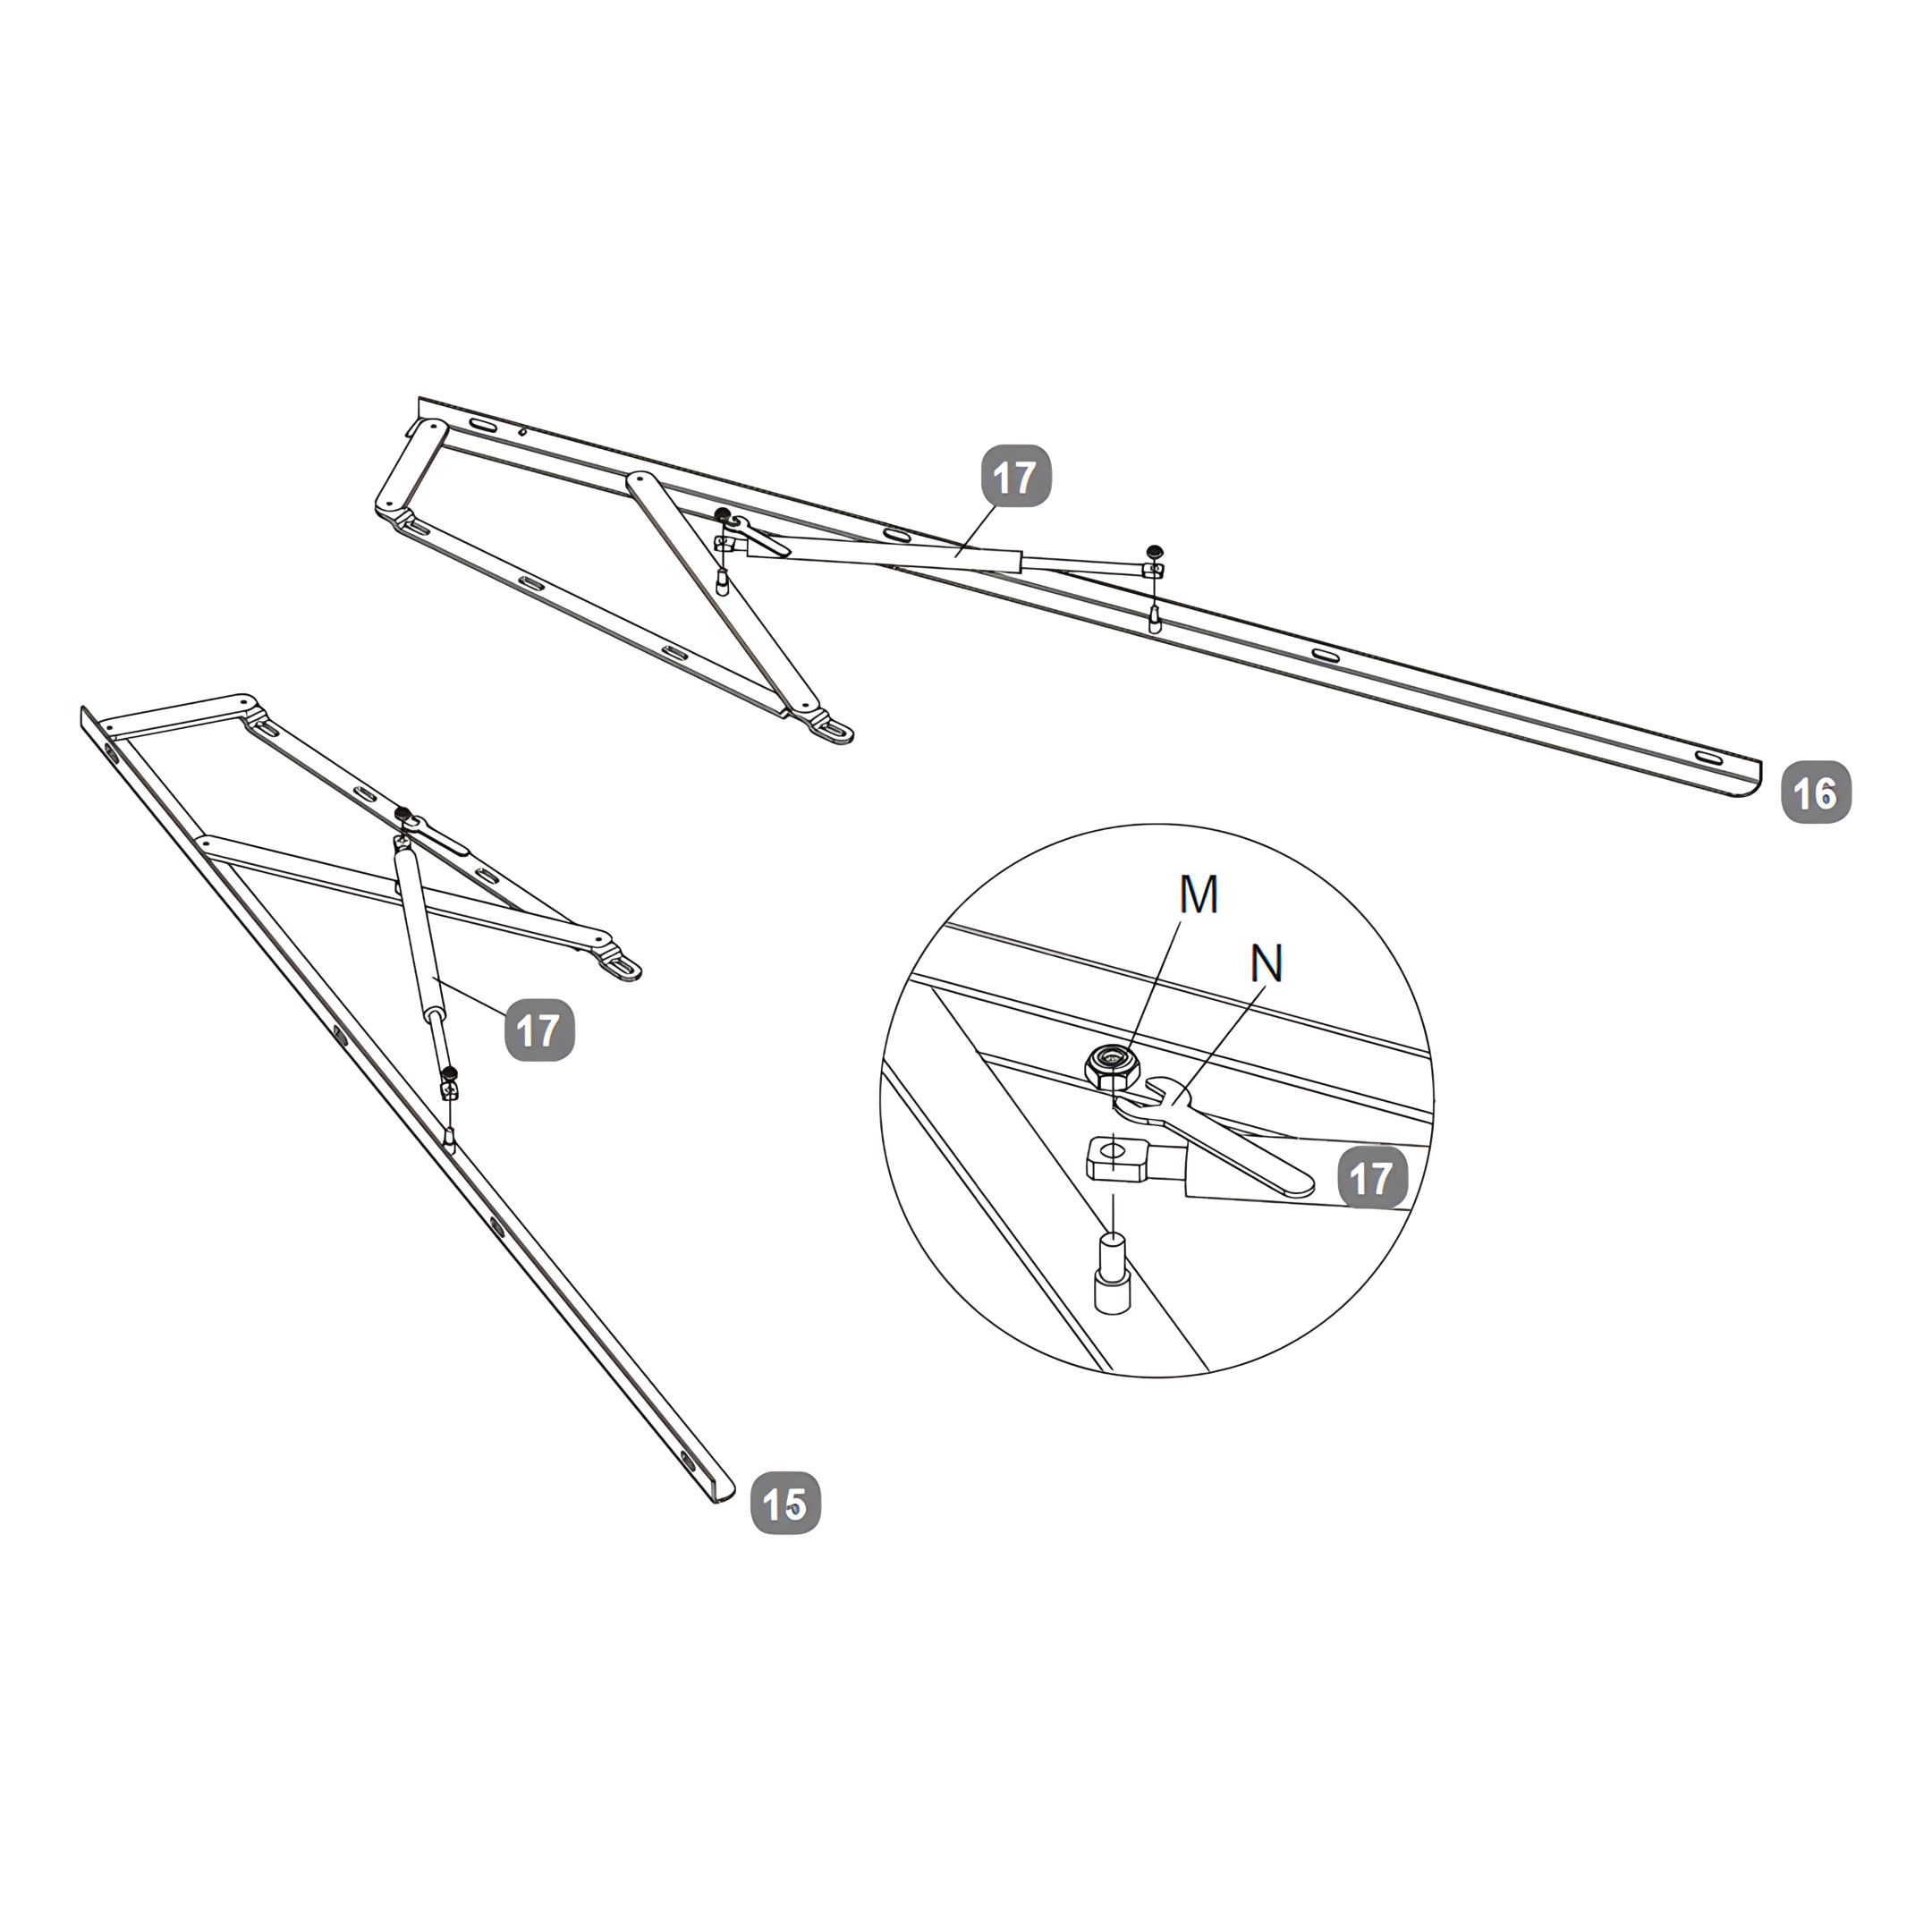
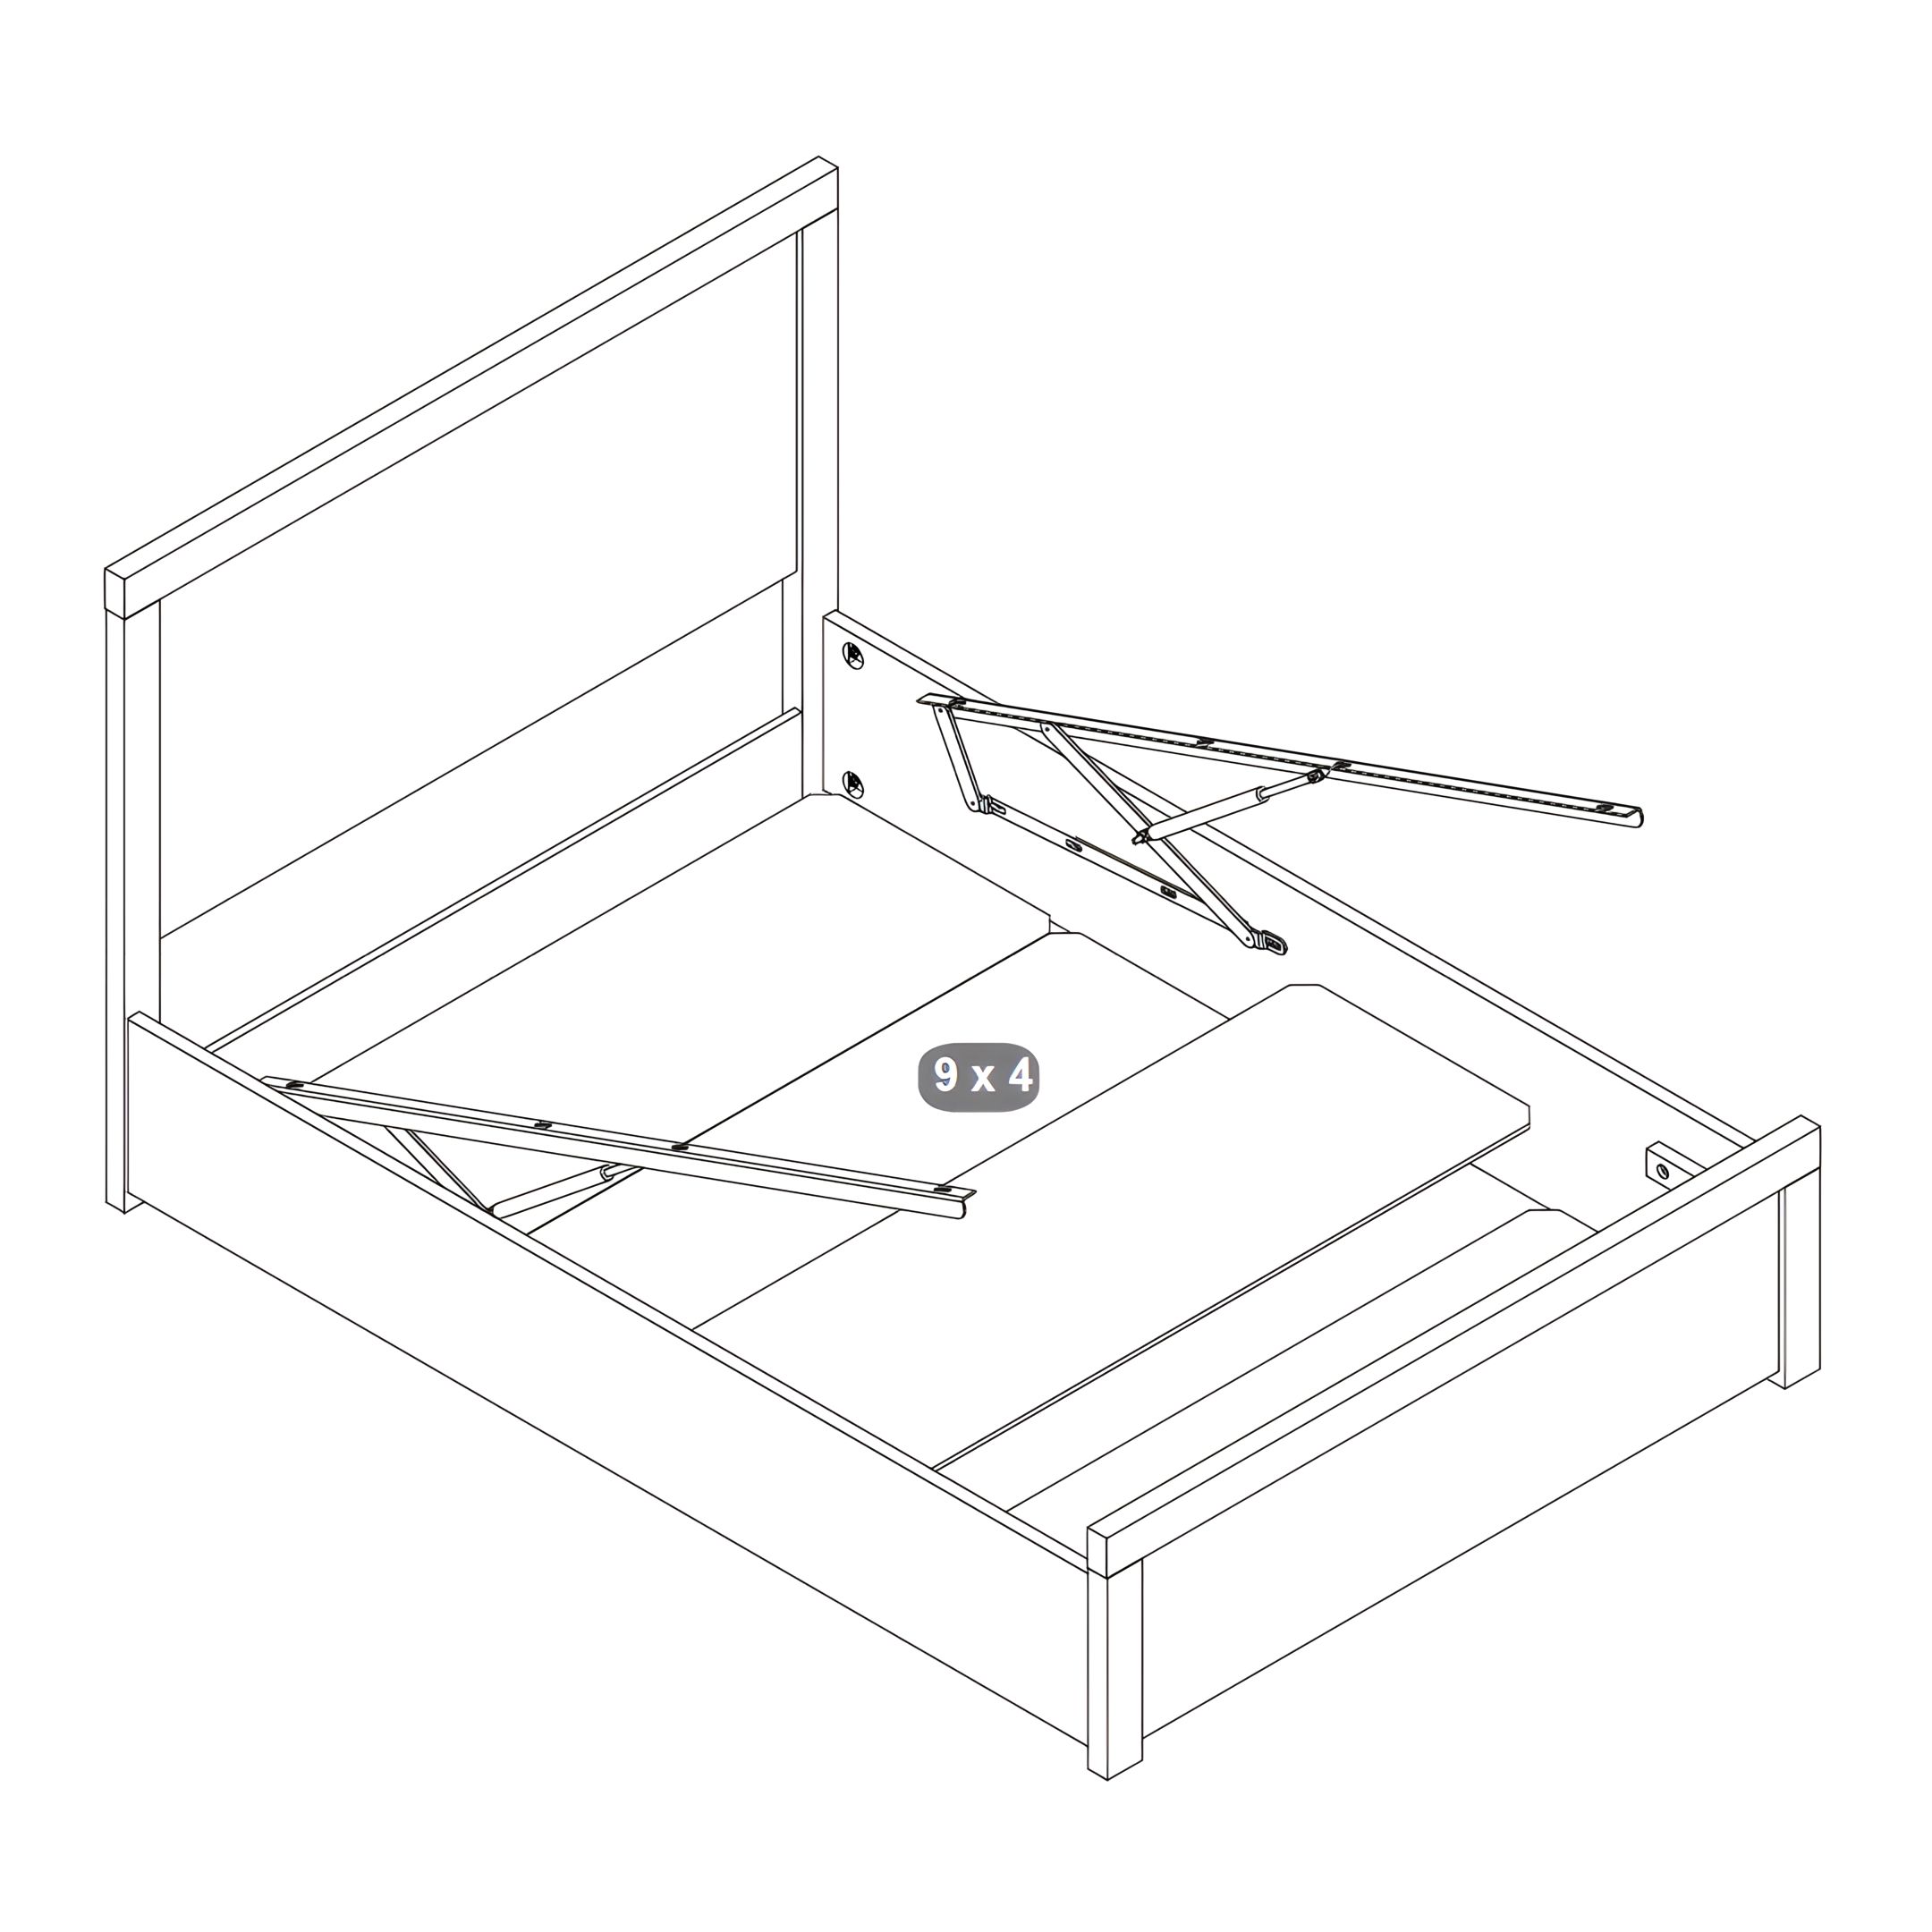
8. Installing the Lift Mechanisms and Gas Lift Pistons
- Identify the Left-Hand Lift Mechanism (15) and the Right-Hand Lift Mechanism (16).
- For both the Left-Hand and Right-Hand Lift Mechanisms, locate the attachment points for the Gas Lift Pistons (17).
- Fasten each Gas Lift Piston (17) to the Lift Mechanisms using Flanged M8 Lock-Nuts (M).
- Tighten the Lock-Nuts with a Spanner for Flanged M8 Lock-Nuts (N), ensuring a secure fit without over-tightening.
Note: The installation of the Gas Lift Pistons is a critical step for ensuring the smooth operation of the bed's lift feature. Ensure all connections are secure and that the pistons have the necessary range of motion for effective performance.
-
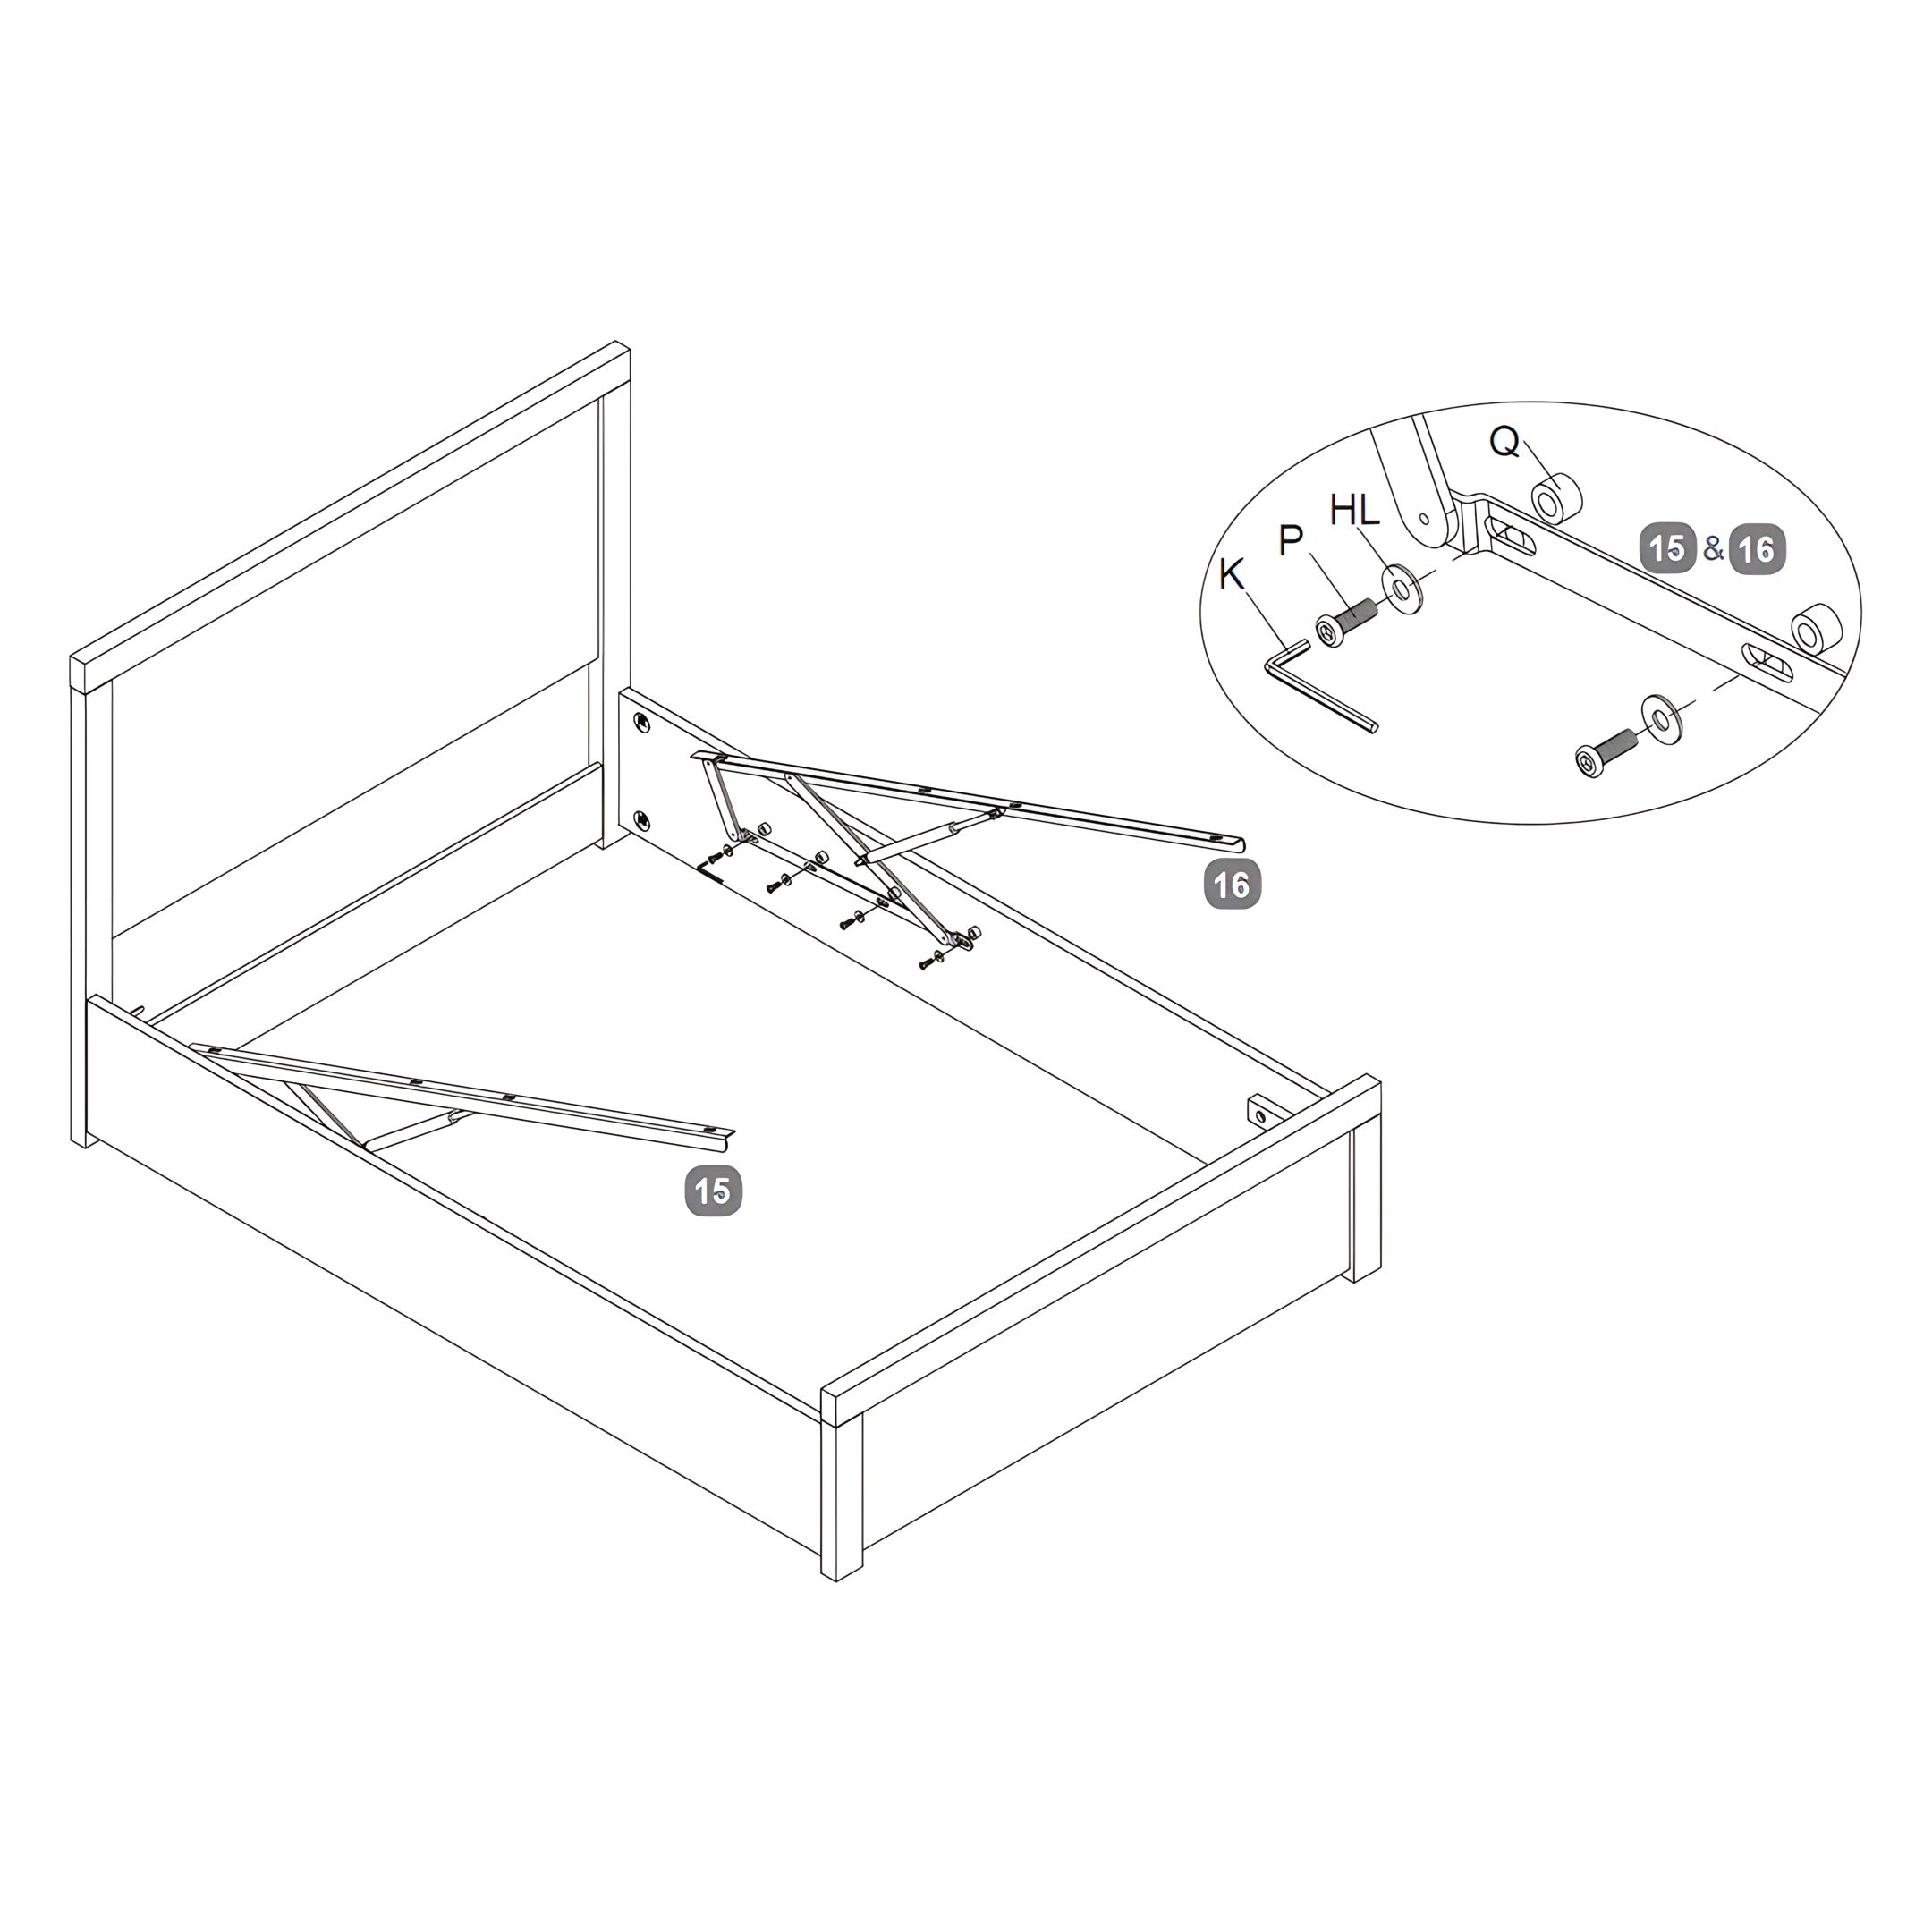
9. Installing the Lift Mechanisms
- Assemble the Hardware, gather 8 Bolts (P), 8 Large Flat Washers (HL), and 8 Plastic Spacers (Q), four for each side.
- Place Plastic Spacers (Q) against the side attachment points on the Side Rail.
- Align the Lift Mechanisms (15 & 16) over the spacers and place a Large Flat Washer (HL) on each mechanism, then insert Bolts (P - M8x35mm) through the assembly.
- Tighten the bolts with the Allen Key (K), ensuring each component is firmly fixed but allows for movement.
-
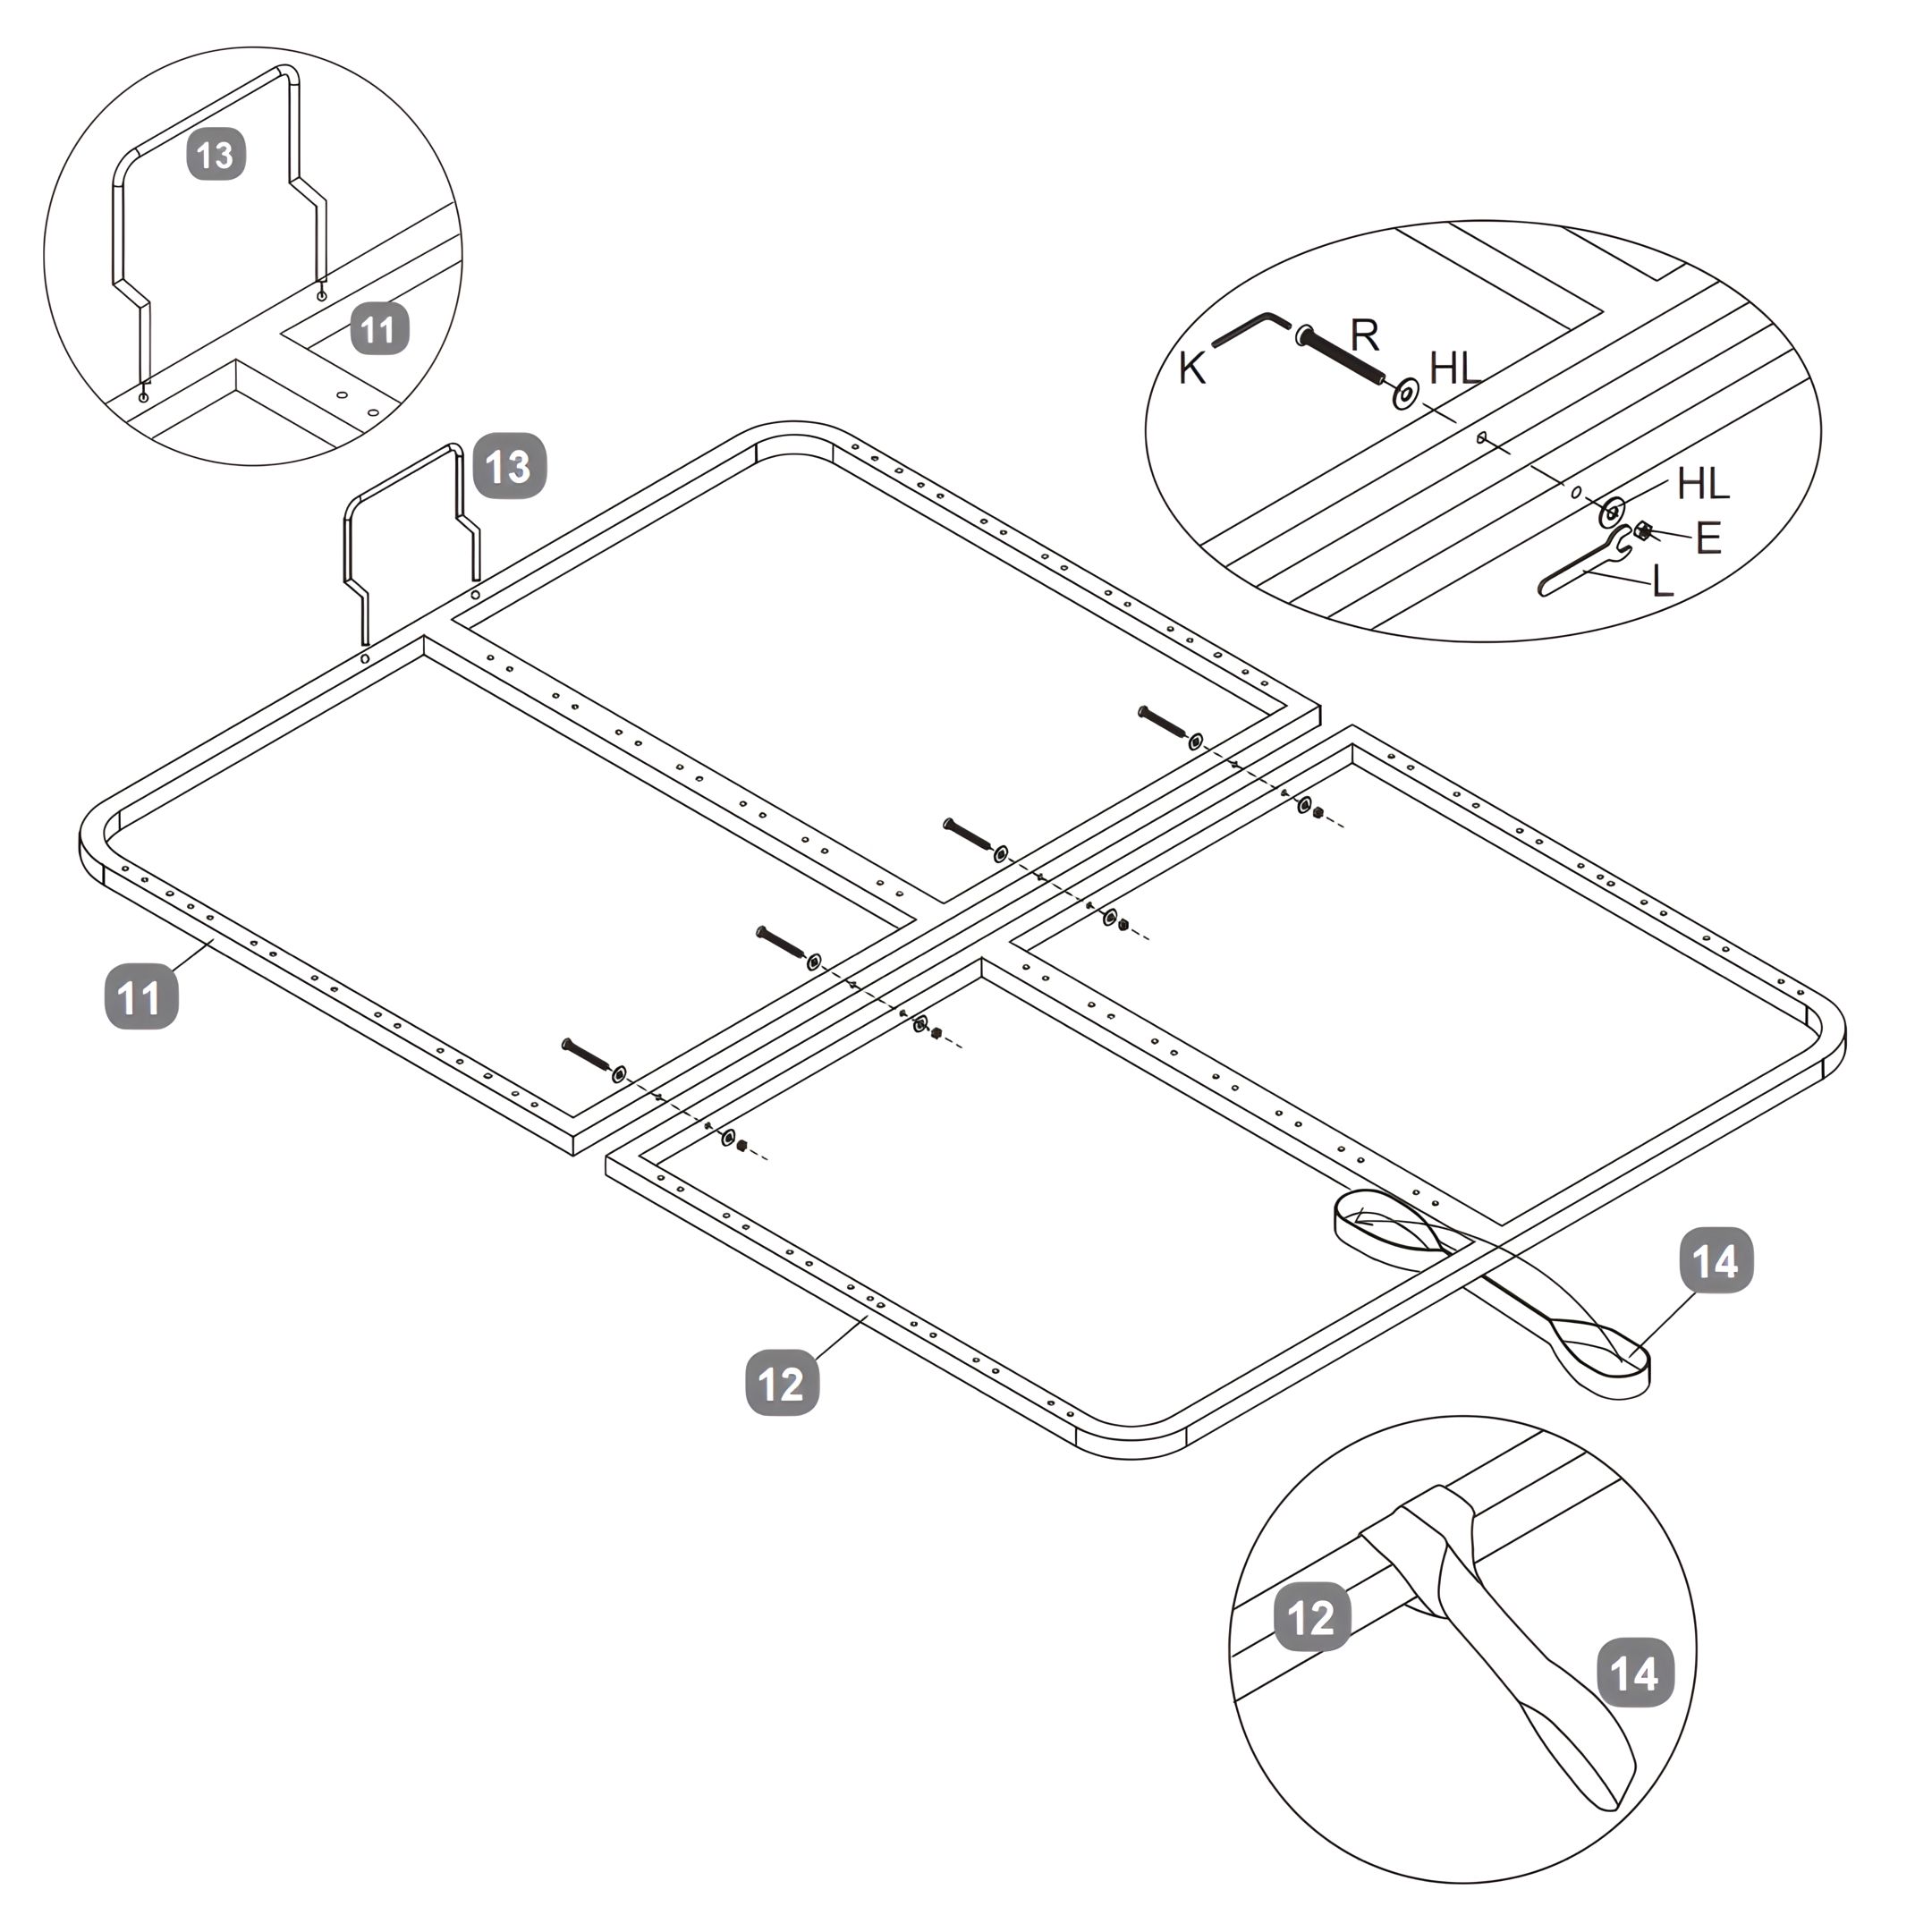
10. Assembling the Metal Slat Frames
- Identify the Metal Slat Frame - Headend (11) and Footend (12), and align them as indicated in the diagram.
- Insert Bolts (R) through the aligned frames, adding a Washer (HL) on each side of the bolt. On the opposite side, add another Washer (HL) and a Nut (E). Tighten each assembly using a Spanner (L).
- Repeat this for all four pre-drilled holes.
- Attach the Fabric Handle (14) to the designated area on component 12 as shown in the close-up diagram. Ensure the Fabric Handle (14) is securely fastened and easily accessible for operating the ottoman lift mechanism.
- Attach the Mattress Stopper (13) at the top of the Metal Slat Frame - Headend to prevent the mattress from shifting when the bed is lifted or lowered. Ensure it is securely in place to provide stability and safety during use
-
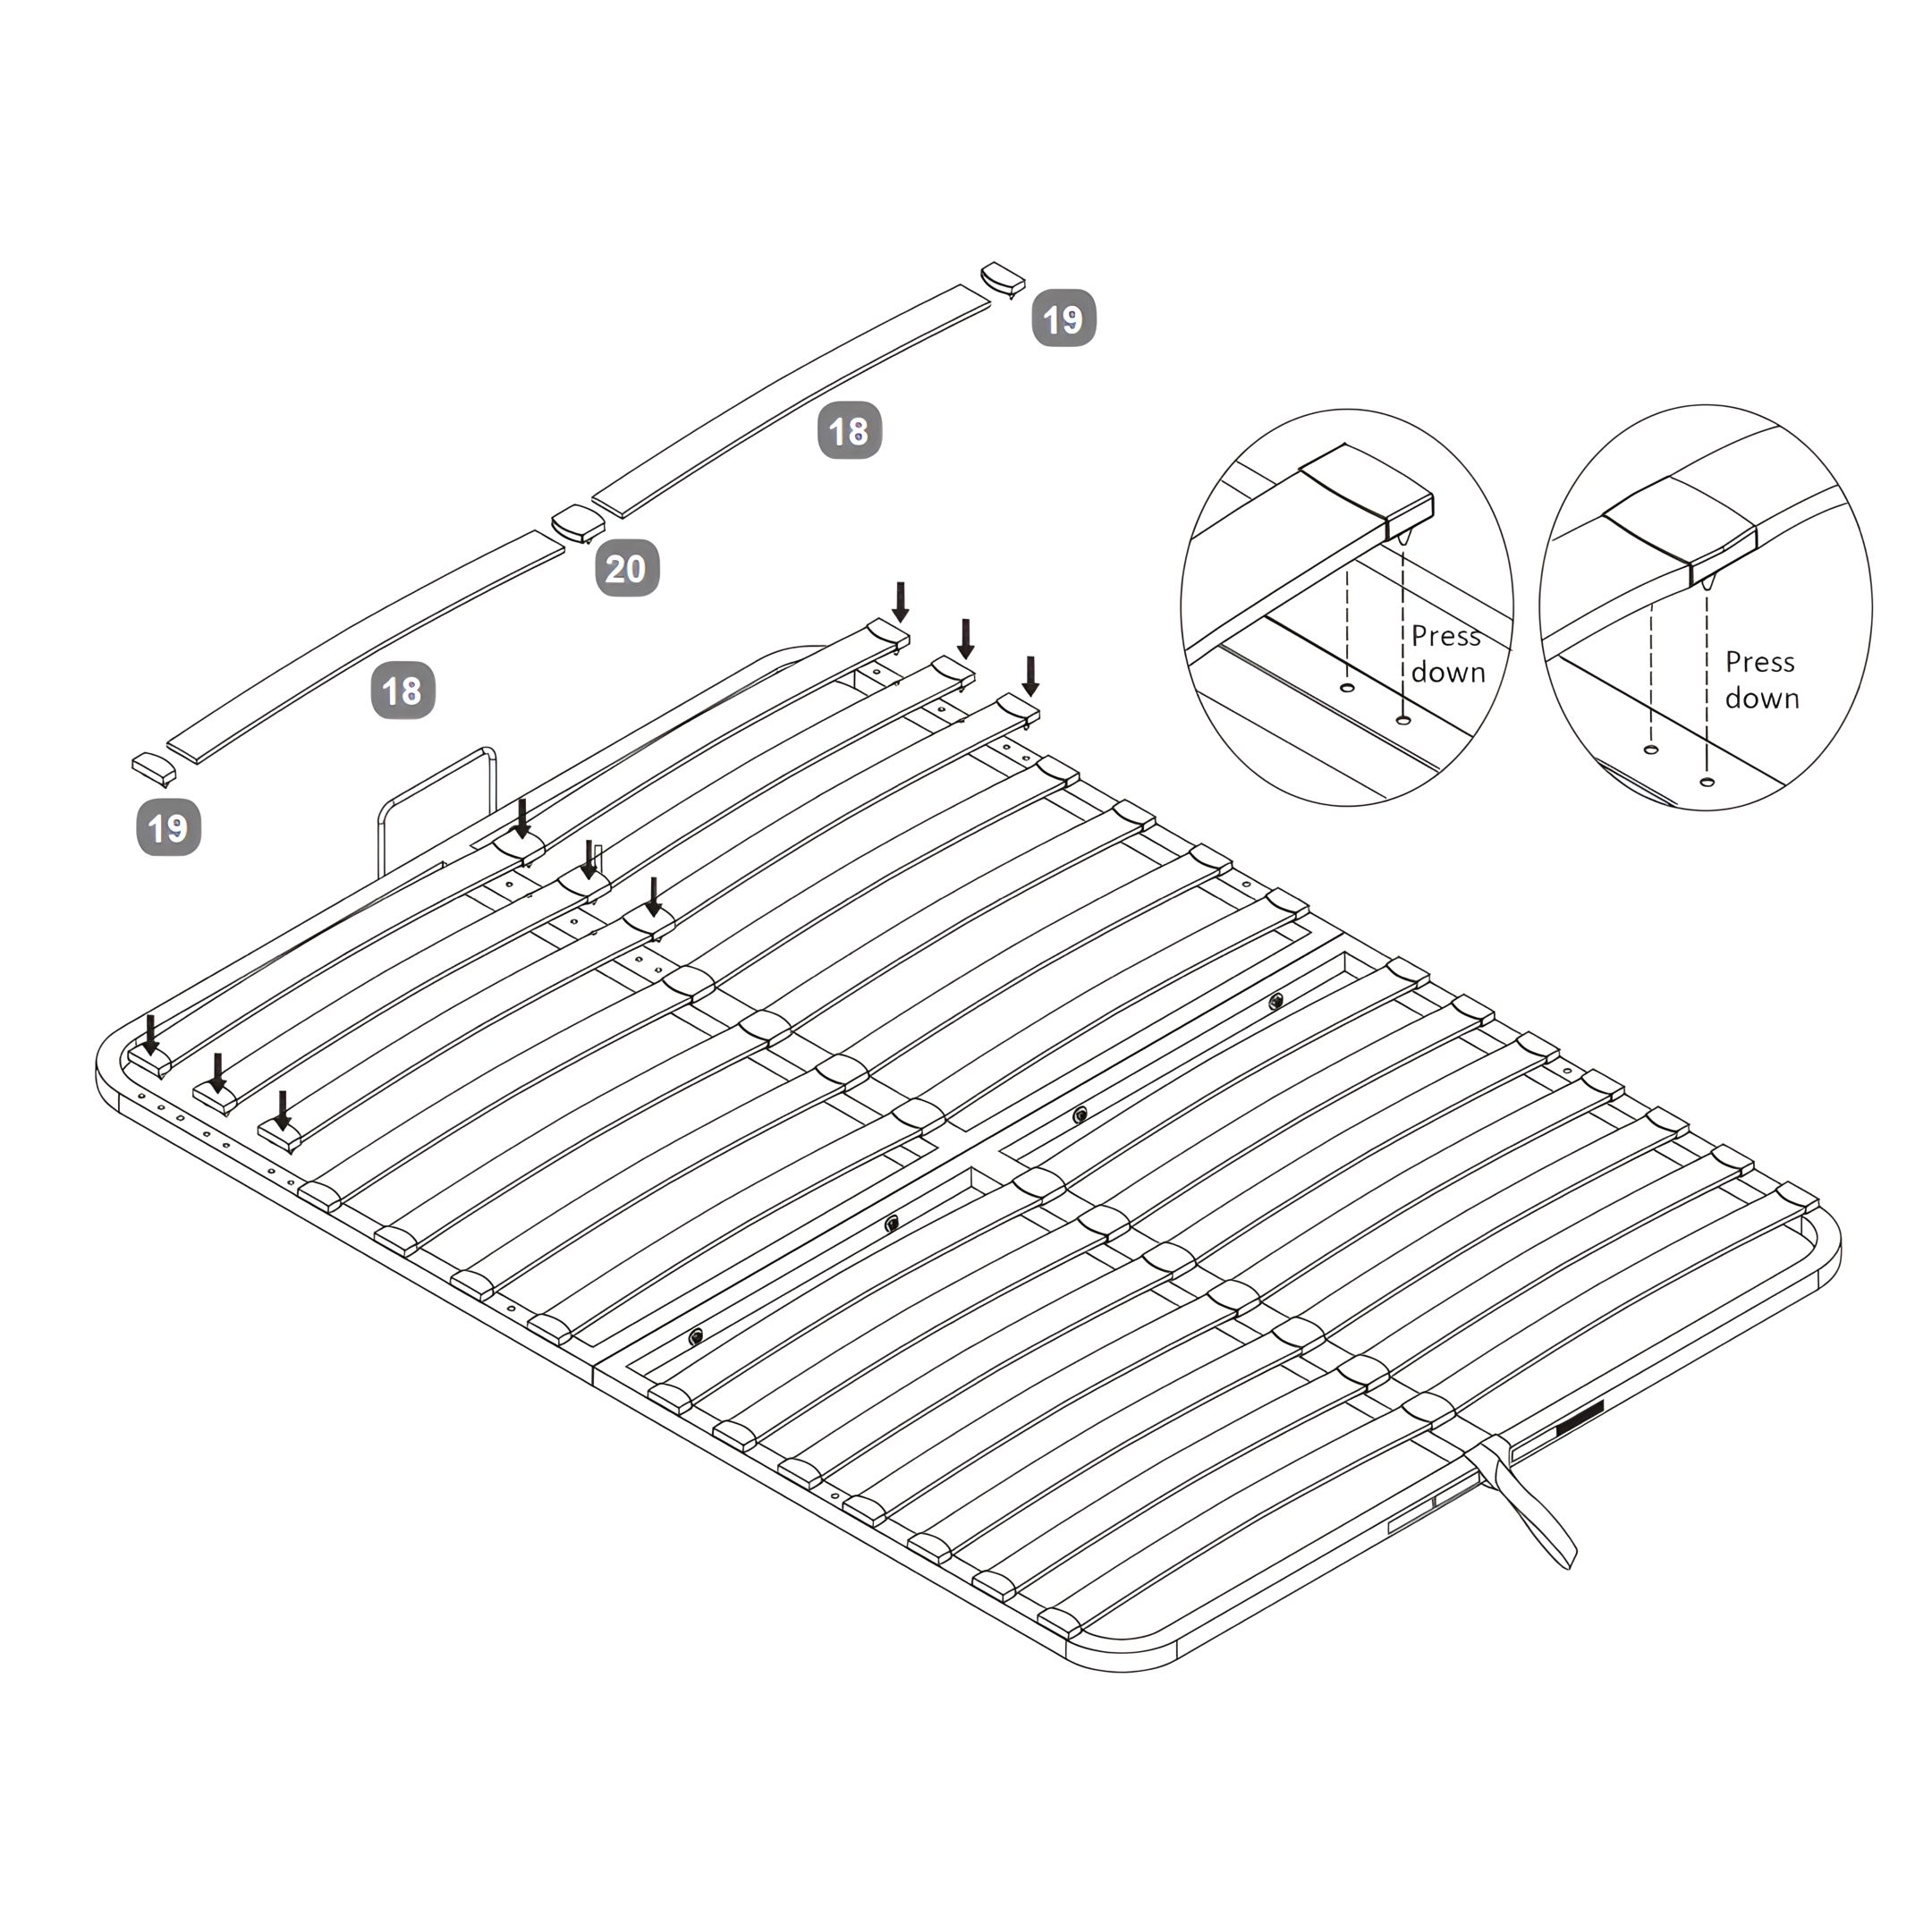
11. Installing Slats and Plastic Caps
- Lay out the Bentwood Slats (18) across the bed frame, spacing them evenly.
- Secure each end of the slats using Single Plastic Caps (19) by snapping them into the designated holes on the frame.
- Press down a Double Plastic Cap (20) at each middle connection point where slats meet, ensuring stability and a secure fit, as demonstrated in the close-up diagrams.
- Test the setup by pressing gently on the slats to check for any movement or looseness, adjusting as needed.
Note: Use 24 slats for a double bed and 28 slats for a king bed.
-
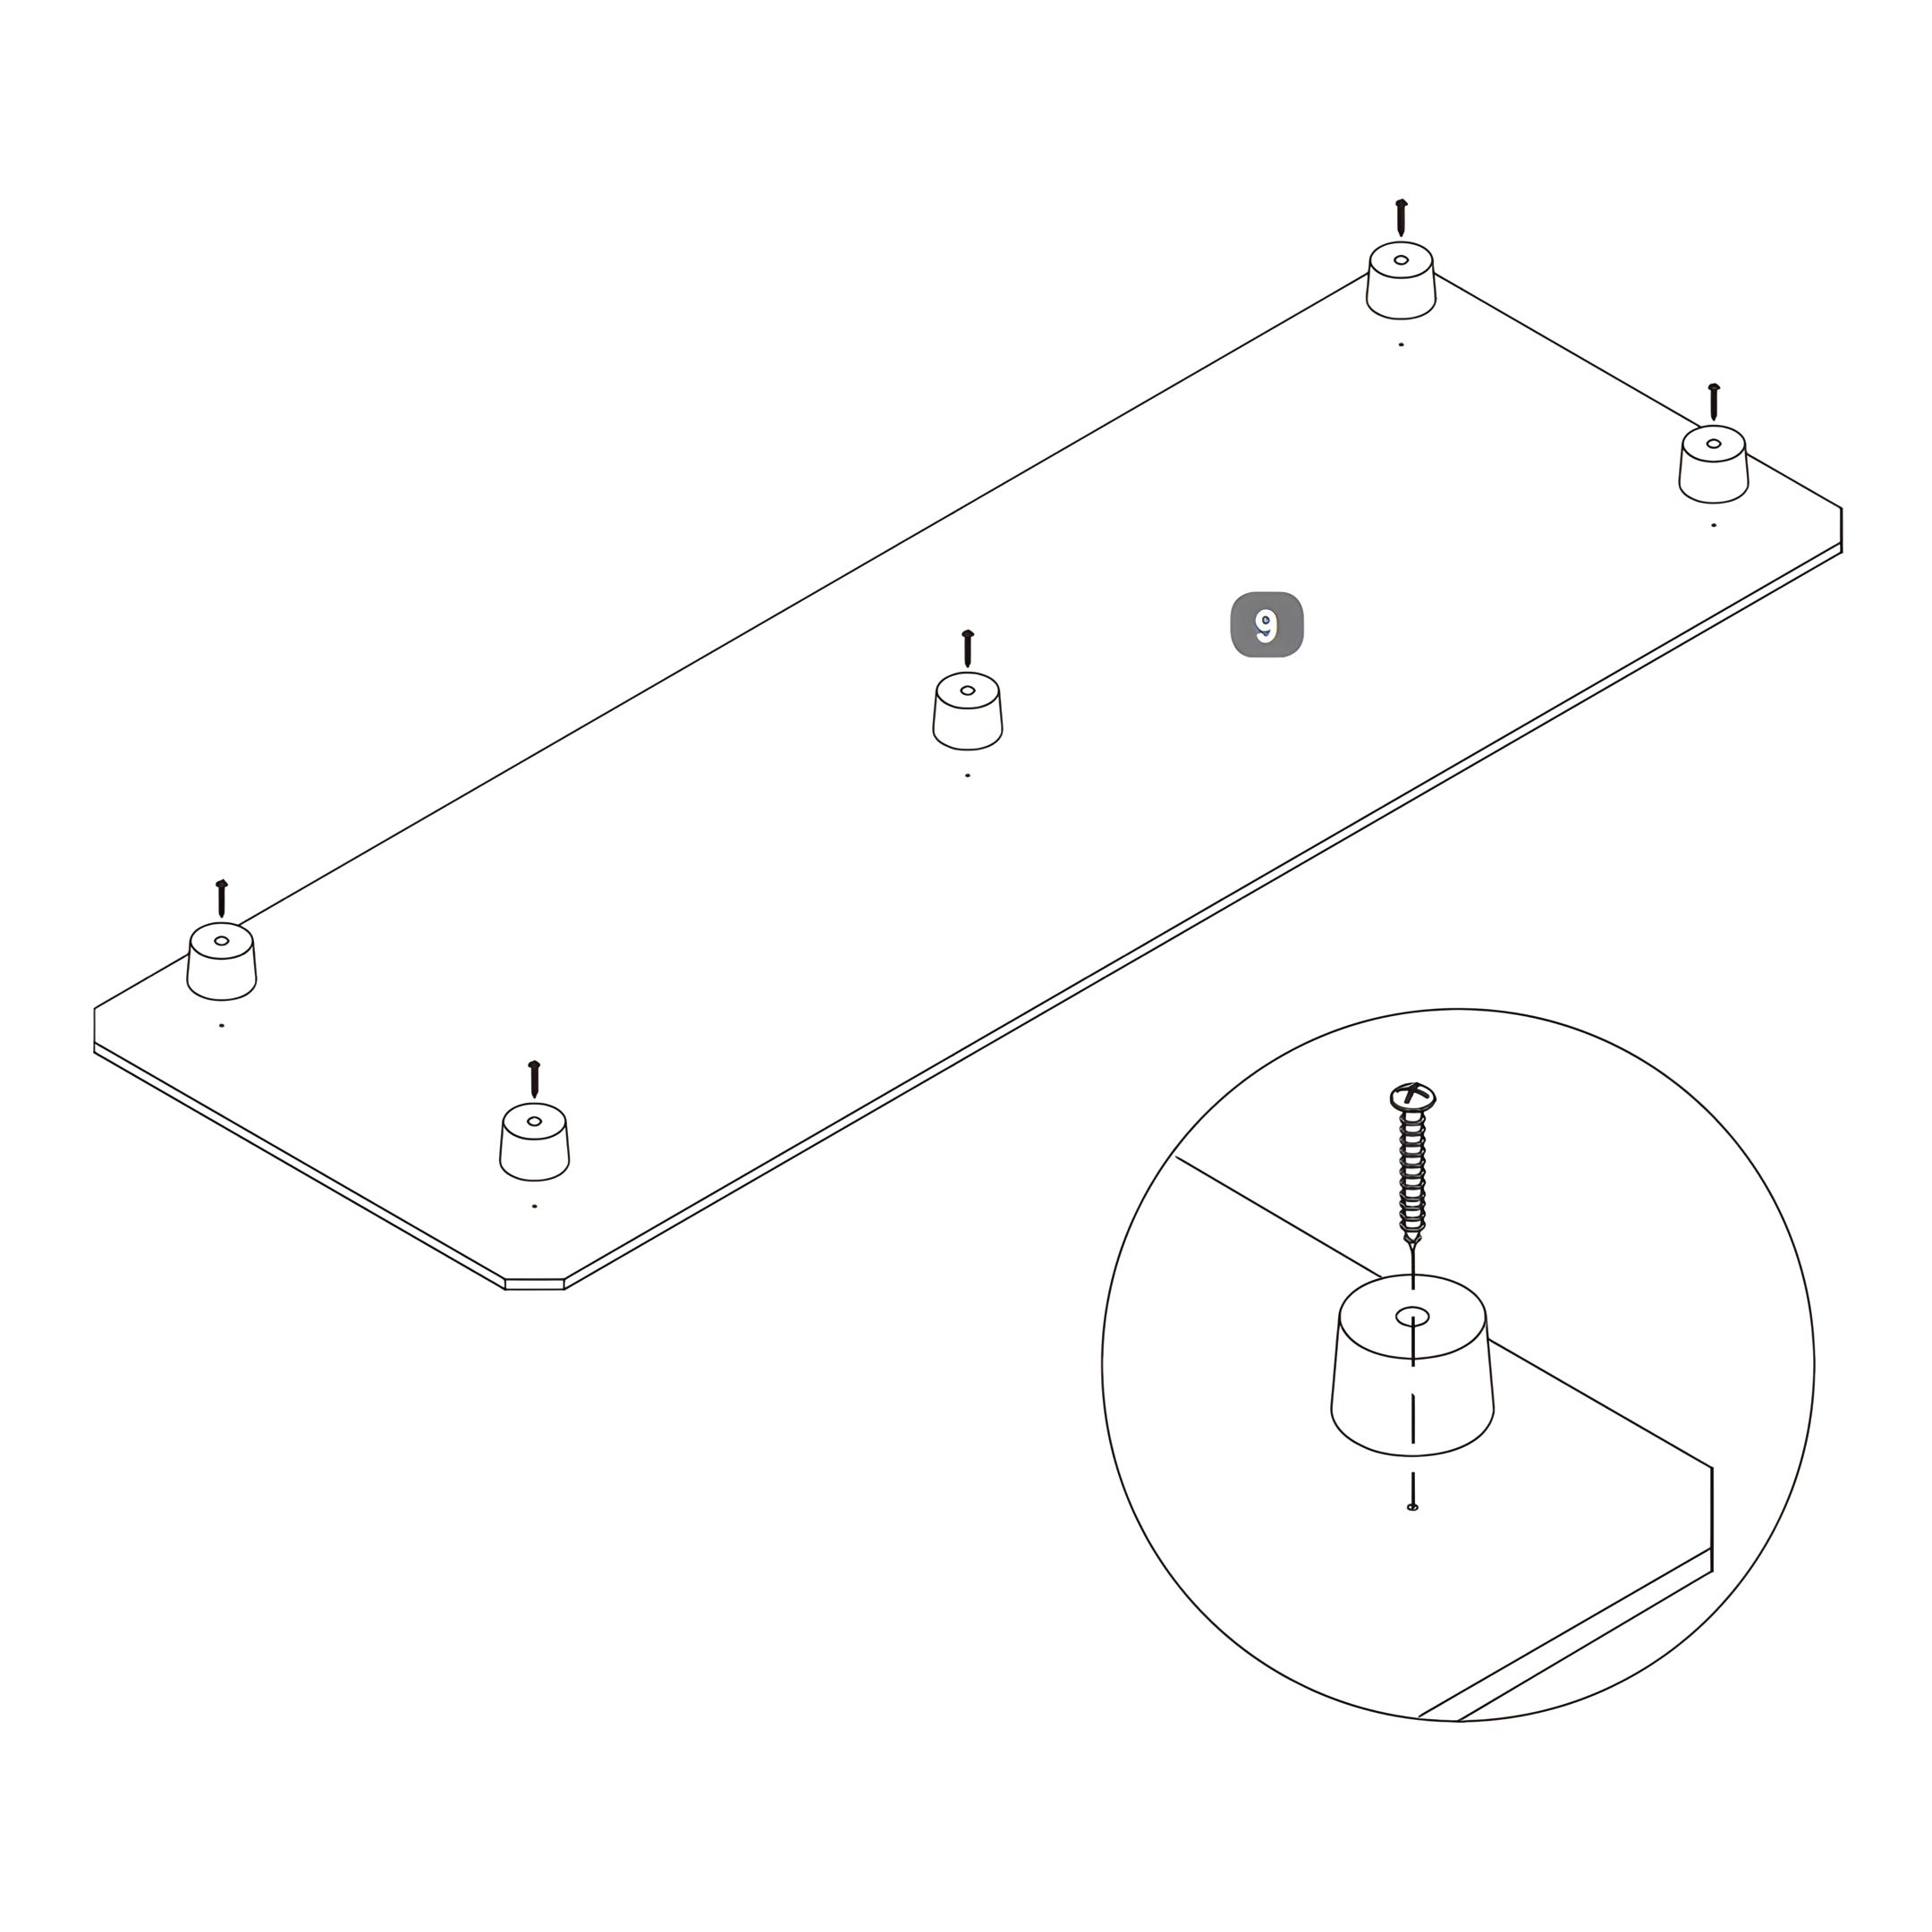
12. Attaching Feet to Base Boards
- Position the Base Board (9) on a flat surface.
- Locate the pre-marked spots on each corner and center of the Base Board where the Plastic Feet (U) will be attached.
- Use Screws (T) to secure each foot in place, tightening them until the foot is firmly attached to the Base Board. Ensure not to overtighten to prevent damage.
- Repeat this process for all four of the Base Boards
-
13. Installing the Base Boards Position the four Base Boards (9) at the bottom of the bed frame. Align each board within the frame's edges, ensuring they are evenly spaced.
-
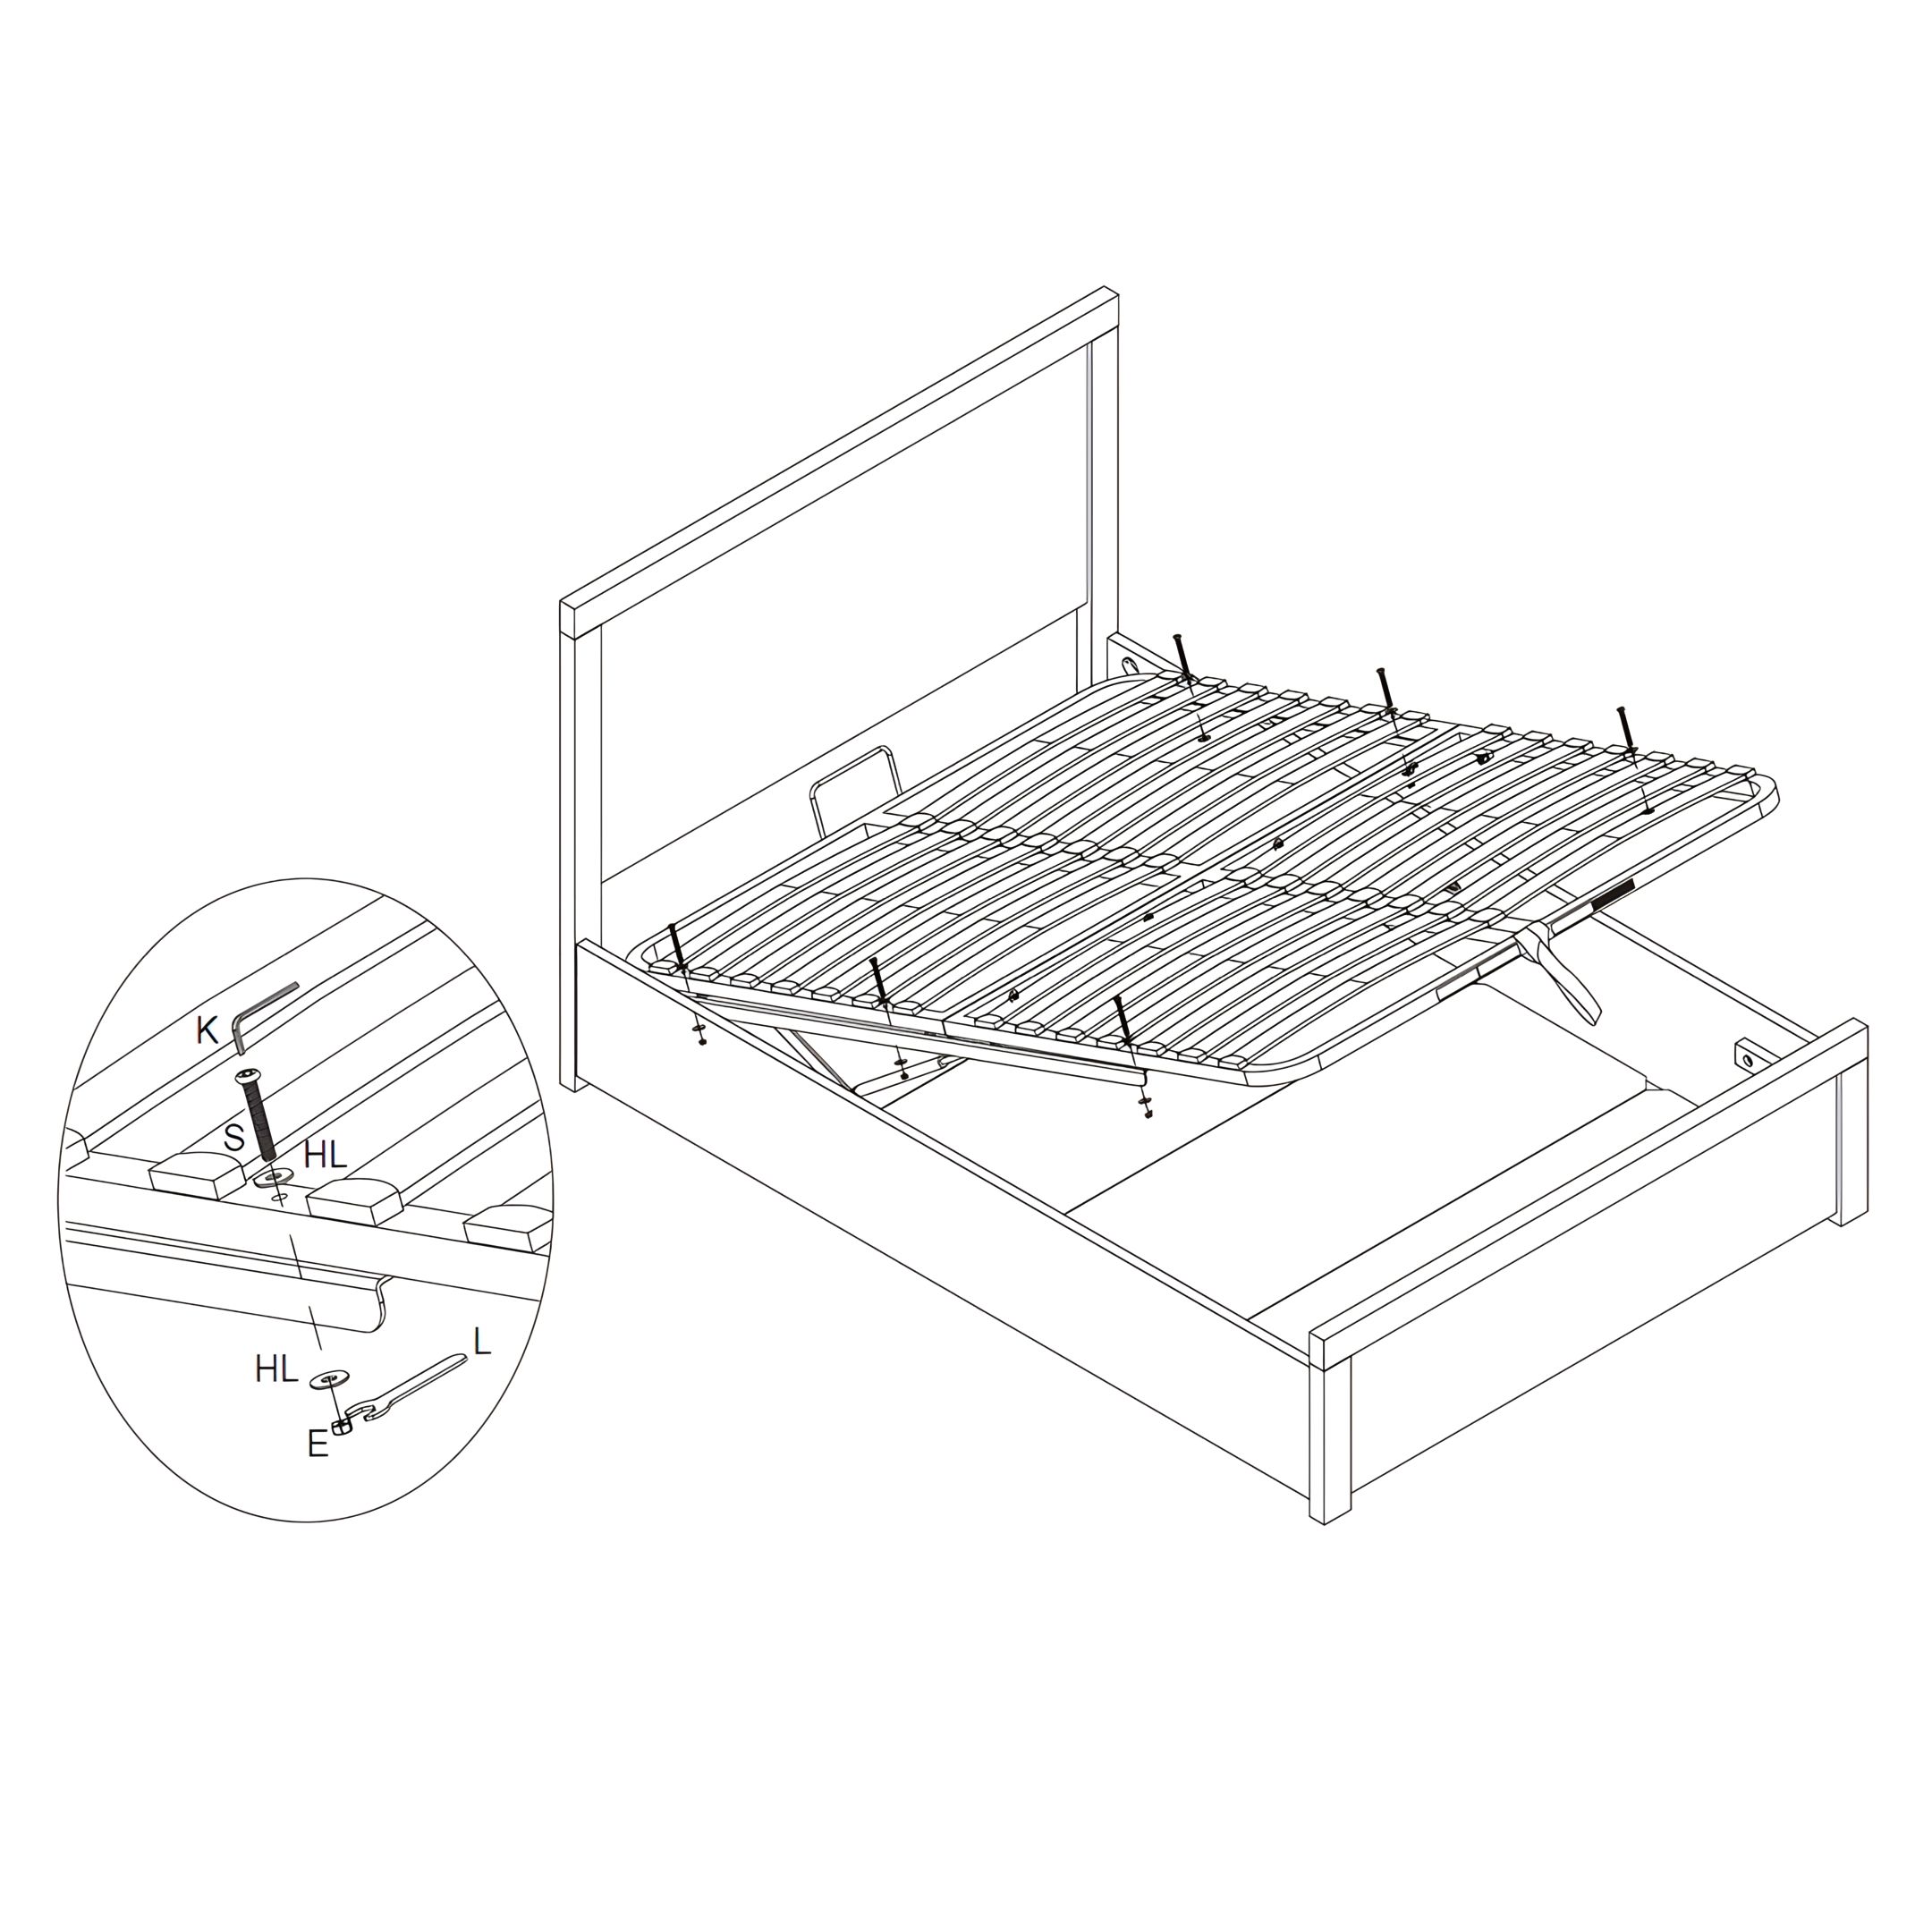
14. Attaching the Metal Frame to the Lift Mechanisms
- Align the metal frame with the lift mechanisms on both sides of the bed.
- Insert Bolts (S) through the frame into the lift mechanisms, placing a Washer (HL) on each side of the bolt and on each bolt to ensure even pressure distribution.
- Secure the assembly with Nuts (E) on the opposite side.
- Tighten each bolt firmly using an Allen Key (K) and a Spanner (L). Ensure the frame is securely attached to the mechanisms, allowing for proper operation of the lift feature.
-
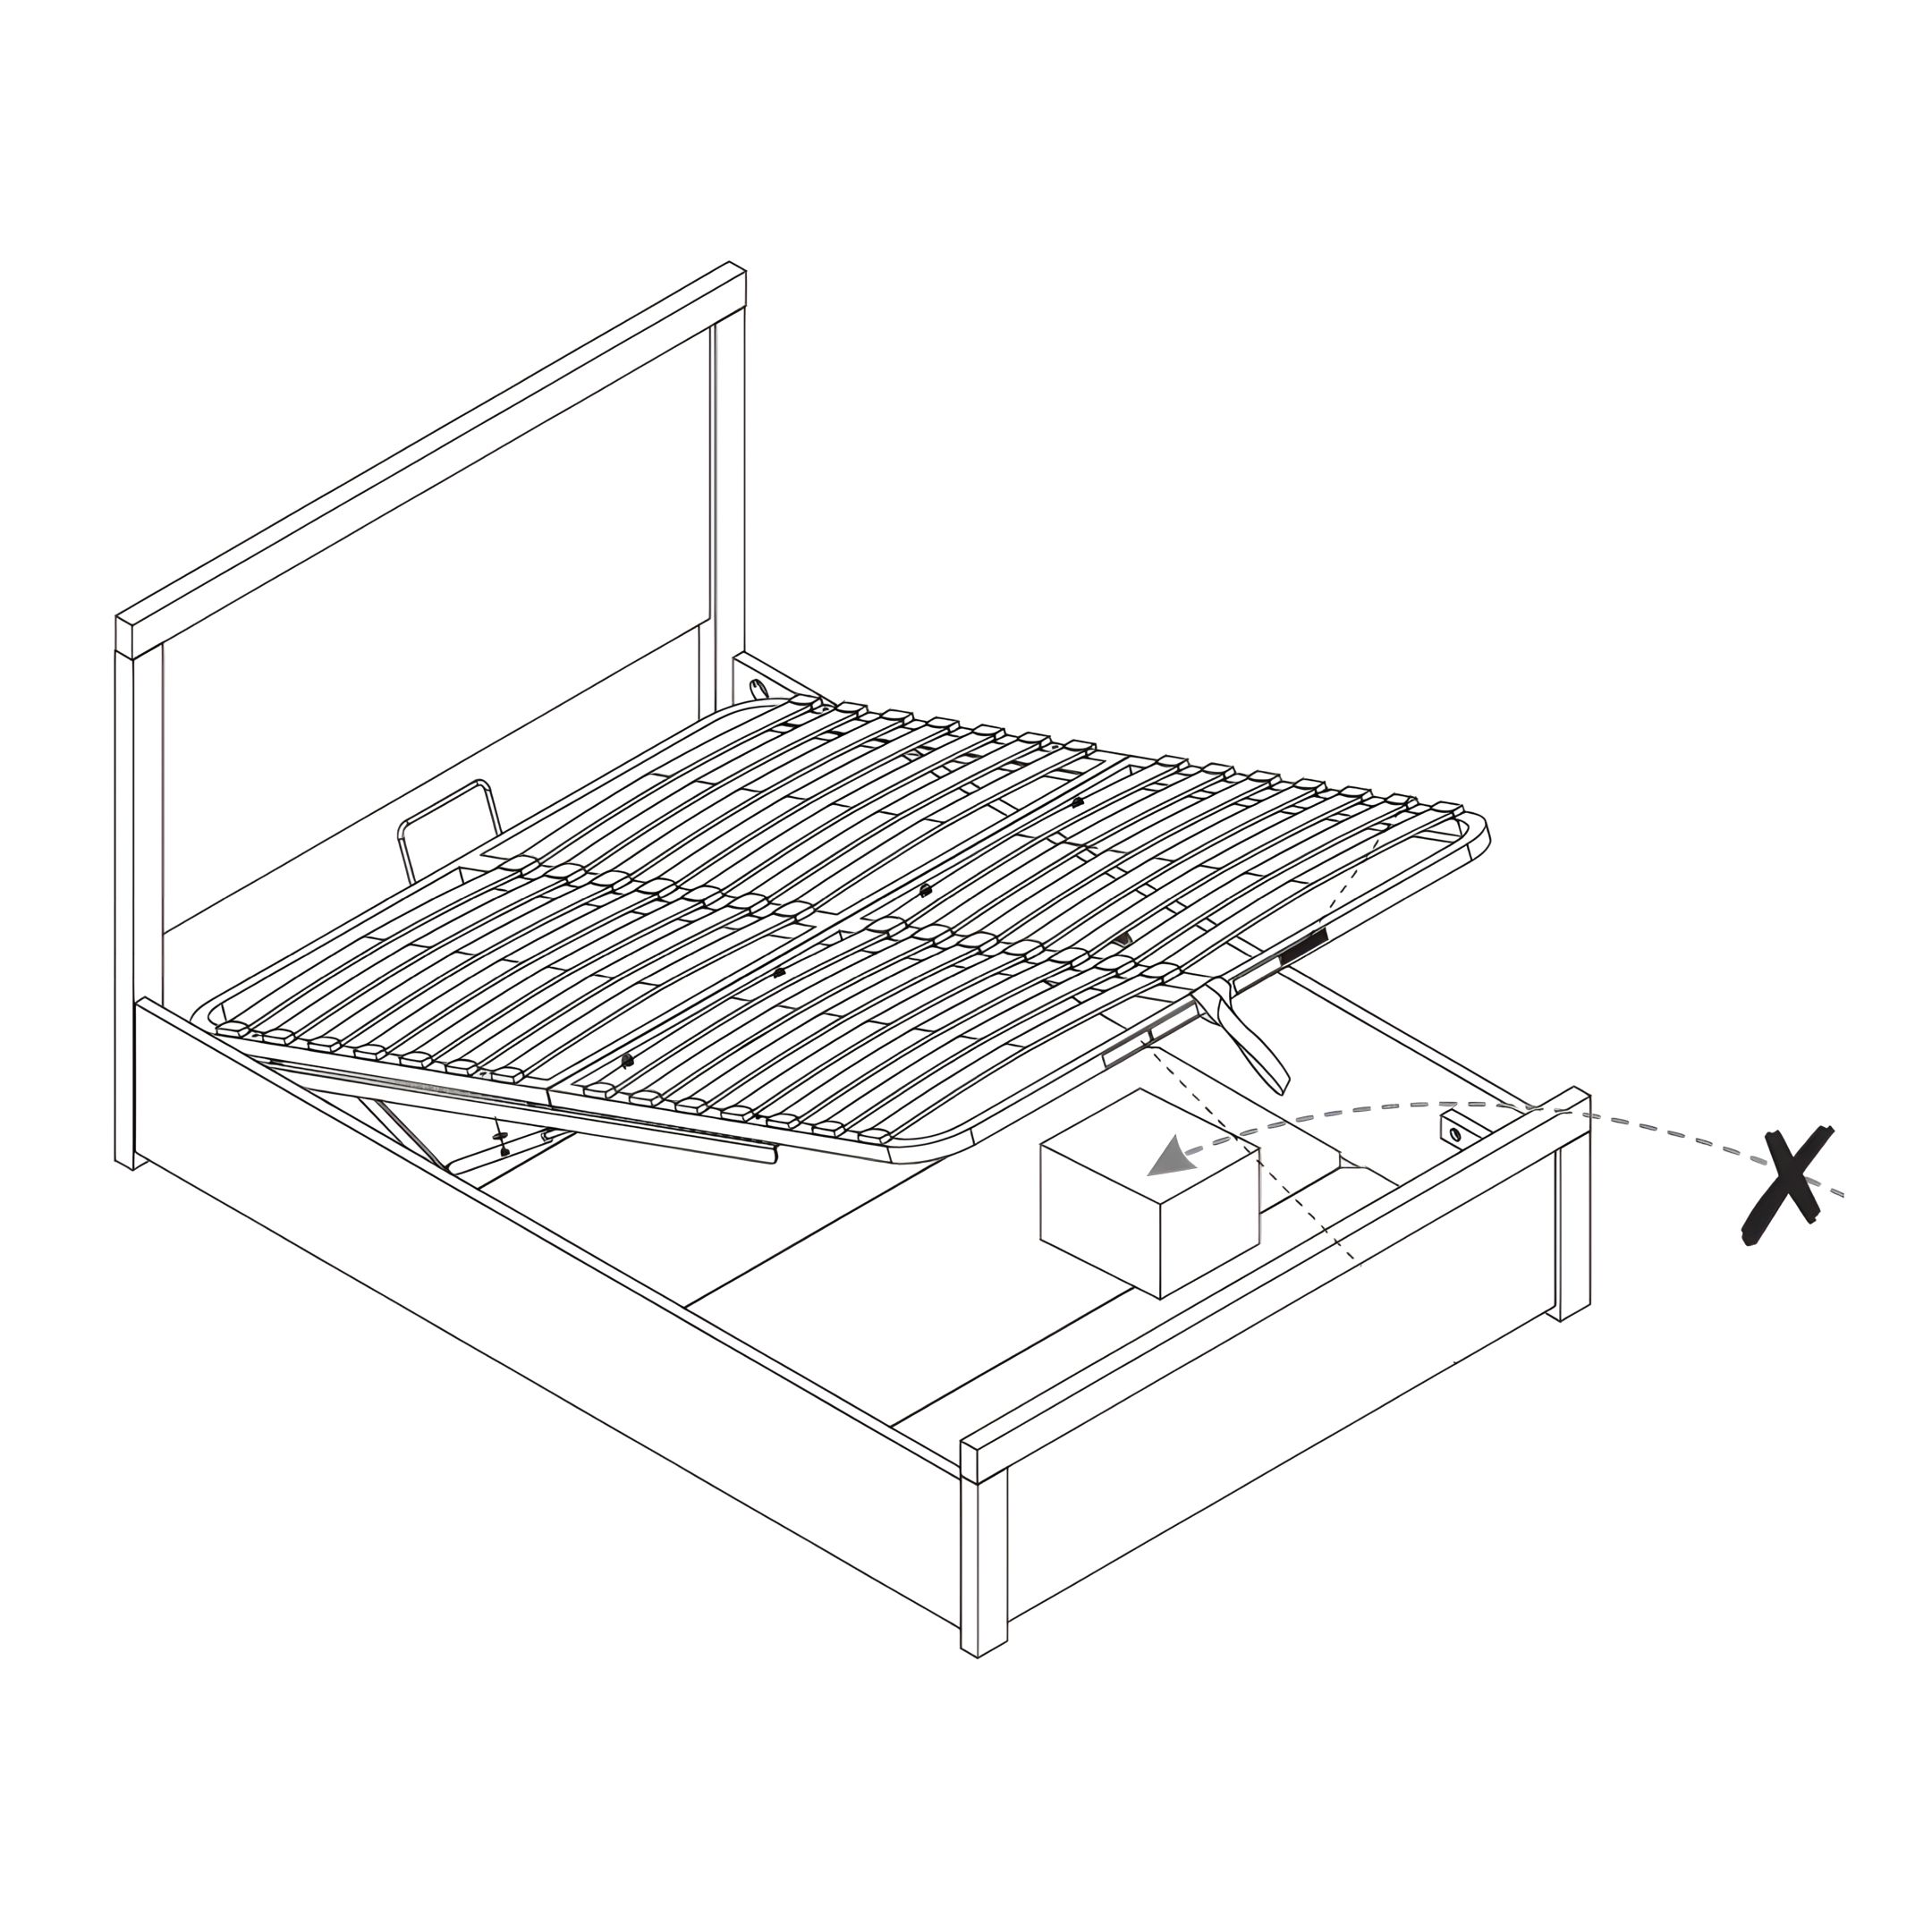
15. Safety Guidelines for Operating and Using the Ottoman Bed
- Only use the handle to lift & lower the bed frame to avoid trapping fingers.
- To avoid accidents, to access the storage area the ottoman frame must be fully opened and then fully closed afterwards.
- Be careful what you store under the bed - the top of an item, like a suitcase or a box, must not touch the slats or they may be damaged. Maximum storage height is 25cm.
Safety warnings:
- Please do not allow children or pets inside the storage area.
- Please be careful when lifting. Only lift with mattress on top. To be operated by adults only
-
16. Final Check
- Verify that all slats are securely fastened and evenly spaced.
- Check for any loose connections and tighten the screws if necessary.
|